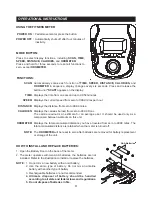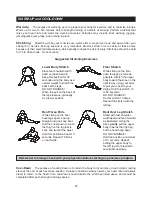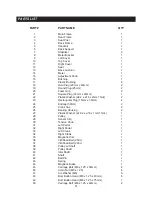
background image

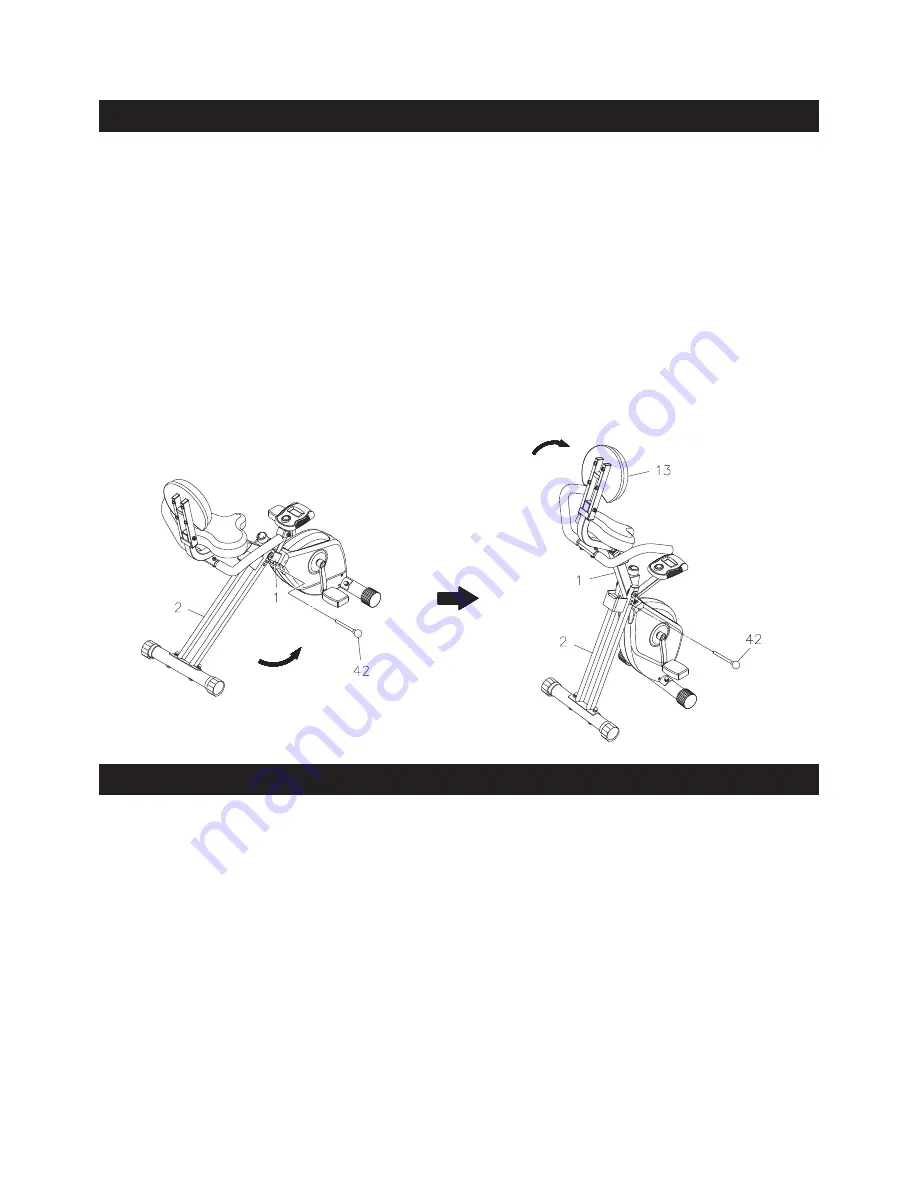
a. Remove the 

BALL PIN(42).

 Fold the 

REAR FRAME(2)

 forward. Insert the 

BALL PIN(42)

 into the 

lower hole in the 

REAR FRAME(1)

 after folding.

b.  Fold the 

BACK CUSHION(13)

 flat.

NOTE:

STORAGE

13

B

A

The safety and integrity designed into the 

STAMINA® Folding Exercise Bike

 can only be maintained 

when the 

STAMINA® Folding Exercise Bike

 is regularly examined for damage and wear. Special 

attention should be given to the following:
1.  Adjust the 

TENSION KNOB(30)

 and verify that it functions properly and the resistance changes.

2.  Use a wrench to verify that the pedals are tightened securely. If tightening is required, remember that 

the left pedal has left hand threads and is tightened by turning counterclockwise.

3.  Verify that all nuts and bolts are present and properly tightened. Replace missing nuts and bolts. 

Tighten loose nuts and bolts.

4.  Verify that the 

WARNING LABEL(83)

 is in place and easy to read. Call Stamina Products immediately 

at 

1-800-375-7520

 for a replacement 

WARNING LABEL(83)

 if it is missing or damaged.

5.  It is the sole responsibility of the user/owner to ensure that regular maintenance is performed.

6.  Worn or damaged components shall be replaced immediately or the 

STAMINA® Folding Exercise 

Bike

 removed from service until repair is made.

7.  Only Stamina Products supplied components shall be used to maintain/repair the 

STAMINA® Folding 

Exercise Bike.

8.  Keep your 

STAMINA® Folding Exercise Bike

 clean by wiping it off with an absorbent cloth after use.

MAINTENANCE

1.  To store the 

STAMINA® Folding Exercise Bike,

 simply keep it in a clean dry place.

2. To avoid damage to the electronics, remove the batteries before storing the 

STAMINA® Folding 

Exercise Bike 

for one year or more.

3.  Use two people to lift the 

STAMINA® Folding Exercise Bike

 from the 

HANDRAIL(5)

 and the front 

STABILIZER(7)

 to move. 

4. The minimum folded dimensions of the 

STAMINA® Folding Exercise Bike

 are approximately 20.3 

inches long x 21.7 inches wide x 41.9 inches tall. Please measure your 

STAMINA® Folding Exercise 

Bike

 if exact dimensions are needed.

5.  Follow the illustrated process below to fold the 

STAMINA® Folding Exercise Bike.

Make sure the 

BALL PIN(42)

 goes through the holes on both sides of the 

REAR FRAME(2)


and the tube on the 

MAIN FRAME(1).

Insert the pin into 

the lower hole to 

lock the frames in 

folded position.

Summary of Contents for 15-0199

Page 1: ...inning any exercise program with this equipment If you feel faint or dizzy immediately discontinue use of this equipment Serious bodily injury can occur if this equipment is not assembled and used cor...

Page 2: ...eat per instructions on page 12 13 Do not attempt to adjust the seat while you are on the STAMINA Folding Exercise Bike 14 Make sure the Seat Post 3 is locked properly by the Adjustment Knob 15 15 Mak...

Page 3: ......

Page 4: ...e Before reading further please review the drawing below and familiarize yourself with the parts that are labeled Read this manual carefully before using the STAMINA Folding Exercise Bike Although Sta...

Page 5: ...ded to help identify the warning caution and notice labels on the STAMINA Folding Exercise Bike Please take a moment to familiarize yourself with all of the warning caution and notice labels EQUIPMENT...

Page 6: ...ts and screws are measured from the top of the head to the end of the bolt or screw After unpacking the unit open the hardware bag and make sure that you have all the following items Some hardware may...

Page 7: ...8x1 25 46 and ARC WASHERS M8 47 Insertthepinintotheupper hole to lock the frames in unfolded position Place all parts from the box in a cleared area and position them on the floor in front of you Remo...

Page 8: ...holes in the SEAT POST 3 The ADJUSTMENT KNOB 15 should be screwed in tight to make the SEAT POST 3 fit securely in the MAIN FRAME 1 STEP 5 Attach the BACK FRAME 4 to the SEAT POST 3 with CARRIAGE BOLT...

Page 9: ...Refer to the detail view below The shoulder of the PEDALS 31 32 should be in contact with the CRANKS 33 34 when securely tightened Repeat on the left side in order to attach the LEFT PEDAL 31 to the...

Page 10: ...AMINA Folding Exercise Bike sits on the floor without rocking MOVING The STAMINA Folding Exercise Bike must be lifted to be moved Two people are required to grasp the HANDRAIL 5 and the front STABILIZ...

Page 11: ...ETER Pedal movement or press the button Automatically shuts off after four minutes of inactivity POWER ON POWER OFF MODE BUTTON Press to select display functions including SCAN TIME SPEED DISTANCE CAL...

Page 12: ...out locking your knees or shifting your hips on the seat The seat is too close to the pedals if you have more than a slight bend in your knees at the bottom of the pedal stroke The seat is too far fro...

Page 13: ...e user owner to ensure that regular maintenance is performed 6 Worn or damaged components shall be replaced immediately or the STAMINA Folding Exercise Bike removed from service until repair is made 7...

Page 14: ...of your maximum heart rate zone Start at the lower intensity and build up to higher intensity as you become more aerobically fit If you feel dizzy or lightheaded you should slow down or stop exercisin...

Page 15: ...cool down should include the stretches listed above and should be completed after each strength training session Lower Body Stretch Place feet shoulder width apart and lean forward Keep this position...

Page 16: ...PRODUCT PARTS DRAWING 16 FRONT BACK...

Page 17: ...hick 2 23 Rectangular Plug 15mm x 30mm 4 24 Endcap 50mm 2 25 Crank Cap 2 26 Bearing Housing 2 27 Plastic Washer 10 2 x 16 x 1mm Thick 1 28 Pulley 1 29 Sensor Clip 1 30 Tension Knob 1 31 Left Pedal 1 3...

Page 18: ...25 7 61 Screw Round Head M4 x 0 6 x 10mm 1 62 Washer M8 12 63 Nylock Nut M10 x 1 5 1 64 Washer M10 1 65 Washer M6 1 66 Idler Wheel 1 67 Ball Bearing 6000ZZ 3 68 Ball Bearing 6003RS 2 69 Bearing Housi...

Page 19: ...1 YEAR AFTER DELIVERY OF THE PRODUCT TO THE PURCHASER This limited warranty is not transferable IF ANY PART OF THE PRODUCT IS NOT IN COMPLIANCE WITH THIS LIMITED WARRANTY OR ANY IMPLIED WARRANTY THE...

Page 20: ...NOTES 20...

Page 21: ...NOTES 21...

Page 22: ...nvenience Stamina s customer care representatives can be reached by email at customer care staminaproducts com or by phone at 1 800 375 7520 in the U S Our customer care representatives are available...

Reviews: