ASSEMBLY INSTRUCTIONS
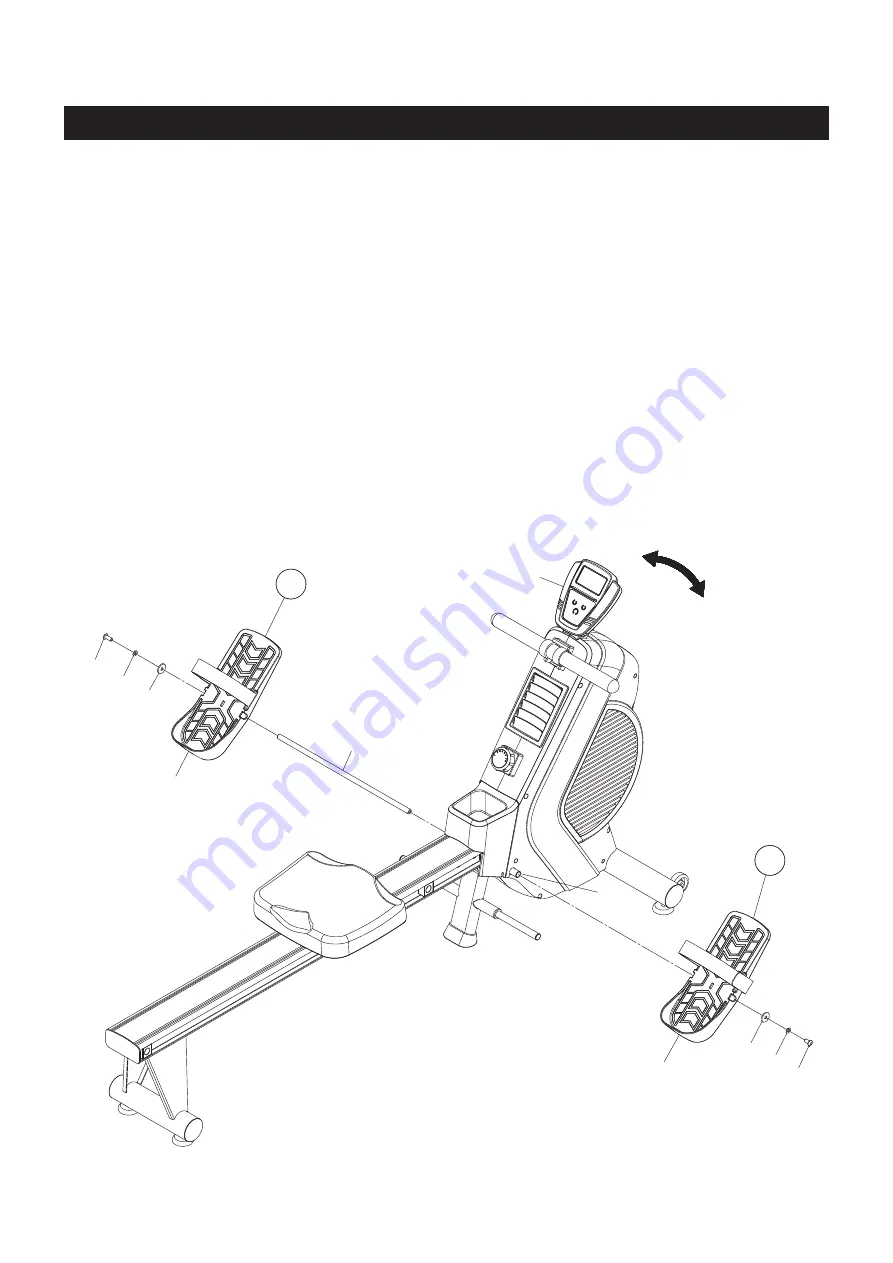
STEP 8
There is an
“L”
decal on the left
PEDAL CAP(43L),
and an
“R”
decal on the right
PEDAL CAP(43R).
Insert
the
PEDAL SHAFT(6)
through the tube located on the
MAIN FRAME(1).
Slide the left
PEDAL CAP(43L)
onto the left side of the
PEDAL SHAFT(6).
Slide the right
PEDAL CAP(43R)
onto the right side of the
PEDAL SHAFT(6).
Then secure the
PEDAL CAPS(43)
with
BUTTON HEAD BOLTS(M8x1.25x15mm)
(66), LOCK WASHERS(68),
and
FENDER WASHERS(M8)(96)
at both ends of the
PEDAL SHAFT(6).
You need to use two Allen Wrenches to tighten the
BUTTON HEAD BOLTS(M8x1.25x15mm)(66)
at both
ends of the
PEDAL SHAFT(6)
at the same time.
STEP 9
Install two AAA batteries into the
METER(14),
the batteries are not included. See page 12 for detailed battery
installation instructions. Check the
SENSOR WIRES(16)
at the back of the
METER(14)
are connected
securely. Adjust the
METER(14)
to the proper angle for using.
11
96
68
66
6
96
66
68
43L
43R
1
14
L
R
Summary of Contents for DT 397
Page 2: ......
Page 22: ...NOTES 22...


