background image

Place all parts from the box  in a cleared area and position them on the floor in front of you. Remove all
packing materials from your area and place them back into the box. Do not dispose of the packing materials
until assembly is completed. Read each step carefully before beginning. If you are missing a part please call
our toll-free number for assistance 

1 (800) 375-7520

 or e-mail us at:

parts@staminaproducts.com

7

ASSEMBLY INSTRUCTIONS

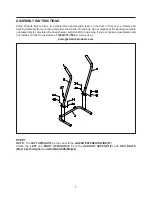
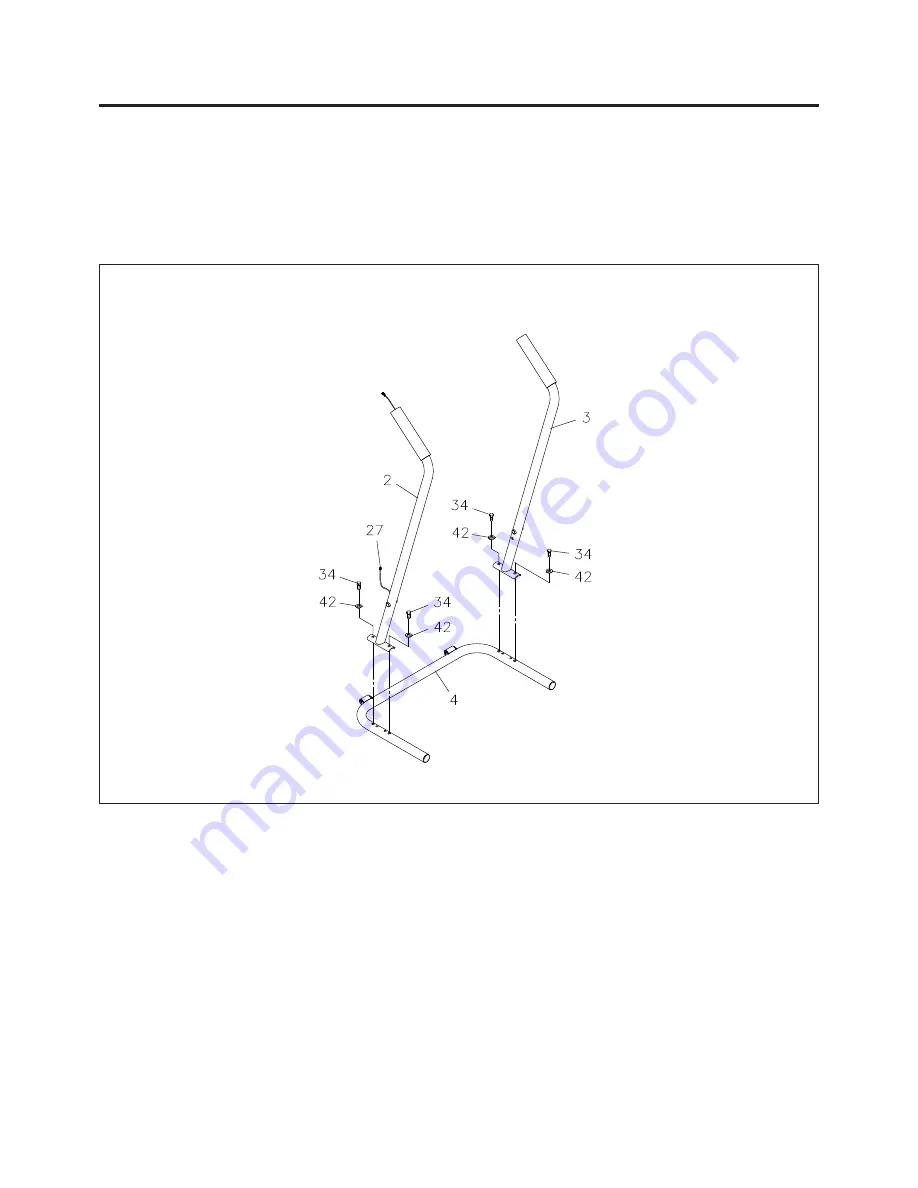
STEP 1

NOTE:

  The 

LEFT UPRIGHT(2)

 is the one with the 

LOWER EXTENSION WIRE(27).

Attach the 

LEFT

 and 

RIGHT UPRIGHTS(2, 3)

 to the 

UPRIGHT SUPPORT(4)

 with 

HEX BOLTS

(M8x1.25x15mm)(34)

 and 

ARC WASHERS(M8)(42).

Summary of Contents for In Motion T3000

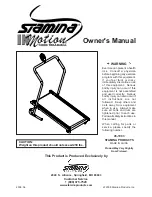
Page 1: ...rious bodily injury can also occur if all instructions are not followed Keep others and pets away from equipment when in use Always make sure all bolts and nuts are tightened prior to each use Follow all safety instructions in this manual When calling for parts or service please specify the following number WARNING CAUTION Weight on this product should not exceed 250 lbs Owner s Manual 2040 N Alli...

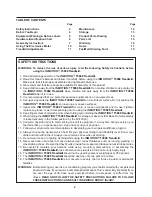
Page 2: ...ll Keep fingers clear of all pinch points when folding and unfolding the INMOTION T3000 Treadmill When folding the INMOTION T3000 Treadmill for storage make sure that Base Frame Assembly is locked securely in the folded position by the Pull Pin 6 Consult a physician prior to commencing an exercise program If at any time during exercise you feel faint dizzy or experience pain stop and consult your ...

Page 3: ...hieving a happier and healthier lifestyle 3 Should you have any questions please call our Customer Service Department toll free number 1 800 375 7520 Monday Thursday 7 30 A M 5 00 P M Central Time Friday 8 00 A M 3 00 P M Central Time CALL US FIRST Customer Service 1 800 375 7520 www staminaproducts com TELEPHONE CUSTOMER SERVICE Tel 1 800 375 7520 FAX CUSTOMER SERVICE Fax 417 889 8064 MAIL STAMIN...

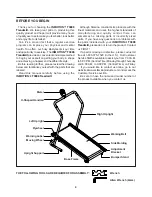
Page 4: ...estyle Before reading further please review the drawing below and familiarize yourself with the parts that are labeled Read this manual carefully before using the INMOTION T3000 Treadmill Although Stamina constructs its products with the finest materials and uses the highest standards of manufacturing and quality control there can sometimes be missing parts or incorrectly sized parts If you have a...

Page 5: ... This chart is provided to help identify the warning notice labels on the INMOTION T3000 Treadmill Please take a moment to familiarize yourself with all of the warning notice labels Label is larger than actual size WARNING LABEL 46 W1 ...

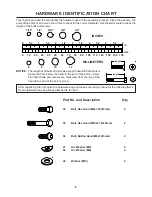
Page 6: ...h of the bolts and screws NOTICE The length of all bolts and screws except those with flat heads is measured from below the head to the end of the bolt or screw Flat head bolts and screws are measured from the top of the head to the end of the bolt or screw mm in INCHES MILLIMETERS 1 1 2 0 2 1 2 3 1 2 4 1 2 5 1 2 6 1 2 0 10 20 30 40 50 60 70 80 90 100 110 120 130 140 150 6 8 10 12 3 16 5 16 1 2 3 ...

Page 7: ...til assembly is completed Read each step carefully before beginning If you are missing a part please call our toll free number for assistance 1 800 375 7520 or e mail us at parts staminaproducts com 7 ASSEMBLY INSTRUCTIONS STEP 1 NOTE The LEFT UPRIGHT 2 is the one with the LOWER EXTENSION WIRE 27 Attach the LEFT and RIGHT UPRIGHTS 2 3 to the UPRIGHT SUPPORT 4 with HEX BOLTS M8x1 25x15mm 34 and ARC...

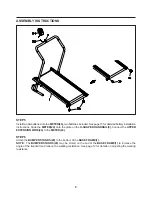
Page 8: ...XTENSION WIRE 26 to the LOWER EXTENSION WIRE 27 Insert the U SHAPED HANDRAIL 5 into the LEFT and RIGHT UPRIGHTS 2 3 and secure with BUTTON HEAD BOLTS M6x1x15mm 36 and ARC WASHERS M6 41 Slide up the FOAM GRIPS 22 to cover the screw heads STEP 4 Go back and tighten HEX BOLTS M12x1 75x75mm 35 in STEP 2 Connect the LOWER EXTENSION WIRE 27 located on the LEFT UPRIGHT 2 to the SENSOR WIRE 28 Insert the ...

Page 9: ... 24 onto the plate on the U SHAPED HANDRAIL 5 Connect the UPPER EXTENSION WIRE 26 to the METER 24 STEP 6 Attach the BUMPER STANDS 20 to the bottom of the BASE FRAME 1 NOTE The BUMPER STANDS 20 may be stored on the end of the BASE FRAME 1 to increase the angle of the treadmill and reduce the walking resistance See page 12 for details on adjusting the walking resistance ...

Page 10: ...to 99 59 minutes Displays the current speed from zero to 999 9 Mile Hr Displays the distance from zero to 99 99 miles Displays the calorie consumption from zero to 999 9 Kcal The calorie readout is an estimate for an average user It should be used only as a comparison between workouts on this unit HOW TO INSTALL AND REPLACE BATTERY Open the Battery Door on the back of the meter The meter operates ...

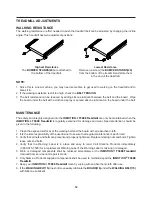
Page 11: ...ALKING BELT is centered use the treadmill for three 3 minutes to verify the WALKING BELT won t drift to one side If the WALKING BELT continues to drift the floor may not be level Rotate the treadmill 90 degrees or move the treadmill to another location BELT TENSION The belt should be tight and not lying on the treadmill board If the belt is too loose the belt will slip on the front roller and you ...

Page 12: ...sole responsibility of the user owner to ensure that regular maintenance is performed Verify that all nuts and bolts are present and properly tightened Replace missing nuts and bolts Tighten loose nuts and bolts Verify that the Warning Label is in place and easy to read Call Stamina Products immediately 1 800 375 7520 for a replacement Warning Label if the Warning Label is missing or damaged Worn ...

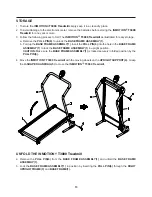
Page 13: ...d the BASE FRAME ASSEMBLY 1 Lock the BASE FRAME ASSEMBLY 1 in position by inserting the PULL PIN 6 through the RIGHT UPRIGHT FRAME 3 and BASE FRAME 1 a b Move the INMOTION T3000 Treadmill with the moving wheels on the UPRIGHT SUPPORT 4 Grasp the U SHAPED HANDRAIL 5 to move the INMOTION T3000 Treadmill a b Remove the PULL PIN 6 to unlock the BASE FRAME ASSEMBLY 1 Fold up the BASE FRAME ASSEMBLY 1 I...

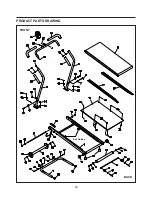
Page 14: ...PRODUCT PARTS DRAWING 14 FRONT BACK Belt Guides ...

Page 15: ...p 2 23 Long Foam Grip 2 24 Meter 1 25 Grommet Plug 2 26 Upper Extension Wire 1 27 Lower Extension Wire 1 28 Sensor Wire 1 29 Magnet 1 30 Screw Sleeve 6 31 Round Plug 31 8mm 2 32 Screw Round Head M3 x 15mm 2 33 Screw Flat Head M5 x 25mm 6 34 Bolt Hex Head M8 x 1 25 x 15mm 4 35 Bolt Hex Head M12 x 1 75 x 75mm 2 36 Bolt Button Head M6 x 1 x 15mm 2 37 Bolt Button Head M6 x 1 x 55mm 2 38 Bolt Button He...

Page 16: ...DELIVERY OF THE PRODUCT TO THE PURCHASER This limited warranty is not transferable IF ANY PART OF THE PRODUCT IS NOT IN COMPLIANCE WITH THIS LIMITED WARRANTY OR ANY IMPLIED WARRANTY THE REMEDY OF REPAIR OR REPLACEMENT IS THE EXCLUSIVE REMEDY AVAILABLE TO YOU In the event that the purchaser makes any claim under this limited warranty or any implied warranty the Warrantor reserves the right to requi...

Page 17: ...17 NOTES ...
Page 18: ... defective part found please call us from 7 30 A M to 5 00 P M Central Time Monday through Thursday and 8 00 A M to 3 00 P M on Friday or fill out the fax sheet ordering form below and fax it to 417 889 8064 Our Customer Service Department will be able to assist you with your problem and the part will be mailed directly to your house Mr Ms Address Apt City State Zip Code Phone Work Phone Date Purc...

Reviews: