background image

OPERATIONAL INSTRUCTIONS

TREADMILL ADJUSTMENTS

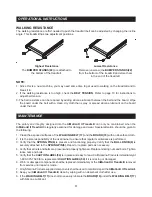
RIGHT

ADJUSTMENT

LEFT 

ADJUSTMENT

When adjusted properly, the 

InMotion® II Treadmill’s


WALKING BELT(17)

 will roll smoothly around the 

BOARD(18)

 and over the front and rear rollers without catching or rubbing. For the belt to run smoothly, 

there are a few points that need to be noted

BELT ALIGNMENT

The 

WALKING BELT(17)

 must be in the center of the 

BOARD(18)

 to prevent it from rubbing against the 

flywheels. If the belt rubs a flywheel, it will be difficult to keep the belt moving and will eventually damage 

the edge of the belt. The treadmill has belt guides welded to the bottom of the treadmill frame that move the 

belt toward the center of the treadmill. However, the 

REAR ROLLER(14)

 must be properly aligned with the 

treadmill frame and 

FRONT ROLLER w/FLYWHEELS(10)

 if the belt is to remain centered on the treadmill. 

The bolts in the rear of the treadmill (one on the left and the other on the right) adjust the alignment of the 

REAR ROLLER(14)

 as well as the tension of the belt

The belt will run to the side of the loose rear bolt.

Hint: 

Visually check the 

REAR ROLLER(14)

 to make sure both the right side and the left side of the 

REAR 

ROLLER(14)

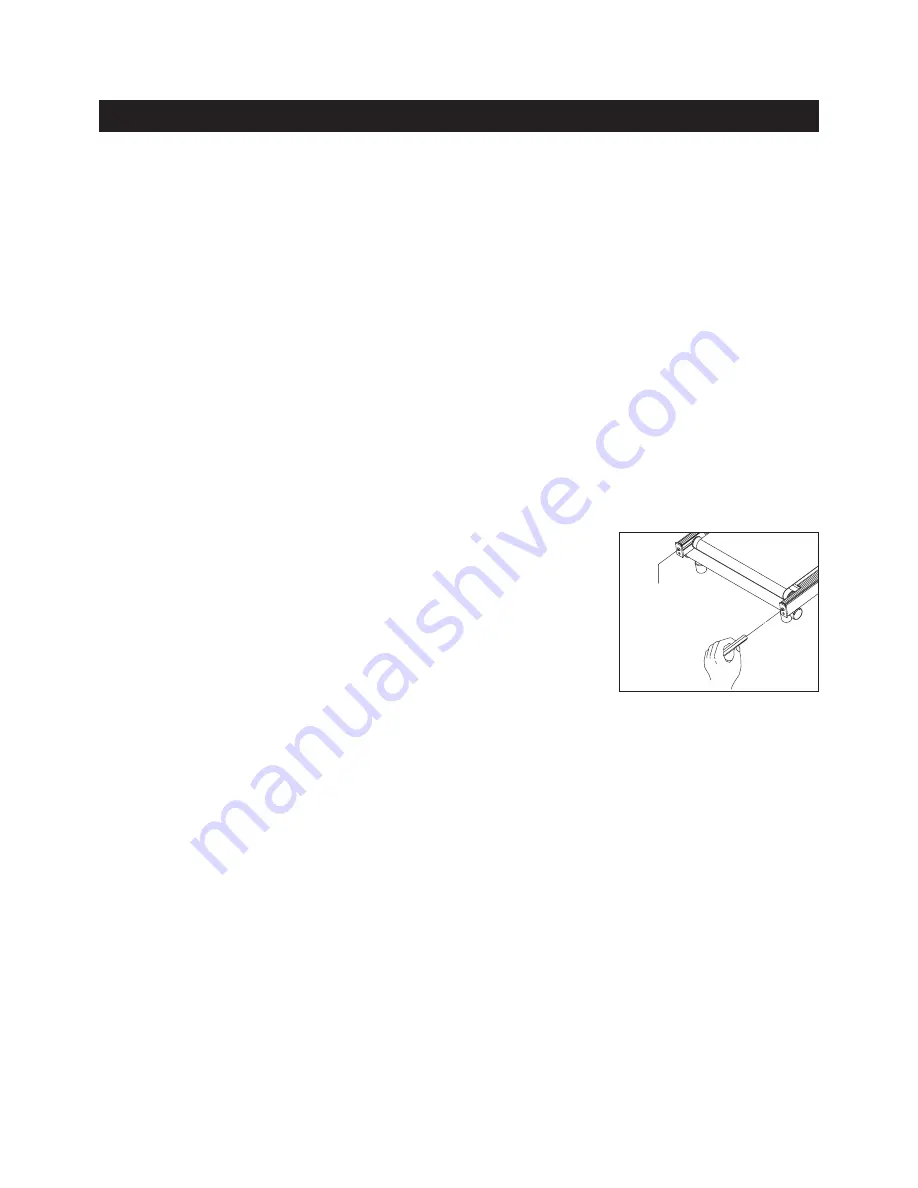
 are the same distance from the back edge of the treadmill. Using the 4mm 

ALLEN 

WRENCH

, make adjustments by turning the bolts clockwise to tighten and counterclockwise to loosen. 

BELT DRIFTING LEFT

Adjust by turning the left screw 1/4 turn CLOCKWISE and the right screw 

1/4 turn COUNTERCLOCKWISE. Walk on the treadmill to check alignment. 

Repeat if needed.

BELT DRIFTING RIGHT

Adjust by turning the left screw 1/4 turn COUNTERCLOCKWISE and the 

right screw 1/4 turn CLOCKWISE. Walk on the treadmill to check alignment. 

Repeat if needed.

NOTE:

When you believe the 

WALKING BELT(17)

 is centered, use the treadmill for three (3) minutes to verify the 

WALKING BELT(17)

 won’t drift to one side or the other. If the 

WALKING BELT(17)

 continues to drift, the 

floor may not be level. Rotate the treadmill 90 degrees or move the treadmill to another location.

BELT TENSION

The 

WALKING BELT(17)

 should be taut and not lying loosely on the treadmill 

BOARD(18).

 If the belt is too 

loose, it will slip on the front roller and you will notice a jerky movement when you walk on the treadmill. If 

the belt is too tight, the edges of the belt will begin to curl and more effort will be required to move the belt. 

Excessive belt tension can also damage the bearings in the rollers. The bolts on the ends of the 

BASE 

FRAME(1)

 (one on the left and the other on the right) adjust the 

WALKING BELT(17)

 tension as well as 

the 

REAR ROLLER(14)

 alignment.

BELT TOO LOOSE:

 Use the 4mm 

ALLEN WRENCH

 to tighten the bolts on the ends of the 

BASE 

FRAME(1).

 Tighten both bolts 1/4 turn clockwise at a time until the belt stops slipping on the 

FRONT 

ROLLER w/FLYWHEELS(10).

BELT TOO TIGHT


:

 Use the 4mm 

ALLEN WRENCH

 to loosen the bolts on the ends of the 

BASE FRAME(1). 

Loosen both bolts 1/2 turn counterclockwise at a time until the belt begins to slip on the 

FRONT ROLLER 

w/FLYWHEELS(10).

 Then use the procedure above to tighten the belt to the proper tension.

10

Summary of Contents for InMotion II 45-1002C

Page 1: ...2012 Stamina Products Inc 2012 01 Exercise can present a health risk Consult a physician before beginning any exercise program with this equipment If you feel faint or dizzy immediately discontinue us...

Page 2: ...ian prior to commencing an exercise program and follow his her recommendations in developing your fitness program If at any time during exercise you feel faint dizzy or experience pain stop and consul...

Page 3: ...ur Customer Service Department toll free number 1 800 375 7520 Monday Thursday 7 30 A M 5 00 P M Central Time Friday 8 00 A M 3 00 P M Central Time TELEPHONE CUSTOMER SERVICE Tel 1 800 375 7520 FAX CU...

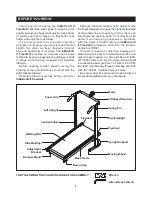
Page 4: ...admill BEFORE YOU BEGIN Although Stamina constructs its products with the finest materials and uses the highest standards of manufacturing and quality control there can sometimes be missing parts or i...

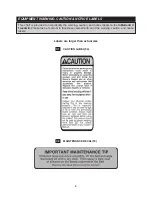
Page 5: ...nd notice labels on the InMotion II Treadmill Please take a moment to familiarize yourself with all of the warning caution and notice labels EQUIPMENT WARNING CAUTION NOTICE LABELS CAUTION LABEL 54 C1...

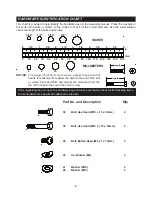
Page 6: ...screw Flat head bolts and screws are measured from the top of the head to the end of the bolt or screw After unpacking the unit open the hardware bag and make sure that you have all the following ite...

Page 7: ...com or call us toll free at 1 800 375 7520 in the U S Our Customer Service Staff is available to assist you from 7 30 A M to 5 00 P M Central Time Monday through Thursday and 8 00 A M to 3 00 P M Cen...

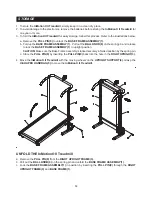
Page 8: ...WIRE 29 located on the LEFT UPRIGHT 2 to the SENSOR WIRE 30 Insert the PULL PIN 9 through the RIGHT UPRIGHT 3 and BASE FRAME 1 to lock the BASE FRAME 1 in position STEP 6 Install twoAAbatteries into t...

Page 9: ...to 999 9 miles per hour Displays the distance from zero to 99 99 miles Displays the calorie consumption from zero to 999 9 Kcal The calorie readout is an estimate for an average user It should be use...

Page 10: ...e right screw 1 4 turn COUNTERCLOCKWISE Walk on the treadmill to check alignment Repeat if needed BELT DRIFTING RIGHT Adjust by turning the left screw 1 4 turn COUNTERCLOCKWISE and the right screw 1 4...

Page 11: ...treadmill Highest Resistance The BUMPER STANDS 22 are attached to the bottom of the treadmill 1 Clean the exposed surfaces of the WALKING BELT 17 and the BOARD 18 with an absorbent cloth 2 It is the...

Page 12: ...EMBLY 1 c Lock the BASE FRAME ASSEMBLY 1 in position by inserting the PULL PIN 9 through the RIGHT UPRIGHT FRAME 3 and BASE FRAME 1 4 Move the InMotion II Treadmill with the moving wheels on the UPRIG...

Page 13: ...of your maximum heart rate zone Start at the lower intensity and build up to higher intensity as you become more aerobically fit If you feel dizzy or lightheaded you should slow down or stop exercisin...

Page 14: ...cool down should include the stretches listed above and should be completed after each strength training session Lower Body Stretch Place feet shoulder width apart and lean forward Keep this position...

Page 15: ...ERY OF THE PRODUCT TO THE PURCHASER This limited warranty is not transferable IF ANY PART OF THE PRODUCT IS NOT IN COMPLIANCE WITH THIS LIMITED WARRANTY OR ANY IMPLIED WARRANTY THE REMEDY OF REPAIR OR...

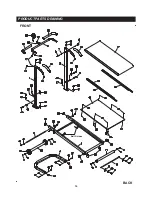
Page 16: ...PRODUCT PARTS DRAWING 16 FRONT BACK Belt Guides...

Page 17: ...ng Foam Grip 2 26 Meter 1 27 Grommet Plug 4 28 Upper Extension Wire 1 29 Lower Extension Wire 1 30 Sensor Wire 1 31 Magnet 1 32 Screw Sleeve 6 33 Round Plug 25mm 2 34 Rectangular Plug 25mm x 50mm 2 35...

Page 18: ...NOTES 18...
Page 19: ...OMER SERVICE For your convenience Stamina s customer service representatives can be reached by email at customerservice staminaproducts com or by phone at 1 800 375 7520 in the U S Our customer servic...

Reviews: