11UNO User
’s Manual
Revision 6
8
Standa Ltd. All rights reserved
3-
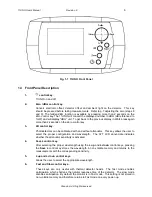
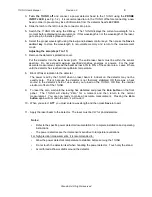
Turn the 11UNO off
and connect a power detector head to the 11UNO using the
PROBE
INPUT JACK
(see Fig. 1-2). It is recommended to turn the 11UNO off before connecting a new
head in order to prevent any loss of information from the detector head’s EEPROM.
4- Slide the latch to the left to lock the connector into place.
5- Switch the 11UNO ON using the
I/O
key. The 11UNO displays the current wavelength for a
moment before displaying measurements. If this wavelength is not the wavelength of the laser,
go to step 6, otherwise proceed to step 7.
6- Select the proper wavelength using the
λ up
and
λ down
control keys
.
Then press the
Save λ
control key
to store the wavelength in non-volatile memory and return to the measurement
mode.
Adjusting the zero (steps 7 to 11)
7-
Remove the detector’s protective cover.
Put the detector into the laser beam path. The entire laser beam must be within the sensor
aperture. Do not exceed maximum specified densities, energies or powers. For the most
accurate measurement, spread the beam across 60% to 80% of the sensor area. Leave it there
until the detector has reached its equilibrium temperature.
8-
Block off laser radiation to the detector.
The power read by the 11UNO when no laser beam is incident on the detector may not be
exactly zero. This is because the detector is not thermally stabilized OR there was a heat
source in the detector’s field of view when you turned on the 11UNO, OR from the internal
electronic offset of the 11UNO.
9-
To reset the zero, wait until the reading has stabilized and press the
Zero button
on the front
panel. The 11UNO
will display “ZEro“ for a moment and then return to the normal
measurement. You are now ready to make an accurate measurement. Pressing the
Zero
button
again will not undo the zero; it will re-do it.
10- When you select
ATT
you must enter a wavelength and then press
S
ave λ
to exit
.
11- Apply the laser beam to the detector. The laser must be CW for photodetectors.
Notes:
•
Refer to the specific power detector documentation for complete installation and operating
instructions.
•
The power detectors are thermal sensors sensitive to temperature variations.
For high-precision measurements, it is recommended to:
•
Allow the power detector’s temperature to stabilize before zeroing the 11UNO.
•
Do not touch the detector itself when handling the power detector. Touch only the stand.
•
Avoid forced airflow or drafts around the detector.

