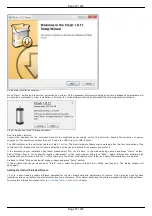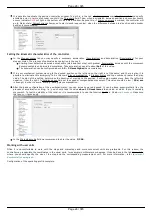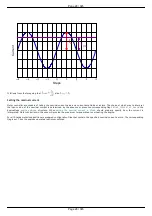
XILab main installation window.
Press “Next>” button and follow the instructions on screen. All the necessary software including all drivers, packages and programs will
be installed automatically. After installation is finished, the XiLab software starts by default and the following window will open:
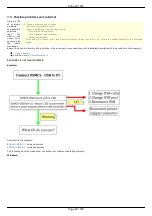
XILab "No devices found" dialogue window.
Don't press any buttons.
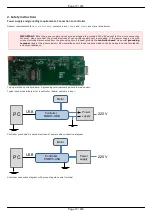
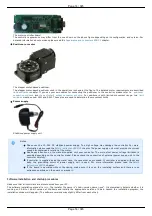
Connect the positioner to the controller. Connect the stabilized power supply unit to the controller. Ground the controller or power
supply unit. Connect the controller to your PC using the USB-A to mini-USB-B cable.
The LED indicator at the controller board will start
. The New Hardware Wizard starts working after the first connection of the
controller to PC. Please wait until Windows detects a new device and installs all necessary drivers for it.
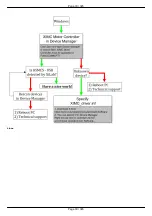
If the automatic driver installation has failed, please select ”No, not this time” in the window being opened and press “Next>” button.
Select “Install from a list or specific location (Advanced)” in the next window and press “Next>” again. Browse the software disk
supplied with controller and find the *.inf file there or in the XiLab-install-path\driver\ folder and wait until installation is completed.
Go back to XILab "No devices found" dialog window and press "Retry" button.
If this window was closed, please go to “Start” menu, select Programs->XILab Х.Х.Х->XILab and launch it. The dialog window will
open again.
Getting started with XILab software
is a user-friendly graphic interface designed for control, diagnostics and adjustment of motors. It can also be used for easy
installation and save/restore of parameters for any type of motors. This chapter describes the startup procedures with XILab software.
For complete information please refer to
XILab application User's guide
chapter.
Page 15 / 345
Page 15 / 345
Summary of Contents for 8SMC5-USB
Page 30: ...Linux Page 30 345 Page 30 345 ...
Page 83: ...Connection of magnetic brake to one axis or two axis systems Page 83 345 Page 83 345 ...
Page 87: ...Scheme of buttons connection to the HDB 26 connector Page 87 345 Page 87 345 ...
Page 99: ...Page 99 345 Page 99 345 ...
Page 167: ...Vertical load capacity the maximum vertical load on the stage Page 167 345 Page 167 345 ...
Page 186: ...Click Next Click Continue anyway Page 186 345 Page 186 345 ...
Page 188: ...Page 188 345 Page 188 345 ...
Page 190: ...Page 190 345 Page 190 345 ...
Page 193: ...Page 193 345 Page 193 345 ...
Page 201: ...Select the XILab application in the Programs block Start it Page 201 345 Page 201 345 ...
Page 274: ...7 Files 1 Configuration files 2 Software Page 274 345 Page 274 345 ...
Page 331: ...Motorized Iris Diaphragms 8MID98 Motorized Iris Diaphragm Page 331 345 Page 331 345 ...
Page 338: ...8 Related products 1 Ethernet adapter Page 338 345 Page 338 345 ...
Page 339: ...8 1 Control via Ethernet 1 Overview 2 Administration Page 339 345 Page 339 345 ...


