background image

V2.2 

2022 RUNGU Dualie Rugged/XR series 

Copyright 2021 Standard Bearer Machines, LLC  

22 

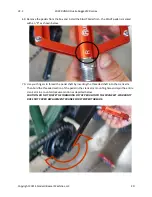
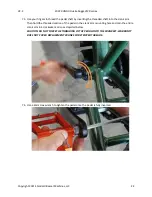
73.


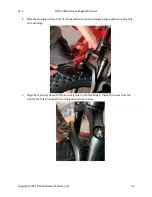
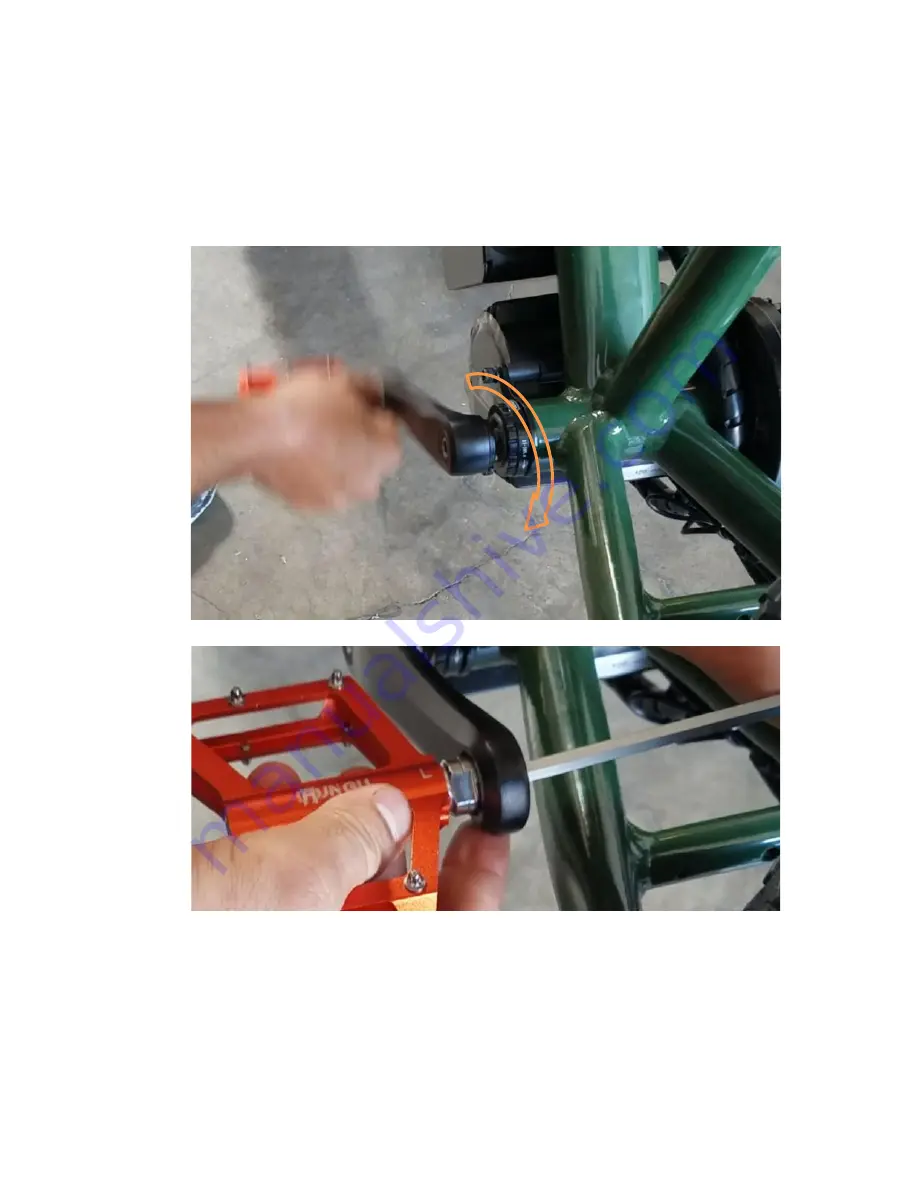
Use your fingers to thread the pedal shaft by inserting the threaded shaft into the crank arm.  
Then hold the threaded section of the pedal in the crank arm mounting hole and spin the entire 
crank arm in a clockwise motion as depicted below. 

CAUTION: DO NOT FORCE THE THREADING OF THE PEDAL ONTO THE CRANKSET. WARRANTY 
DOES NOT COVER REPLACEMENT CRANKS FOR STRIPPED THREADS. 


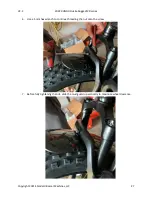
74.


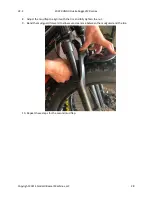
Use a 6mm Hex wrench to tighten the pedal once the pedal is fully inserted. 


Summary of Contents for Rungu Dualie Rugged Series

Page 1: ... to full power which is intended for use off road only The power settings are discussed below Note US Federal Law mandates a 750W 20 MPH limit for riding an e bike on public roads without a license Please check with your local government to ensure you follow all local laws and ordinances Standard Bearer Machines are not liable for those who choose not to follow their local laws CAUTION STANDARD BE...

Page 2: ...tery Safety In Depth 42 Battery Failure Response Procedure 43 Operating Rungu Dualie 44 8 Charging Your Main Battery without removing the battery RUGGED MODEL ONLY 44 9 Charging your Main Battery after removing the battery Frame Battery 48 10 Charging Dual Batteries without removing the batteries Dualie XR Models 54 11 Removing dual batteries for external charging Dualie XR 58 12 Inflating Tires u...

Page 3: ...n Cautions 81 18 Riding Safety 82 19 Adjusting the Front Suspension 82 20 Using the parking brake 83 Rungu Dualie Maintenance Care and Repair 85 21 Before Each Ride 85 22 Securing your Dualie 85 23 After Each Ride 85 24 Battery Care 85 25 Storage When Not Using Dualie for Periods of Two Weeks or Longer 85 26 Prolonging the Life of your Battery Best Practices 86 27 Chain Maintenance Cleaning and Lu...

Page 4: ...XR series Copyright 2021 Standard Bearer Machines LLC 4 34 Dimensions 101 35 Performance 102 36 Electrical 102 Troubleshooting 103 37 Electrical 103 38 Motor and System Performance 104 39 Mechanical 105 Getting more information 106 ...

Page 5: ...Rugged XR series Copyright 2021 Standard Bearer Machines LLC 5 Rungu Dualie parts identification The following images show the names of various components on a Rungu Dualie Figure 1 Right Side View Figure 2 Steering assembly ...

Page 6: ...V2 2 2022 RUNGU Dualie Rugged XR series Copyright 2021 Standard Bearer Machines LLC 6 Figure 3 Parking Brake View ...

Page 7: ...f you have a high bandwidth Internet connection click here to watch a video of these assembly instructions Tools required 2 5mm Hex wrench 5mm Hex wrench 6mm Hex wrench Adjustable wrench not included Recommended SATA 6 inch Professional Adjustable Wrench with Forged Alloy Steel Body Wide Jaw and a Chrome Plated Finish ST47202SC Tire inflation pump not included Recommended CYCPLUS Tire Inflator Por...

Page 8: ...accessories that come with the specific model you ordered Note If you purchased a Dualie XR eXtended Range with dual batteries or a Dualie with the optional Cargo Rack remove the rack first and place it to the side 42 Remove the two wheels from the carton and place them aside carefully to avoid damaging the disc brake rotors 43 Lift the frame and rear wheel from the carton and place the assembly o...

Page 9: ...OF YOUR NEW DUALIE 45 Use the 5mm hex wrench to loosen and remove the four bolts from the right side handlebar clamp 46 Open the right side handlebar clamp to allow placement of the right side handlebar 47 Place the right side handlebar in the clamp such that there s a 1 8 gap between the handlebar end stop and the side of the stem as seen from the front of the handlebar ...

Page 10: ...and finger tighten 49 From the front of the bike align the handlebar by rotating it so the middle hashmark lines up with the upper inside edge of the stem as shown below CAUTION FAILURE TO EXTEND THE HANDLEBAR AS SHOWN MAY RESULT IN WHEELS MAKING CONTACT WITH FORKS WHICH CAN LEAD TO FORK OR TIRE DAMAGE Upper inside edge Middle hashmark ...

Page 11: ...NING TIGHTENING HANDLEBAR RETENTION SCREWS BEYOND 6NM 53 IN LBS OR FAILING TO ALIGN THE SCREWS WITH THE THREADS IN THE STEM MAY STRIP THREADS IN STEM LEADING TO INSUFFICIENT TIGHTENING OF THE HANDLEBAR FAILURE TO TIGHTEN HANDLEBAR SUFFICIENTLY MAY RESULT IN UNEXPECTED HANDLEBAR ROTATION THAT CAN RESULT IN ACCIDENTAL RIDER INJURY OR DEATH 51 Repeat steps 6 through 11 for the left side handlebar 52 ...

Page 12: ...V2 2 2022 RUNGU Dualie Rugged XR series Copyright 2021 Standard Bearer Machines LLC 12 53 Mount the keypad onto the left handlebar and slide the keypad near the throttle ...

Page 13: ...ox to remove the two quick release skewers from the packaging 56 Select which wheel is the right side wheel and the left side wheel Each wheel is labeled Left or Right This means that the brakes have been adjusted differently for each wheel use the labels to guide which wheel mounts on which side Note The left side is considered the side with the brake rotors The right side has the chain and geari...

Page 14: ...ines LLC 14 57 Remove the two quick release skewers from the accessories box Unscrew the end cap nut from the quick release skewers and remove one of the two conical springs for each skewer 58 Insert the skewer into the LEFT wheel from the side of the brake disc as shown below ...

Page 15: ...s LLC 15 59 Replace the conical spring small end first on the other side of the wheel Screw the end cap on a few turns to ready the wheel for installation 60 Prep the RIGHT wheel Insert the other skewer into the RIGHT wheel from the side OPPOSITE to the brake disc as shown below ...

Page 16: ... cap with a few turns to ready the wheel for installation 62 Get the bike ready to mount the front wheels by making sure the parking brake is off which is the way the bike ships See the section Using the parking brake on page 83 more information 63 Lift the front of the bike and mount the RIGHT wheel to the RIGHT fork making sure that the rotor fits between the brake caliper pads ...

Page 17: ...17 64 The ends of the axle will sit in the fork dropouts when correctly aligned You may have to unscrew the end cap a turn or two if the fork doesn t drop in place 65 Tilt the bike and mount the LEFT wheel to the LEFT fork making sure that the rotor fits between the brake caliper pads ...

Page 18: ...n t drop in place 67 Tighten the end cap nut on the LEFT wheel and close the quick release lever As a guideline the end cap nut should begin to clamp onto the fork drop out when the lever points away from the wheel at a right angle WARNING MAKE SURE TO TIGHTEN THE QUICK RELEASE IN THE FORK SO THAT THE WHEEL CANNOT FALL OUT OF THE FORK FAILURE TO ADEQUATELY TIGHTEN THE QUICK RELEASE CAN RESULT IN A...

Page 19: ...ck release lever As a guideline the end cap nut should begin to clamp onto the fork drop out when the lever points away from the wheel at a right angle WARNING MAKE SURE TO TIGHTEN THE QUICK RELEASE IN THE FORK SO THAT THE WHEEL CANNOT FALL OUT OF THE FORK FAILURE TO ADEQUATELY TIGHTEN THE QUICK RELEASE CAN RESULT IN ACCIDENTAL RIDER INJURY OR DEATH ...

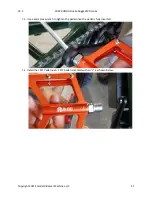
Page 20: ...as shown below 70 Use your fingers to thread the pedal shaft by inserting the threaded shaft into the crank arm Then hold the threaded section of the pedal in the crank arm mounting hole and spin the entire crank arm in a counterclockwise motion as depicted below CAUTION DO NOT FORCE THE THREADING OF THE PEDAL ONTO THE CRANKSET WARRANTY DOES NOT COVER REPLACEMENT CRANKS FOR STRIPPED THREADS ...

Page 21: ...ie Rugged XR series Copyright 2021 Standard Bearer Machines LLC 21 71 Use a 6mm Hex wrench to tighten the pedal once the pedal is fully inserted 72 Install the LEFT Pedal next LEFT pedal is marked with an L as shown below ...

Page 22: ...to the crank arm Then hold the threaded section of the pedal in the crank arm mounting hole and spin the entire crank arm in a clockwise motion as depicted below CAUTION DO NOT FORCE THE THREADING OF THE PEDAL ONTO THE CRANKSET WARRANTY DOES NOT COVER REPLACEMENT CRANKS FOR STRIPPED THREADS 74 Use a 6mm Hex wrench to tighten the pedal once the pedal is fully inserted ...

Page 23: ...FROM SEATING ON THE RIM AND PREVENT YOU FROM RIDING DUALIE OVER INFLATION MORE THAN 15 PSI 103 KPA MAY RESULT IN TIRE BLOW OUT WHILE RIDING 76 Loosen the Seat Post Clamp by opening the lever Insert the seat post and adjust to the height that suits you then tighten the clamp by closing the lever Note Failure to tighten the seat post can result in discomfort or injury while riding Dualie WARNING DO ...

Page 24: ...Mud Guards If you received Mud Guards as part of your package follow the directions below for installation 1 Remove the mud flaps from packaging along with their screws and retention nuts Remove the retention nut from each screw You ll need a crescent wrench or 10 mm socket wrench and a 5mm hex wrench to install the fenders ...

Page 25: ...ines LLC 25 2 Slide the mud guard from front of fork backwards until mounting tab aligns with mounting hole on fork bridge 3 Align the mounting slot with the mounting hole on the fork bridge Install the screw from the front of the fork through the mounting slot as shown below ...

Page 26: ...2 RUNGU Dualie Rugged XR series Copyright 2021 Standard Bearer Machines LLC 26 4 Thread the nut onto the back of the screw behind fork bridge 5 Use an adjustable wrench or 10 mm socket wrench to secure the nut ...

Page 27: ...ugged XR series Copyright 2021 Standard Bearer Machines LLC 27 6 Use a 5mm hex wrench to continue threading the nut onto the screw 7 Before fully tightening the nut slide the mud guard up vertically to maximize wheel clearance ...

Page 28: ...ght 2021 Standard Bearer Machines LLC 28 8 Adjust the mud flap to align it with the tire and fully tighten the nut 9 Bend the mud guard forward to allow even clearance between the mudguard and the tire 10 Repeat these steps for the second mud flap ...

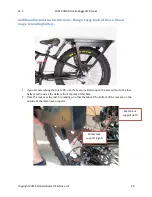
Page 29: ...ange extending battery 1 If you are assembling the Dualie XR use the keys provided to open the access door to the rear battery and remove the battery from the rack at this time 2 Place the rack over the rear tire making sure that the tabs at the bottom of the rack are on the outside of the metal rack supports Metal rack support right Metal rack support left ...

Page 30: ...rear rack support as shown The rack will come to rest here and on the right and left rack supports so you can insert fasteners next 4 Align the front rack tab with the mounting bracket and place an M8 screw and washer through the mounting bracket hole Thread the screw into the threaded hole on the front of the rack Finger tighten ...

Page 31: ...g location on the left side metal rack support Thread an M8 screw and washer through the tab and into the rack support Finger tighten the screw 6 Align the holes in the tab at the bottom right side of the rack with the fastening location on the right side metal rack support Thread an M8 screw and washer through the tab and into the rack support Finger tighten the screw ...

Page 32: ... BETWEEN THE RACK AND THE LEFT SIDE OF THE FRAME WHEN TIGHTENING FASTENERS Note If you have the standard Rungu Cargo Rack your rack installation is complete Continue to step 8 if your Rungu Cargo Rack includes the range extending battery 8 Use the keys provided to open the access door to the rear battery and insert the end of the cable harness into the rear battery compartment through the hole pro...

Page 33: ...es LLC 33 10 Working from the inside and the outside of the rack squeeze the grommet on the harness into place so that it covers the entire hole in the battery case and secures the cable harness 11 Push at least one inch of the cable wrapped harness into the battery compartment ...

Page 34: ... Battery Link making the front and rear batteries work together to extend your practical range The pigtail connector remains disconnected and may be covered with electrical tape Tuck the wiring between the front of the battery and the front of the box to keep them out of the way of the locking lid Make sure the cabling doesn t interfere with the latch mechanism and close and lock the lid ...

Page 35: ...et above the zip tie locations Clip and remove the zip tie tails after you ve tightened the zip ties CAUTION MAKE SURE THE CABLE HARNESS OR THE ZIP TIES DON T INTERFERE WITH THE MOTION OF THE REAR WHEEL AND THE OPERATION OF THE REAR BRAKE CAUTION AVOID THREADING THE CABLE HARNESS THROUGH THE HOLES IN THE RACK DOING SO MAY CAUSE WEAR ON CABLE HOUSING RESULTING IN A SHORT CIRCUIT SHOCK OR FIRE ...

Page 36: ...e Dualie Rugged or Dualie XR Rubicon Trail Edition or you added pannier bag mounts as an accessory mounting and removing pannier bags has never been easier 1 Adjust the bottom clip using the adjustment knob on the bag so that the clip faces down Align the bag with the bottom mount so that the clip mount channel fits between the two pannier bag mount blocks ...

Page 37: ...s LLC 37 2 Adjust the upper quick release catches using the adjustment knobs so that the catches fit between the two upper mounting blocks 3 Push down on the pannier while pulling up on the quick release strap This opens the two catches so that they engage the upper mounting tube ...

Page 38: ... 2 2022 RUNGU Dualie Rugged XR series Copyright 2021 Standard Bearer Machines LLC 38 4 Lower the pannier onto the upper mounting tube and let go of the quick release strap This locks the pannier in place ...

Page 39: ...lable as an electronic link on the list of documentation that came with your Dualie If you cannot find your copy of the All Purpose Bicycle Manual email support riderungu com and request an electronic copy WARNING THE DUALIE HAS A TIE ROD THAT CONNECTS THE TWO FRONT FORKS DO NOT USE THE TIE ROD TO LIFT DUALIE THE STEERING USES THE TIE ROD AS A HARD STOP SO THE FORKS DON T RUB AGAINST THE FRONT WHE...

Page 40: ...LiNiMnCoO2 or LiNMC for short The electric vehicle industry prefers this chemistry due to the combination of power safety performance and life span compared to the other options available Each battery has a Battery Management System BMS built into the battery to protect you and the Rungu from dangerous battery faults Lithium cells have a lot of energy stored in a small package There is always a po...

Page 41: ...longer than normal If you experience a sudden loss of power while riding your Rungu STOP IMMEDIATELY Turn off the Dualie and inspect your battery system Check for a burnt smell and inspect there are no melted or shorted wires Shorted wires or a burnt smell indicate a shorted or failed BMS stop using Rungu and contact us as soon as possible If you notice that your battery is swollen damaged or smok...

Page 42: ...er discharge charging or excessive mechanical abuse Specifically mechanical abuse in the form of excessive shock or vibration can result in case deformation crushing and damage to the electrode materials WARNING NOT GUARDING AGAINST THESE CONDITIONS MAY RESULT IN A HOT CELL OR A BATTERY PACK THAT COULD VENT OR EXPLODE Only trained and equipped emergency responders should respond to an incident wit...

Page 43: ...using a non contact thermometer or thermal imager If temperature monitoring equipment is not available keep the area evacuated and secure and do not handle the cell battery for at least 24 hours If the battery cools continue to monitor until it reaches ambient temperature Remove the battery from the area once it is cool Dispose of the cell in accordance with waste or recycling protocols For more i...

Page 44: ...UR RUNGU DUALIE IS STORED AT A TEMPERATURE OF 32 F 0 C OR LOWER CHARGING THE BATTERY IN AN AMBIENT TEMPERATURE OF 32 F 0 C OR LOWER WILL DAMAGE THE BATTERY AND REDUCE CAPACITY BY A SIGNIFICANT AMOUNT VOIDING MANUFACTURER WARRANTY REFER TO THE NEXT SECTION CHARGING YOUR MAIN BATTERY AFTER REMOVING THE BATTERY FOR INSTRUCTIONS ON HOW TO REMOVE THE BATTERY 1 Make sure your charger is set to the corre...

Page 45: ...e Rugged XR series Copyright 2021 Standard Bearer Machines LLC 45 2 Unscrew the battery charging port access cover on the right side of the battery case 3 Remove the cover and place it in a location where it won t get lost ...

Page 46: ... for a full charge You should expect a full charge in fewer than 3 hours If it fails to charge please look at the troubleshooting section for further information NOTE You do not always need to wait for a full charge you may use your batteries at any time since the batteries have no memory For extended use it will always be better to get a full charge so that you do not deplete your batteries too f...

Page 47: ...nnector and replace the battery charge cover by screwing the cover back onto the outlet CAUTION DO NOT LEAVE CHARGER PLUGGED INTO WALL AFTER COMPLETING CHARGING THIS MAY DAMAGE THE BATTERY CHARGER UNPLUG OR OTHERWISE DISCONNECT THE CHARGER FROM AC POWER WHEN IT IS NOT IN USE FAILURE TO DO SO WILL VOID YOUR WARRANTY ...

Page 48: ...attery indoors you can remove the battery and charge it indoors Use the keys supplied with your Dualie to unlock the battery case from the front You will find the lock under the Main Battery Case Use some pressure to retain the Battery Cover while turning the key CAUTION THE BATTERY HAS PADDING INSIDE OF THE MAIN BATTERY CASE TO MINIMIZE SHOCK AND VIBRATION TURNING THE KEY MAY REQUIRE THAT YOU OVE...

Page 49: ...er Machines LLC 49 2 Remove the Main Battery Case cover and put it aside 3 Grasp the battery and pull it up and forward CAUTION IF YOU DECIDE TO REMOVE THE BATTERY MAKE SURE YOU HAVE THE GRIP AND ARM STRENGTH TO REMOVE IT THE BATTERY WEIGHS APPROXIMATELY 10 LBS 4 5 KGS ...

Page 50: ...ully place the battery vertically on the floor beneath the Rungu Dualie and disconnect both yellow connectors WARNING ONLY PULL ON THE YELLOW CONNECTORS TO DISCONNECT DO NOT USE THE WIRES TO PULL THE CONNECTORS APART DOING SO MAY EXPOSE INTERNAL WIRING AND LEAD TO A SHORT CIRCUIT SPARKS OR FIRE ...

Page 51: ...GING THE BATTERY PLACE IT OUTSIDE ON CONCRETE A SAFE DISTANCE AWAY AND MONITOR IT CLOSELY FROM A SAFE DISTANCE TO MAKE SURE ALL IS O K GIVE US A CALL EMAIL US IMMEDIATELY IF A BATTERY BEGINS TO PUFF AND CONTACT RUNGU FOR GUIDANCE ON THE NEXT STEPS DO NOT ATTEMPT TO USE A BATTERY AFTER IT HAS SWELLED AND EXPANDED OR PUFFED SIGNIFICANTLY 8 Wait until the light on the charger turns green for a full c...

Page 52: ...r to the motor connector inside the Main Battery Case and reconnect the small charging connector to the external charging port pigtail cable Replace the battery inside the Main Battery Case opposite the way you removed it Position both sets of cables and connectors inside the main battery case away from the key latch mechanism CAUTION DO NOT LEAVE CHARGER PLUGGED INTO WALL AFTER COMPLETING CHARGIN...

Page 53: ...WAY FROM THE LATCH TO AVOID DAMAGING THE CABLE AND SHORTING THE BATTERY BATTERIES FROM SHORTED CABLES AND SEVERED BATTERY CABLES ARE NOT COVERED BY YOUR RUNGU WARRANTY GOOD cables positioned away from cover BAD Cables will be pinched by cover 10 Use the same technique as in step 1 to hold the cover in place while using the key to close the latch 11 Remove the key from the latch and put it away to ...

Page 54: ...TERY AFTER REMOVING THE BATTERY FOR INSTRUCTIONS HOW TO REMOVE THE BATTERY Note Dual battery units have one battery located in the Rungu Cargo Rack and another in the battery case under the frame 1 Make sure each of your dual battery chargers are set to the correct voltage for your country s power requirement Each charger has an input voltage switch Check that the voltage switch is switched correc...

Page 55: ...T REMOVE THE PADDING FROM THE BATTERY 3 Open the door to expose the battery and cabling inside the Rungu Cargo Rack 4 Plug each battery charger into an AC wall outlet 5 To charge both batteries in place extend the small yellow connector from the battery in the rear rack as well as the one from the second battery which will be alongside the cable coming from the side of the rack CAUTION THERE IS AN...

Page 56: ...onds and the fan in each charger may turn on Wait until the light on the charger turns green for a full charge Depending on the amount of charge remaining in your battery you should expect a full charge in fewer than 3 hours If the battery fails to charge or the light fails to turn red please look at the troubleshooting section for further information NOTE You do not always need to wait for a full...

Page 57: ...right 2021 Standard Bearer Machines LLC 57 GOOD cables placed away from door and key latch BAD cables obstruct door closure 10 Lower the door over the battery 11 Lock the latch and remove the key from the latch and put it away to avoid losing it ...

Page 58: ...Each charger has an input voltage switch Check that the voltage switch is switched correctly for your voltage standard 110V refers to 110 120VAC 60Hz common to North America 220V refers to 220 240VAC 50Hz common to Europe and Asia If the voltage input switch is set incorrectly for your voltage standard use the blade of a small screwdriver to push the switch to the correct setting 2 Access the char...

Page 59: ... Charging your Main Battery after removing the battery Dualie single battery version only section earlier in this document 12 Plug each battery charger into an AC wall outlet using the provided AC cord A red light should appear on each charger 13 The small yellow connectors on each battery mate with the charger plugs on each charger The connector is keyed so there is only one way that the plug wil...

Page 60: ...o not deplete your batteries too far when you ride It is better in the long run to use less than 80 capacity of the battery when riding if possible CAUTION REFER TO THE BATTERY CARE SECTION IN THIS DOCUMENT FOR MORE INSTRUCTIONS ON HOW TO MAXIMIZE THE LIFE OF YOUR BATTERIES WARNING IF YOU FULLY CHARGE A BATTERY DISCONNECT THE BATTERY FROM THE CHARGER AS SOON AS POSSIBLE OR WITHIN A FEW HOURS OF CO...

Page 61: ...yright 2021 Standard Bearer Machines LLC 61 GOOD cables placed away from door and key latch BAD cables obstruct door closure 15 Lower the door over the battery 16 Lock the door and remove the key from the latch and put it away to avoid losing it ...

Page 62: ... on adapter Rungu ships the Dualie Rugged and Dualie XR Rubicon Trail edition units with the Cycplus portable tire pump the pump uses a standard Schraeder valve outlet use it with the Presta screw on valve adapters to inflate your tires as shown below CAUTION DO NOT USE GAS STATION AIR PUMPS OR OTHER HIGH VOLUME AIR COMPRESSORS TO INFLATE YOUR TIRES THEY MAY QUICKLY EXCEED THE LIMITS OF THE TIRE A...

Page 63: ...opyright 2021 Standard Bearer Machines LLC 63 3 Screw on the Presta valve adapter 4 Connect the bike tire pump and inflate tire to the pressure appropriate for where you re riding as recommended in the before you ride section of this document ...

Page 64: ... the valve adapter in a safe place they are easy to lose CAUTION DO NOT LEAVE THE PRESTA VALVE ADAPTER IN PLACE THE CAPTIVE NUT NEEDS TO BE RE FASTENED TO RETAIN TIRE AIR PRESSURE 6 Tighten the captive nut on the top of the Presta valve to keep the valve from leaking air 7 Replace the protective cap which protects the captive nut and thread from corrosion ...

Page 65: ...killed has remained relatively consistent at 16 percent since 2010 2 Wear a helmet 2 Make sure the stems are tightly clamped to your forks To do this stand in front of the Rungu astride the left wheel facing the steering assembly Hold both handlebars and try to turn the steering The fork and wheel should flex but the handlebars shouldn t turn independently of the wheel you re bracing If the other ...

Page 66: ...eck that all of the cargo rack fasteners are tightened as well 6 Make sure the handlebars don t twist in place Hold each grip and try to twist the handlebars If they twist STOP Re orient the handlebars according to your preference and re tighten the four screws on each linkage arm to clamp the handlebars 7 Make sure the handlebar ends extend past the stems by at least 45 mm 1 To check this move th...

Page 67: ... to be 5 PSI 34 KPa or above or release air from the tire to lower the pressure below 15 PSI 103 KPa Note Tire pressure plays an especially important role in how you enjoy your Rungu DUALIE If you plan to ride mostly on soft ground like sand or snow use a tire pressure between 5 34 kPa and 6 PSI 41 kPa for best traction and control as well as minimizing tread wear Use 10 PSI 69 kPa if you plan to ...

Page 68: ...he integrated Rungu E Light on and off and sets up the display settings This section provides an overview of the controls that gives you enough information to operate your Dualie For detailed instructions refer to the document Rungu MDV Display User Guide that you can find online at this link3 Turning on Dualie Press and hold the on off switch for one to two seconds The Display will show a start u...

Page 69: ...ive perspective on how load affects the battery The DUALIE voltage varies between 44V fully discharged and 58 60V You may observe that voltage drops significantly during a hill climb or when riding on soft surfaces only to rebound afterwards Voltage drops when the battery experiences greater loading throttle hill climbs etc when load is removed a battery relaxes and returns to its unloaded voltage...

Page 70: ...key repeatedly to sequence through different trip computer output Finally the number bracketed in the center is the power level of the motor The power level at start up is set to 1 the lowest level of pedal assist Default power level ranges from 0 off to 5 full power CAUTION RANGE ESTIMATES CAN BE MISLEADING PRESSING THE I KEY CAN CAUSE THE RANGE TO DISPLAY THIS OUTPUT OF THE TRIP COMPUTER ESTIMAT...

Page 71: ...utes Display settings control the amount of time in minutes Built in USB charging port The Display has a USB Type A charging port under the bottom of the display protected by a rubber cover Lift the cover to access the port You can charge your phone or power a GPS unit with a standard USB charging cable PIN Code You can also prevent accidental or unwanted Dualie activation by implementing a PIN co...

Page 72: ...area with no other vehicular traffic and using power level 1 only to get used to turning and changing gears Watch our introductory video Rungu Dualie Instructional Videos Volume 2 Rungu First Ride before your first ride Riding with long pants If you re riding with long pants and you have purchased your Rungu Dualie with a Chainguard your pant cuffs are protected The Rungu Chainguard can also be pu...

Page 73: ...1 Standard Bearer Machines LLC 73 WARNING RIDING WITH LONG PANTS WITHOUT USING A PANTS CUFF PROTECTOR OR CHAINGUARD MAY CAUSE THE CHAIN AND CHAINRING TO CATCH YOUR PANTS CUFF WHICH CAN LEAD TO LOSING CONTROL OF THE RUNGU DUALIE AND SEVERE INJURY OR DEATH ...

Page 74: ...the power coming from the motor regardless the power level Like the transmission in a car being in the wrong gear can cause the car to stall or use excessive energy to maintain speed The same holds true with your Dualie Each Dualie has 9 gears first gear is the largest sprocket on the rear wheel ninth uses the smallest First gear has the lowest gear ratio between the motor and the rear wheel First...

Page 75: ...wo thumb triggers Upper and Lower Each press of the thumb against one of the triggers indexes the gear A long press of the Lower Thumb Trigger decreases the gear by one gear at a time starting in ninth gear A short press of the Upper Thumb Trigger increases the gear by one gear at a time starting with first gear Upper thumb trigger Lower thumb trigger ...

Page 76: ... It is designed so you MUST pedal to complete the gear change Shutting the motor off and relying on pedaling minimizes the force on the chain and sprockets during gear changes to avoid damage to the chain or cassette WARNING IF YOU DO NOT PEDAL DURING A GEAR CHANGE THE MOTOR WILL REACTIVATE AND PROBABLY BREAK THE CHAIN OR CASSETTE WHEN COMPLETING THE GEAR CHANGE When operating under heavy load pow...

Page 77: ...ower by one level Press key to decrease the power by one increment As you re riding you can increase and decrease the power output of the DUALIE motor in this way If you re operating DUALIE on flat paved roads using level 2 or 3 is adequate to maintain a speed of 10 mph with minimal effort If you re riding steep inclines off road or in deep sand snow use a combination of appropriate gearing and a ...

Page 78: ... above always start in first or second gear before changing gears to get a higher speed As with steep hills changing gears under load may cause the chain to break or the sprockets in the cassette to bend The Importance of Shifting into the Correct Gear Appropriate gearing takes full advantage at each power level Using the shifter on the right handlebar you can change the Dualie gearing Dualie has ...

Page 79: ...E IS UNDER LOAD SHIFTING GEARS WHILE USING POWER LEVEL 4 OR 5 AND HILL CLIMBING MAXIMIZES CHAIN WEAR AND MAY RESULT IN A BROKEN CHAIN BENT CASSETTE COGS OR BOTH THE DUALIE USES A CHAIN DESIGNED FOR THE OUTPUT OF THE MOTOR HOWEVER REPEATED GEAR CHANGES AT THE HIGHER POWER LEVELS GENERATES VERY HIGH FORCE AND CAN BREAK A LINK IF YOU PLAN TO OPERATE DUALIE IN DIFFICULT OR CHALLENGING TERRAIN BE PREPA...

Page 80: ...OUR WARRANTY DOES NOT COVER DAMAGE TO THE CASSETTE DUE TO WEAR OR LOADING New 10th speed cog older Shimano Cassette Same cog after three miles of acceleration from a full stop in 10th gear using power level 5 Note tooth damage Also prior Shimano version of Cassette For detailed information on how to change Display settings refer to the Rungu MDV Display User Guide that you can find online at this ...

Page 81: ...4 80 and 5 100 when using 8th or 9th gear The force of acceleration at high power levels on these small cassette sprockets leads to premature wear b ON STEEP HILLS greater than 20 grade stay in first or second gear and leave the power level set to 5 100 Avoid changing gears Changing gears under load may cause the chain to break or the sprockets in the cassette to bend If you plan to ride off road ...

Page 82: ...YOU USE THE PRODUCT STANDARD BEARER MACHINES OR ITS DISTRIBUTOR WILL NOT BEAR ANY RESPONSIBILITY Adjusting the Front Suspension The front suspension has two manual controls that can change ride and handling characteristics Looking from above astride the Dualie the left side knob controls the stiffness of the suspension The right side switch is used to disable enable the suspension To stiffen or lo...

Page 83: ... shown below The parking brake is engaged when the knob is pressed flush or within 1 8 of the housing and secured by the lever Release the lever to make sure the knob is in position as shown below The knob holds the brake lever in place which in turn holds the dual front rotors in place and prevents Rungu Dualie from moving when parked The parking brake is very useful when parking on an angled sur...

Page 84: ...t brake lever in and pull the knob away from the from the lever Release the brake lever REMEMBER to switch off the parking brake before riding NOTE Riding with the parking brake engaged produces significant wear on the brake pads leading to a decrease in brake pad life and stopping power Warranty DOES NOT cover replacement brake pads ...

Page 85: ...fully charge the batteries if you plan to use the Dualie within the next few days 3 If you plan to not use the Dualie for more than a few days keep the batteries charged around 50 of their capacity Voltage level of 50 52 V and recharge the battery the day before your next ride CAUTION IT IS IMPORTANT THAT THE BATTERY CHARGER GETS AIR FLOWING OVER THE HEATSINK AND IS OUT OF DIRECT SUN TO AVOID OVER...

Page 86: ...you are not using the pack the battery will only be good for so long To prolong the life and performance of the pack it is best to not drain the pack to zero capacity like when the battery management system shuts it off Going from 100 to zero capacity will adversely affect your life cycles It is much better for instance to go from 100 to 50 If you only rode your bike 3 miles every day you are bett...

Page 87: ...atch v Aiql_2UNTEE After using the degreaser empty the reservoir in the chain cleaner and fill it with water and run the chain cleaning mechanism over the chain again to remove the degreaser Wipe and dry the chain with a new rag With the chain clean use the Lubrication guidelines below to choose the chain lube best for your environment Follow application instructions printed on the chain lube bott...

Page 88: ... which can cause a breakdown of wire insulation Any wire with melted insulation indicates a poor connection nearby Disconnect the batteries and do not operate if insulation is melted or wire is exposed 5 Inspect and lubricate your chain as described earlier or if necessary replace the chain If you observe gear changes to take longer than normal it may be time to replace the chain Contact support r...

Page 89: ...e and replace the rear wheel How to remove the rear wheel 1 First shift the rear wheel into 9th gear Whether or not the chain is on the Rungu shifting to 9th gear before wheel removal makes wheel removal easier 2 If possible find an object e g empty bucket cardboard box that you can use to support the bike after the rear wheel is removed Alternatively hang the rear triangle from straps or ropes to...

Page 90: ...ase lever 4 Loosen the quick release skewer by unscrewing the end cap Be careful to not lose the springs or other components of the skewer if you remove the end cap 5 The wheel will drop out and the cassette will get caught on the derailleur pulley 6 Push back on the derailleur cage so the wheel can drop further ...

Page 91: ...XR series Copyright 2021 Standard Bearer Machines LLC 91 7 Move the chain above the cassette so it doesn t interfere with wheel removal 8 Put the rear wheel aside and support the frame as noted above while you service the rear wheel ...

Page 92: ...th gear Lift the rear of the frame and position the rear wheel underneath and pull back on the derailleur so you can orient the chain around 9th gear on the cassette 2 Remove any support for the frame and lower the frame so the axle of the wheel moves up into the dropouts Take care to slide the brake rotor between the brake caliper pads on the left side of the bike ...

Page 93: ...eft and right dropouts then carefully lower the wheel onto the ground Gravity helps seat the axle in the dropouts Then tighten the quick release end cap As a guideline the end cap nut should begin to clamp onto the left drop out when the quick release lever points away from the wheel at a right angle 4 Close the quick release lever ...

Page 94: ...e tighten the quick release 6 After checking that the rear wheel is fastened tightly switch on the derailleur clutch and test ride the Rungu for more than five minutes to make sure the speedometer is working WARNING MAKE SURE TO TIGHTEN THE QUICK RELEASE IN THE FRAME SO THAT THE WHEEL CANNOT FALL OUT FAILURE TO ADEQUATELY TIGHTEN THE QUICK RELEASE CAN RESULT IN ACCIDENTAL RIDER INJURY OR DEATH ...

Page 95: ... Dualie The instructions in this section also apply to replacing a broken chain with a spare But the instructions do not cover the repair of chains broken where a master link cannot be placed without the removal of plates from the chain There are many good videos available on YouTube on chain repair The team at Rungu recommends the Park Tool video https www youtube com watch v HpUCCrgugQE 1 Turn o...

Page 96: ...ugged XR series Copyright 2021 Standard Bearer Machines LLC 96 4 Insert the pins of each side of the master link into the ends of the chain 5 Pull the chain together and align the pins with the slots on the master link plates ...

Page 97: ...hain so that the master link is above the chainstay and on the chain ring With the rear brake engaged you can step or use your hand on the right side pedal to pull on the chain and set the master link You should feel the master links click into place Rotate the chain to verify the master links are set ...

Page 98: ... translate that in real time to your actual speed in mph kph If the speed sensor is not aligned with the magnet the speedometer will fail to operate You will see Error 21 appear on your display Though we align and test all sensor and magnets at the factory wheel removal or accident may cause the magnet to change alignment 1 Check that the sensor is in place It is found inside the left chain stay C...

Page 99: ... wheel has a magnet attached to one spoke If you cannot find the magnet on one of the spokes reorder one from Rungu or other sources online before proceeding 4 If you are replacing a magnet place the magnet so that the face of the magnet faces the sensor and algins with the oblong recess on the sensor it has the word Bafang embossed ...

Page 100: ...ng during a ride requiring a motor replacement Though motor replacements of this kind are covered under warranty replacement labor shipping and tools are not making this an expensive and time consuming warranty repair DO tie down your Rungu Dualie from the frame The frame has many attachment points and provides the most rigid connections to your hitch rack or truck bed DON T use ratchet straps whe...

Page 101: ...V2 2 2022 RUNGU Dualie Rugged XR series Copyright 2021 Standard Bearer Machines LLC 101 Dimensions ...

Page 102: ...V2 2 2022 RUNGU Dualie Rugged XR series Copyright 2021 Standard Bearer Machines LLC 102 Performance Electrical ...

Page 103: ...if you do not have an ebike computer If the voltage is at or below 42V the battery is fully discharged If you are having trouble charging the battery please look below about charging your battery 5 If none of the proposed solutions work contact Rungu Problem I drove my Dualie until it went completely dead and now it will not charge This is a problem that occurs when you fully deplete the battery T...

Page 104: ...the speed sensor is in place and connected 2 Refer to the section Wheel speed sensor alignment to realign the magnet If following these instructions fails to correct the problem 3 Contact Rungu Support to investigate other measures Problem I am not getting the advertised range Range depends on many factors surface tire pressure power level load wind incline etc Like a car accelerating hard or spen...

Page 105: ...mponents as necessary If the derailleur hanger and frame are intact 4 Replace the chain 5 Contact Rungu Support if you have other questions Problem I hear a loud click noise coming when I m pedaling in a high gear The cassette cog is worn out replace cassette Refer to the Understanding and changing the Power Level section above on how to avoid this problem after replacing the cassette Problem I he...

Page 106: ...ith your hands try to shift into first gear Note If you have a high bandwidth Internet connection please watch this video that shows how to do a derailleur adjustment If the derailleur stops or has difficulty moving the chain into first gear clean and lubricate the derailleur and refer to component directions to reset the high and low stops for the derailleur to ensure consistent gear changes If t...

Reviews: