CP390i and CPF390i
Page 83
WAAS 3D
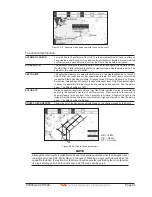
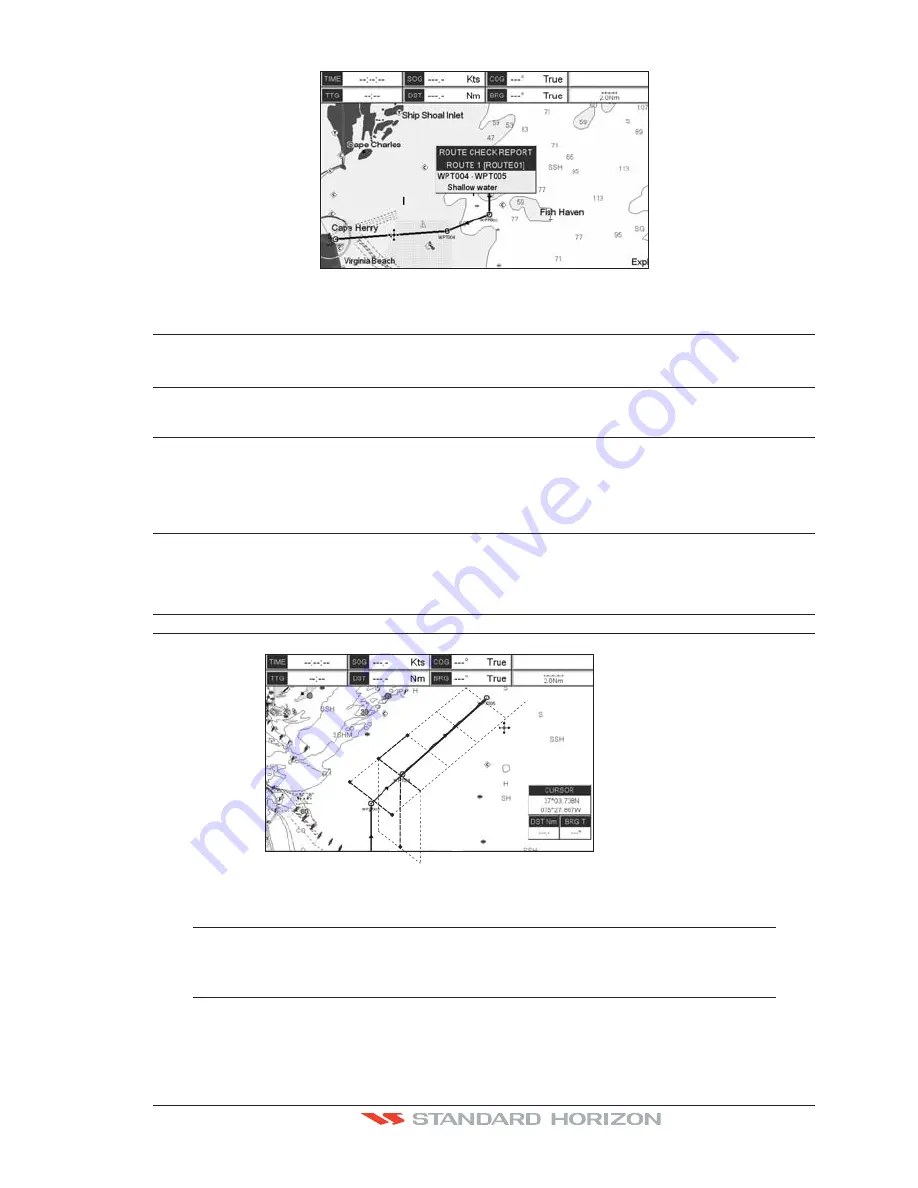
Figure 9.8.0 - Example of dangerous objects found on the chart
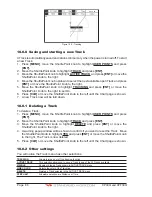
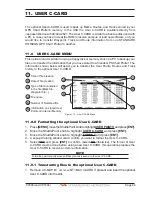
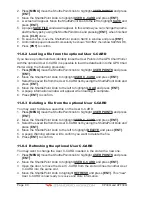
To activate this function:
AUTOMATIC CHECK
Turns the Route Check feature On or Off. Turn the Automatic Route Check on after you
have created a new Route, or if you inserted a new Waypoint, deleted, moved or edited
any Waypoint in a saved Route to confirm the Route can be safely navigated.
ROUTE WIDTH
This selection allows you to select the width from the left and right of the Route leg where
the GPS Chart Plotter will check to confirm navigation threats. See the picture below. The
default for this selection is 0.04NM.
DEPTH LIMIT
This selection allows you to select the water depth in the Route width area so the GPS
Chart Plotter can check and confirm underwater threats. It checks if some objects with
the depth attribute (like Shallow Water, Dredged Areas, Diffusers, Obstructions, Pingos,
Production Installationand Wrecks) are above this depth level. Only if the depth attribute
is above the depth limit are they found and considered as dangerous. See the picture
below. The default setting is 10FT.
ACCURACY
Defines a segment length into which a leg of the Route is divided in order to execute the
search for dangerous objects with better accuracy. When accuracy is maximal, a
segment length is the shortest. When accuracy is minimal, a segment length is the
longest. Selects among Minimum, Low, Medium, High and Maximum. See the picture
below. The default setting is Medium.
ROUTE CHECK REPORT
Shows the list of the dangerous objects found on the charts crossed by the Route.
A
B
C
D
E
F
A-B = Width
C-D = Depth
E-F = Accuracy
Figure 9.8.0a - Route Check parameters
NOTE
Although the functionality is called Route Check, it can also be activated when the navigation is set
to a single point (like DSC, MOB, Mark). In the case of checking a single point towards which the
navigation is started, the leg for which the Route Check is executed is defined by the current position
(the leg’s starting point) and the destination point (the leg’s ending point).
Summary of Contents for CP390i
Page 1: ......
Page 5: ...Page 6 CP390i and CPF390i ...
Page 15: ...Page 16 CP390i and CPF390i ...
Page 29: ...Page 30 CP390i and CPF390i ...
Page 43: ...Page 44 CP390i and CPF390i ...
Page 53: ...Page 54 CP390i and CPF390i ...
Page 67: ...Page 68 CP390i and CPF390i ...
Page 75: ...Page 76 CP390i and CPF390i ...
Page 83: ...Page 84 CP390i and CPF390i ...
Page 87: ...Page 88 CP390i and CPF390i ...
Page 109: ...Page 110 CP390i and CPF390i ...
Page 145: ...Page 146 CP390i and CPF390i Figure 17 16 C Card Restore settings ...
Page 147: ...Page 148 CP390i and CPF390i ...
Page 153: ...Page 154 CP390i and CPF390i ...
Page 157: ...Page 158 CP390i and CPF390i ...
Page 168: ......


