Page 81
CPV350
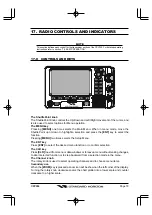
The DISTRESS key
Used to send a DSC Distress Call. To send the distress call refer to section “19.2.0
Transmitting A DSC Distress Call.”
The Soft keys (located underneath the display)
These keys are used for selection of a variety of function.
The actual selection available is shown on the display, just above the function key.
The PWR key and Lamp/Contrast
Press and hold
[PWR]
to turn the CPV350 On or Off.
Secondary use
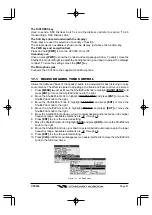
Once on press
[PWR]
to show the Contrast and Lamp popup window. To adjust, move the
ShuttlePoint knob left/right to adjust the backlight and up and down to adjust the displays
contrast. To store the settings press the
[ENT]
key.
The Microphone jack
Connects the CPV350 to the supplied Hand Microphone.
17.1
RECEIVER AUDIO TONE CONTROL
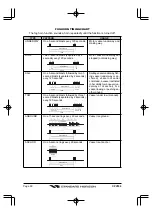
Allows the treble and bass of the speaker audio to be adjusted for best listening in noisy
environments. The effect is similar to adjusting a the treble and bass controls on a stereo.
1. Press
[MENU]
two times. Move the ShuttlePoint knob to highlight
RADIO SETUP
and
press
[ENT]
or move the ShuttlePoint knob to the right.
2. Move the ShuttlePoint knob to highlight
VHF SETTING
and press
[ENT]
or move the
ShuttlePoint knob to the right.
3. Move the ShuttlePoint knob to highlight
AF SETUP
and press
[ENT]
or move the
ShuttlePoint knob to the right.
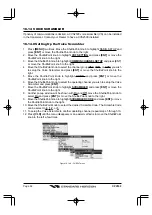
4. Move the ShuttlePoint knob to highlight
TREBLE
and press
[ENT]
or move the
ShuttlePoint knob to the right.
5. Move the ShuttlePoint knob up or down to select desired audio response in the higher
frequency range. Available selections are
–6
” through
+6
.
6. Press
[ENT]
to store the selected setting.
7. Move the ShuttlePoint knob to highlight
BASS
and press
[ENT]
or move the ShuttlePoint
knob to the right.
8. Move the ShuttlePoint knob up or down to select desired audio response in the lower
frequency range. Available selections are
–6
” through
+6
.
9. Press
[ENT]
to store the selected setting.
10. Press
[CLR]
until the menu disappears or an easier method is to move the ShuttlePoint
knob to the left a few times.
Figure 17.1 - AF Setup menu


