Printing Functions
124
3
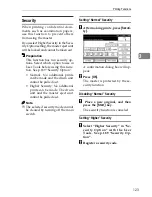
Disabling “Higher” Security
A
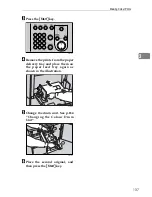
Press
[
Security
]
.
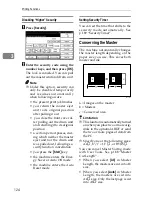
B
Enter the security code using the
number keys, and then press
[
OK
]
.
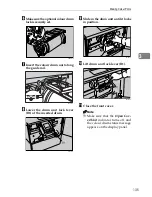
The lock is canceled. You can pull
out the master unit and drum unit.
Note
❒
Under this option, security can
only be disabled temporarily
and resumes automatically
when following occurs:
• the present print job finishes
• you return the master eject
unit to its original position
after pulling it out
• you close the front cover af-
ter pulling out the drum unit
and returning it to its original
position
• a certain period passes, dur-
ing which neither the master
eject unit nor the drum unit
was pulled out, following se-
curity function cancellation
• you press the
{
Start
}
key
• the machine enters the Ener-
gy Saver or Auto Off mode
• the machine enters the Auto
Reset mode
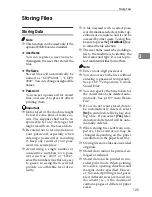
Setting Security Timer
You can set the time that shifts to the
security mode automatically. See
p.189 “Security Timer”.
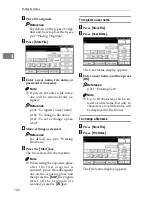
Conserving the Master
The machine automatically changes
the master length depending on the
paper size you use. This saves both
master and ink.
a = Images on the master
b = Masters
c = Conserved area
Limitation
❒
This function is automatically turned
on when you place two or more orig-
inals in the optional ARDF or send
the two or more pages of data from
the PC.
❒
Specify one of the following sizes:
A4
K
, 8
1
/
2
"
×
11"
K
, or B5 JIS
K
.
You can cancel Master Saving mode
with User Tools. See p.188 “Master
Cut Length”.
• When you select
[
A3
]
in Master
Length, the masters are cut into A3
size.
• When you select
[
Auto
]
in Master
Length, the masters are cut into
A4
K
size. Only the last page is cut
into A3
L
size.
ACY062S
Summary of Contents for SD462
Page 2: ......
Page 4: ......
Page 28: ...13 AUX167S ...
Page 42: ...THIS PAGE LEFT BLANK INTENTIONALLY ...
Page 78: ...Basics 62 2 ...
Page 156: ...Printing Functions 140 3 ...
Page 194: ...Troubleshooting 178 4 ...
Page 214: ...User Tools 198 5 ...
Page 226: ...Remarks 210 6 ...
Page 242: ...226 EN USA C269 0756 ...
Page 244: ...Operating Instructions Type for 3585DNP2 CP6340D LDD350d DX 4640PD EN USA C269 0756 ...
Page 250: ...iv ...
Page 254: ...Printer Functions Available over a Network 4 1 ...
Page 256: ...Connecting the Network Cable to the Network 6 2 ...
Page 264: ...Setting Up the Machine on a Network 14 3 ...
Page 270: ...Windows Configuration 20 4 ...
Page 371: ...Copyright 2005 ...
Page 372: ...Network Guide GB GB EN USA C269 0780 ...
Page 378: ...iv ...
Page 380: ...2 ...
Page 388: ...Getting Started 10 1 ...
Page 428: ...Preparing to Print 50 2 ...
Page 466: ...Troubleshooting 88 5 ...
Page 483: ...Copyright 2006 ...
Page 484: ...Operating Instructions Printer Reference GB GB EN USA C269 0760 ...
Page 490: ...2 ...
Page 540: ...PostScript3 printer driver Setting Up for Printing 52 1 ...
Page 556: ...THIS PAGE LEFT BLANK INTENTIONALLY ...
Page 557: ...Copyright 2007 ...

