23
MAINTENANCE OF UNIT
WARNING:
To prevent possible serious personal injury, always disconnect the
Wide Drum Sander from the power source before serving the unit or changing
abrasive strips.
Keep your Wide Drum Sander clean. Remove accumulated sawdust from the
drum and other working parts. Frequently clean resin buildup from the inner
drum using a kerosene or a resin remover dampened cloth with the unit
disconnected from the power source.
WARNING:
Provide adequate ventilation when using solvents. Do not use
solvents to clean plastic parts.
Some basic requirements are necessary to ensure a long and enjoyable life
for your Wide Drum Sander.
1. Periodically lubricate moving parts using a non-petroleum based lubricant,
including the
threaded
depth control, sliding surfaces, and bronze
bushings associated with the depth control
mechanism
. Do not use oil or
grease because they tend to attract and hold sawdust.
2. Periodically check the tightness of all frame bolts and motor/drum
mounting bolts/screws.
3. Keep sanding drum feed belt clean.
4. Use only clean sanding abrasives.
5. Periodically check the sanding drum feed belt table alignment. If out of
alignment, see alignment procedure.
WARNING:
Do not operate the Wide Drum Sander with the drum cover
open. Use extreme caution when performing drum cleaning maintenance on
your Wide Drum Sander. DO NOT wear long sleeve shirts, neckties, or
jewelry. Tie back long hair when cleaning the
sander
drum. Failure to heed this
warning can result in serious personal injury.
DRUM ABRASIVE STRIP CLEANING
During use, the sanding strip abrasive may become clogged with sawdust,
causing insufficient sanding, marring of workpiece, and burning of the
workpiece. With the machine off and unplugged from its power source,
occasionally check the condition of the abrasive strip on the sanding drum for
clogging. This should be done often,
especially
with resinous woods, because
material can become os packed into the abrasive that it cannot be removed,
Summary of Contents for MM3126
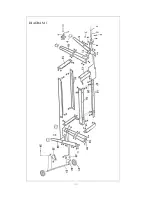
Page 31: ...30 DIAGRAM 1 ...
Page 32: ...31 DIAGRAM 2 ...


