G
B
24
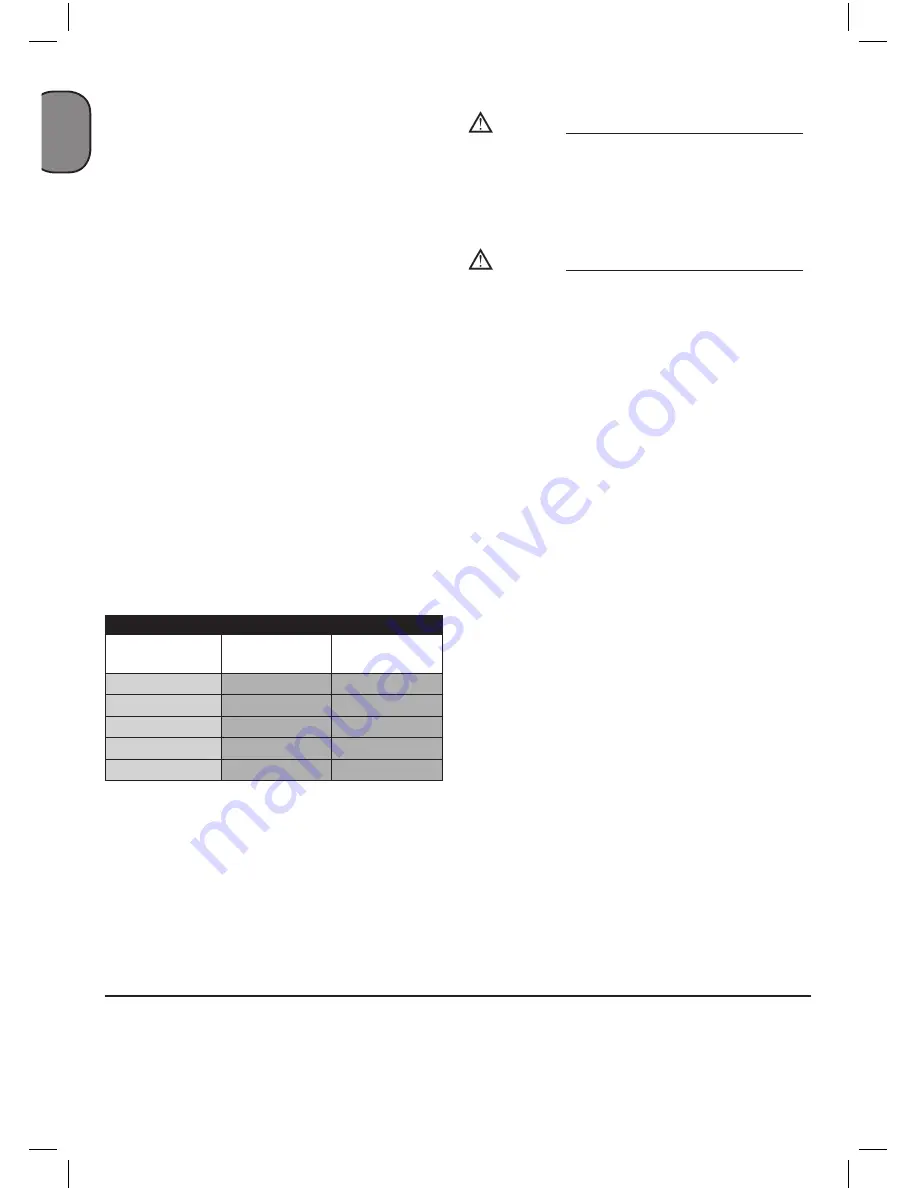
unscrew the oil drainage screw (ref. 15) from the com-
pressor pump. To prevent the oil from running out in an
uncontrolled manner, hold a small metal chute under
the opening and collect the oil in a vessel. If the oil
does not drain out completely, we recommend tilting
the compressor slightly.
Dispose of the old oil at a drop-off point for old oil.
When the oil has drained out, re-fit the oil drainage
screw (ref. 15). Fill new oil through the oil filler opening
(ref. 14) until it comes up to the required level. Then
replace the oil sealing plug (ref. 14).
6.6 Retensioning the V-belt (Figs.13-15)
●
Pull out the power plug and remove the safety guard
for the V-belt.
●
Slacken the four motor fixing screws (A).
●
Shift the motor until the V-belt is tensioned to the
point where it can still be depressed by approx. 1-2
cm at the longest free position.
●
Retighten the motor fixing screws (A) and refit the
safety guard for the V-belt.
6.7 Tightening of head tension rods
●
Check that all screws (in particular those of the head
of the unit) are tightly drawn up (fig. 24).
●
The check must be carried out prior to the first com-
pressor starting.
TIGHTENING OF HEAD TENSION RODS
Nm
Min. torque
Nm
Max. torque
Screw M6
9
11
Screw M8
22
27
Screw M10
45
55
Screw M12
76
93
Screw M14
121
148
6.8 Cleaning the intake filter (ref. 1)
The intake filter prevents dust and dirt being drawn in.
It is essential to clean this filter after at least every 100
hours in service. A clogged intake filter will decrease the
compressor’s performance dramatically. Undo the two
Allen screws (B). You can then remove the filter from
the two halves of the plastic housing, tap it to remove
the dirt, blast it down with low-pressure compressed air
(approx. 3 bar) and re-insert it (Figures 16-17-18).
6.9 Storage
Warning!
Pull the mains plug out of the socket and ventilate
the appliance and all connected pneumatic tools.
Switch off the compressor and make sure that it is
secured in such a way that it cannot be started up
again by any unauthorized person.
Warning!
Store the compressor only in a dry location which
is not accessible to unauthorized persons. Always
store upright, never tilted!
7. DISPOSAL AND RECYCLING
The unit and its accessories are made of various types
of material, such as metal and plastic. Defective com-
ponents must be disposed of as special waste. Ask
your dealer or your local council.
Summary of Contents for B 255/10/100
Page 8: ...8 1e B 480 10 50 T2 B 480 10 50 T4 4 9 11 3 16 6 12 15 2 1 8 14 5 7...
Page 9: ...9 2b 8 2 3 2a 6 12 8 8 1 10 12 7 6 5 7 5 3 17 18 4a 4b 3 4...
Page 10: ...10 7 2 8 6 5 17 19 4 4 19 18 18 13 13 2 2 2 9 10 9 9 2...
Page 11: ...11 11 13 15 12 14 16 15 min 1 2 cm max 16 A A 1 B...
Page 12: ...12 17 1 18 19 20 21 22...
Page 13: ...13 23 24 25 Brown Live L or Red Blue Neutral N or Black...
Page 78: ...78 G R 1 4 20 dB 5 C 40 C 4 5 50 cm S3 50 5 5...
Page 82: ...82 G R 6 9 7 8 21 22 rilsan rilsan 16 17 18 15...
Page 83: ...83 G R 5 5 1 19 5 5 1 20 2b 23...
Page 120: ...120 R U S 1 4 m 20 dB 5 C 40 C 4 5 50...
Page 121: ...121 R U S 2 1 2 3 4 5 6 7 8 9 10 11 12 13 14 15 16 17 18 19 20 3 S3 50 5 5 2 19 2b 20...
Page 126: ...126 R U S 8 21 22 16 17 18 15...
Page 127: ...127 R U S 5 5 1 19 5 5 1 20 2b 23...
Page 146: ...146 B G 1 4 20 dB 5 C 40 C 4 5 50...
Page 147: ...147 B G S3 50 5 5 2 19 2b 20 2 1 2 3 4 5 6 7 8 9 10 11 12 13 14 15 16 17 18 19 20 3 4 E...
Page 151: ...151 B G 5 5 1 19 5 5 1 20 2b 23...
Page 176: ...176 memo...
Page 177: ...177 memo...
Page 178: ...178 memo...


