G
B
27
6.1 Cleaning
●
Keep the safety devices free of dirt and dust as far
as possible. Wipe the equipment with a clean cloth or
blow it with compressed air at low pressure.
●
We recommend that you clean the appliance immedi
-
ately after you use it.
●
Clean the appliance regularly with a damp cloth and
some soft soap. Do not use cleaning agents or sol-
vents; these may be aggressive to the plastic parts in
the appliance. Ensure that no water can get into the
interior of the appliance.
●
You must disconnect the hose and any spraying tools
from the compressor before cleaning. Do not clean
the compressor with water, solvents or the like.
6.2 Condensation water
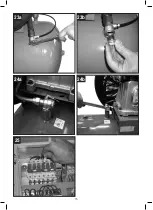
Periodically (or after completing work if for more than an
hour), drain the condensate that forms inside the pres-
sure vessel due to the humidity in the air (
fig. 15
) in
order to protect the reservoir from rust and so as not to
restrict its capacity. By opening the drain valve (ref. 11)
(on the bottom of the pressure vessel).
Warning!
The condensation water from the pressure vessel
will contain residual oil. Dispose of the condensa-
tion water in an environmentally compatible man-
ner at the appropriate collection point.
6.3 Safety valve (ref. 10)
The safety valve has been set for the highest permitted
pressure of the pressure vessel. It is prohibited to adjust
the safety valve or remove its seal.
6.4
Check the oil level at regular intervals
Place the compressor on a level and straight surface.
The oil level must be between the two marks MAX and
MIN on the oil oil level window (
Fig. 13a-13b
/ ref. 16).
Changing the oil: Use
SAE 40
(for cold climates, SAE
20 is recommended). Never mix different grade oils. If
the oil changes color (whitish = presence of water; dark
= overheated), it is good practice to replace the oil im-
mediately.
It should be refilled for the first time after 100 hours of
operation. Thereafter the oil should be drained and re-
filled after every 300 hours in service. After topping up,
tighten the plug (ref. 14) making sure that there are no
leaks during use. Once a week, check the oil level to
assure lubrication in time (
fig. 13a-13b
).
6.5 Changing the oil
Switch off the engine and pull the mains plug out of
the socket. After releasing any air pressure you can
unscrew the oil drainage screw (ref. 15) from the com-
pressor pump. To prevent the oil from running out in an
uncontrolled manner, hold a small metal chute under
the opening and collect the oil in a vessel. If the oil does
not drain out completely, we recommend tilting the com
-
pressor slightly.
Dispose of the old oil at a drop-off point for old oil.
When the oil has drained out, re-fit the oil drainage
screw (ref. 15). Fill new oil through the oil filler opening
(ref. 14) until it comes up to the required level. Then
replace the oil sealing plug (ref. 14).
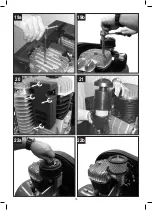
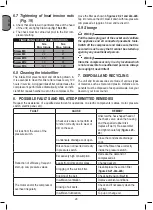
6.6 Retensioning the V-belt (Figs. 16-18)
●
Pull out the power plug and remove the safety guard
for the V-belt.
●
Slacken the four motor fixing screws (A).
●
Shift the motor until the V-belt is tensioned to the
point where it can still be depressed by approx. 1-2
cm at the longest free position.
●
Retighten the motor fixing screws (A) and refit the
safety guard for the V-belt.
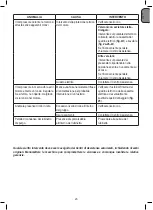
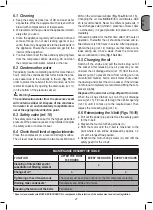
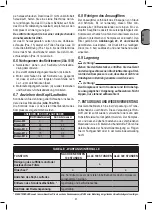
MAINTENANCE RESUMPTIVE TABLE
FUNCTION
AFTER THE FIRST
100 HOURS
EVERY 100 HOURS EVERY 300 HOURS
Cleaning of intake filter and/or
substitution of filtering element
●
Change of oil *
●
●
Tightening of head tension rods
The check must be carried out prior to the first compressor starting.
Draining tank condensate *
Periodically and at the end of work.
Checking the tension of the belts
Periodically.
*
Spent oil and condensate MUST BE DISPOSED OF in compliance with protection of the environment and current legislation
.
Summary of Contents for BA 1100/11/500 (M)
Page 10: ...10 2b 2c 2a ON OFF ON 3a 2d OFF ON 3b...
Page 11: ...11 7 2 8 6 5 17 19 4 4 19 18 18 13 13 2 2 2 3 18 17 4a 4b 3...
Page 12: ...12 10 9 11 9 2 12 9 21 13a 15 min max 16 13b 15 min max 16...
Page 13: ...13 14a 14b 17 A A 15 11 16 18 1 2 cm...
Page 14: ...14 19a 20 19b 21 22a 22b...
Page 15: ...15 23a 23b 25 24a 24b...
Page 16: ...16...
Page 84: ...84 G R 1 5 C 40 C 4 5 50 cm S3 50 5 5...
Page 89: ...89 G R 2d 2a 2b 2c 25...
Page 129: ...129 R U 1 5 C 40 C 4 5 50...
Page 132: ...132 R U 2 12 2a 2b 2c I ON Tandem 12 12 6 6 1 6 2 15 11...
Page 135: ...135 R U 2d 2a 2b 2c 25...
Page 154: ...154 B G 1 5 C 40 C 4 5 50...
Page 157: ...B G 157 100 100 300 2a 2b 2c 10 I ON 12 12 6 6 1 6 2 15 11...
Page 159: ...B G 159 8 23 24 C C 20 21 22a 22b 18...
Page 160: ...160 B G 2d 2a 2b 2c 25...
Page 185: ...185 memo...
Page 186: ...186 memo...
Page 187: ...187 memo...


