ENGLISH
(Original instructions)
6
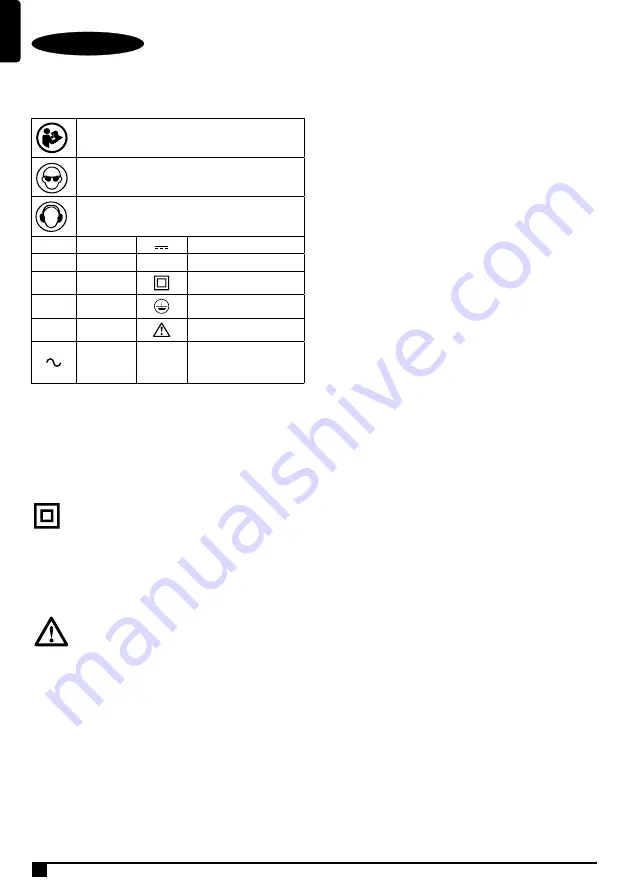
Labels on tool
The label on your tool may include the following symbols:
Electrical safety
This tool is double insulated; therefore no earth wire
is required. Always check that the power supply
corresponds to the voltage on the rating plate.
u If the supply cord is damaged, it must be replaced by the
manufacturer or an authorised Stanley Fat Max Service
Centre in order to avoid a hazard.
Additional safety information
Warning: We recommend the use of a residual
current device with a residual current rating of 30mA
or less.
The package contains
The package contains:
1 SDS-Plus rotary hammer
1 Side handle
1 Depth stop
1 Kitbox
1 Instruction manual
• Check for damage to the tool, parts or accessories which
may have occurred during transport.
• Take the time to thoroughly read and understand this
manual prior to operation.
Features
This tool includes some or all of the following features.
1. Main handle
2. Lock-on button
3. Variable speed switch
4. Forward/Reverse lever
5. Mode selector switch
6. Sleeve
7. Tool clamp
8. Depth Stop
9. Side handle
10. Date code
11. SDS-Plus bit
Assembly
Warning! Before assembly, make sure that the tool is
switched off and unplugged.
Attaching the side handle (Fig A)
Warning! When using the tool, please use the side handle (9)
for your safety.
The side handle can be fitted to suit both right-handed and
left-handled users.
• Turn the grip counter-clockwise until you can slide the side
handle onto the front of the tool.
• Rotate the side handle into the desired position.
• Tighten the side handle by turning the grip clockwise.
Warning! When using the tool, remember to install the side
handles properly.
Fitting an accessory (Fig A)
• Clean and grease the shank (11) of the SDS Plus bit.
• Insert the accessory bar into the tool clamp (7).
• Push the accessory down and turn it slightly until it fits into
the slots.
• Pull on the accessory to check if it is properly locked. The
hammering and drilling function requires the accessory to
be able to move axially several centimetres when locked in
the tool clamp.
• To remove the accessory, pull back the sleeve (6) and pull
out the accessory from the tool clamp.
Use
Warning! Always wear gloves when you change accessories.
The exposed metal parts on the tool and accessory may
become extremely hot during operation. Please operate tool
with normal load. Do not overload. Do not abuse the tool,
please refer instruction manual to use the tool correctly.
Warning! Before drilling into walls, floors or ceilings, check for
the location of wiring and pipes.
WARNING! To reduce the risk of injury, the user
must read the instruction manual before use.
Wear ear protection.
Wear safety glasses or goggles.
V
Volts
Direct Current
A
Amperes
n
0
No-Load Speed
Hz
Hertz
Class II Construction
W
Watts
Earthing Terminal
min
minutes
Safety Alert Symbol
Alternating
Current
/min.
Revolutions or
Reciprocation per
minute
Position of date code
The Date Code, which also includes the year of manufacture,
is printed into the housing.
Example:
2017 XX JN
Year of manufacturing
Summary of Contents for Fatmax FMER524
Page 1: ...FMER524 EN RU www stanleytools com...
Page 2: ...ENGLISH Original instructions 2 A...
Page 3: ...ENGLISH Original instructions 3 B C2 C1 D 5...
Page 10: ...10 SDS Plus Stanley Fat Max FMER524 1 a b c 2 a b c d e f 3 a...
Page 11: ...11 b c d e f g h 4 a b c d e f...
Page 12: ...12 g h 5 a...
Page 14: ...14 9 15 SDS Plus 7 6 9 8 3 2...
Page 15: ...15 1 5 2 E 9 1 D C1 C2 5 9 4 1 4 1 4 2 5...
Page 20: ...N588675 03 2018...


