GB
18
Detecting Reference Level
1.
While powered ON, position the detector where the laser
beam is projected.
2.
Use the detector’s bubble vials (Figure
Ⓒ②
) to maintain
a level plane.
3.
Point the laser reception window (Figure
Ⓒ③
) toward the
laser beam source. The reception window must face within
40° of the laser source.
4.
Use the "Laser Detected" icons on the LCD to align the
Reference Line (Figure
Ⓒ①
) with the laser beam.
NOTE:
If the speaker volume is ON (LOUD/SOFT),
a audible tone also assists with) aligning the detector. A fast
beeping tone signals the detector must be moved down.
A slow beeping tone signals the detector must be moved up.
A steady tone indicates the laser beam is aligned with the
Reference Line on the detector.
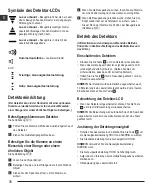
Steady Tone
Aligned with Reference Line
Fast Beeping Tone
Move Detector Down
Slow Beeping Tone
Move Detector Up
5.
When the laser is aligned with the Reference Line, mark
that position.
NOTE:
If the top of the detector is used as a marking
location, reference the back of the detector for the
measurement compensation value.
Maintenance and Care
•
When the laser is not in use, clean the exterior parts with
a damp cloth, wipe the laser with a soft dry cloth to make sure
it is dry, and then store the laser in the kit box provided.
•
NEVER use solvents to clean the laser.
•
Do not store the laser at temperatures below -10˚C or above
40˚C.
•
To maintain the accuracy of your work, check the laser often
to make sure it is properly calibrated.
•
Calibration checks and other maintenance repairs may be
performed by STANLEY service centers.
Summary of Contents for Fatmax FMHT77446
Page 2: ...2 RL700L RL750L G A B ...
Page 3: ...3 1 2 1 2 60 mm 2 36 in RL 600 RL 600L RL 700L RL 750L G E C D 1 2 ...
Page 4: ...4 1 2 AA AA OPEN 1 2 _ _ 1 2 F G ...
Page 5: ...5 5 8 11 5 8 11 H I ...
Page 6: ...6 J K L ...
Page 7: ...7 N M X Y ...
Page 8: ...8 X X Y 20 m 20 m 20 m 20 m D1 D2 D0 D2 D1 O ...
Page 317: ...317 ...


