ENGLISH
6
RESIDUAL RISKS
In spite of the application of the relevant safety
regulations and the implementation of safety devices,
certain residual risks cannot be avoided. These are:
– Impairment of hearing
– Risk of personal injury due flying particles.
– Risk of burns due to accessories becoming hot
during operation.
– Risk of personal injury due to prolonged use.
– Risk of dust from hazardous substances.
ELECTRICAL SAFETY
Only one voltage is applicable to this tool. Be sure to
check that the power supply corresponds to the voltage
on the rating plate.
Your Stanley tool is equipped with double
insulation, hence, it does not require to be
earthed
When the power cord is damaged, have it sent to a
STANLEY service center for replacement to specially
prepared cables.
USING AN EXTENSION CABLE
If an extension cable is required, use an approved 3–core
extension cable suitable for the power input of this tool
(see
Technical Data
).The minimum conductor size is 1.5
mm
2
; the maximum length is 30 m.
When using a cable reel, always unwind the cable
completely.
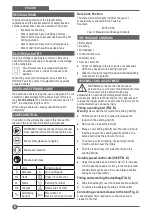
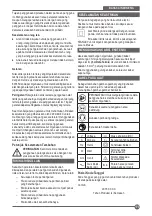
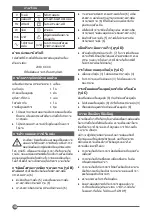
LABELS ON TOOL
In addition to the pictographs used in this manual, the
labels on the tool show the following pictographs:
WARNING! To reduce the risk of injury, the user
must read the instruction manual before use.
Wear safety glasses or goggles.
Wear ear protection.
Wear a dust mask.
V
Volts
Direct Current
A
Amperes
n
0
No-Load Speed
Hz Hertz
Class II Construction
W
Watts
Earthing Terminal
min minutes
Safety Alert Symbol
Alternating
Current
/min. Revolutions or
Reciprocation per minute
Date Code Position
The Date Code, which also includes the year of
manufacture, is printed into the housing.
Example:
2018 XX XX
Year of Manufacture Package Contents
THE PACKAGE CONTAINS
1 Belt sander
1 Dust bag
1 Dust adaptor
1 Instruction manual
1 Warranty card
1 Service center list
♦
Check for damage to the tool, parts or accessories
which may have occurred during transport.
♦
Take the time to thoroughly read and understand this
manual prior to operation.
ASSEMBLY AND ADJUSTMENT
WARNING: To reduce the risk of serious
personal injury, turn tool off and disconnect tool
from power source before making any
adjustments or removing/installing attachments or
accessories. Before reconnecting the tool, depress and
release the trigger switch to ensure that the tool is off. An
accidental start-up can cause injury.
Fitting a sanding belt (FIG. B)
Warning!
Never use the tool without a sanding belt (6).
♦
Pull the tension lever (5) outward to release the
tension on the sanding belt (6).
♦
Remove the old sanding belt (6).
♦
Place a new sanding belt (6) over the rollers. Ensure
that the arrow on the sanding belt (6) points in the
same direction as the arrow on the tool.
♦
To ensure a correct tracking, the sanding belt (6)
must be centred over the rollers.
♦
Push the tension lever (5) inward to tension the
sanding belt (6).
Variable speed control dial (SEE FIG. D)
♦
Adjust the variable speed control dial (7) to increase
or decrease the speed according to the material and
sanding belt specification to be used (also possible
during no load operation).
Fitting and removing the dustbag (FIG. C)
♦
Slide the dustbag (3) over the dust extraction outlet (4).
♦
To remove the dustbag (3), slide it off the outlet.
Connecting a vacuum cleaner to the tool (Fig. C)
A dust adaptor (8) is required to connect a vacuum
cleaner to the tool.
Summary of Contents for SB90
Page 1: ...ENGLISH SB90 English Page 4 BAHASA INDONESIA Halaman 9 15 TI NG VI T Trang 21...
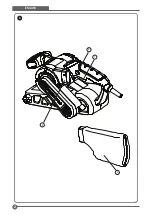
Page 2: ...ENGLISH 2 A 1 2 3 4...
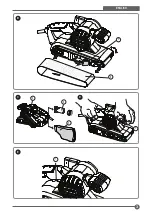
Page 3: ...3 ENGLISH B C D E 5 6 4 3 7 1 8...
Page 15: ...15 SB90 Stanley 1 2 RCD RCD 3...
Page 16: ...16 4 5...
Page 17: ...17 EN 60745 2002 44 EC 30 Stanley STANLEY 3 1 5 2 30...
Page 18: ...18 V A n0 Hz II W min 2018 XX XX 1 1 1 1 1 1 B 6 5 6 6 6 6 6 5 6 D 7 C 3 4 3 C 8 8 4 8 MDF...
Page 19: ...19 A E 1 2 3 4 5 6 7 8 16 6 6 6 6 6 5 A E 1 2 1 1 1 3 10 3 6 STANLEY...
Page 27: ......
Page 28: ...N618118 201809...


