Waterford Stanley (Marketing) Ltd.,
Bilberry, Waterford, Ireland.
Telephone: (051) 302300
Facsimile: (051) 302375
15
DP 030826 Rev:009
ASSEMBLY INSTRUCTIONS - WARMING OVEN
1.
Your warming oven is supplied in a part
assembled condition.
2.
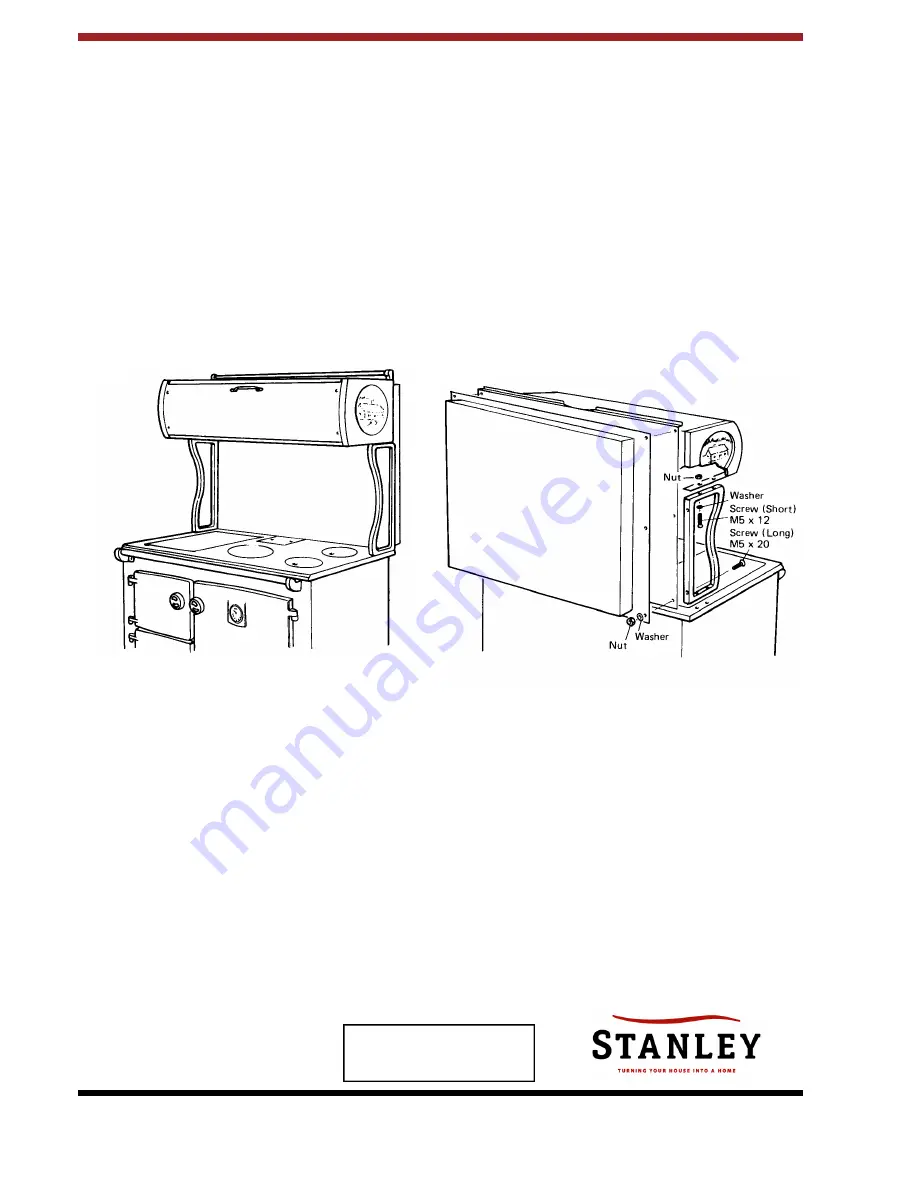
The oven is complete and the splashback,
top rail, top rail brackets and side brackets
are separate components complete with 4
No. short (M5 x 12) set screws and 4 No.
long (M5 x 20) set screws all with washers.
3.
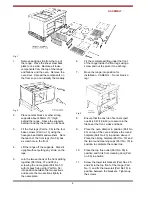
To assemble on a WOODSTANLEY already
installed with a top flue outlet proceed as
follows:
(a)
Remove the inside top bolts of the warming
oven and fit the top rail between the
brackets. Place the brackets on top of the
warming oven and replace the bolts.
(b)
Dismantle, clean and remove flue pipe.
(c)
Remove the four screws from the hob and
place the side brackets, with the flat sur
faces outwards, on the hob. Replace the
screws but do not tighten them.
(d)
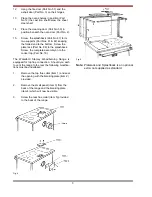
Slide flue through warming oven and
loosely fit warming oven to brackets using
long set screws (M5 x 20). Reassemble
flue.
(e)
Remove the two small set screws (M5 x 12)
from both sides of back of warming oven
and fit splash back using the extra set
screws (M5 x 12) to bolt splash back to side
brackets.
(f)
TIGHTEN ALL BOLTS. Your warming oven
is now ready for use.
Fig. 19
Fig. 20
Summary of Contents for Woodburning Range and
Page 2: ......


