6
7
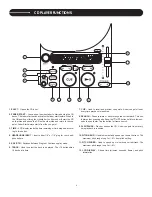
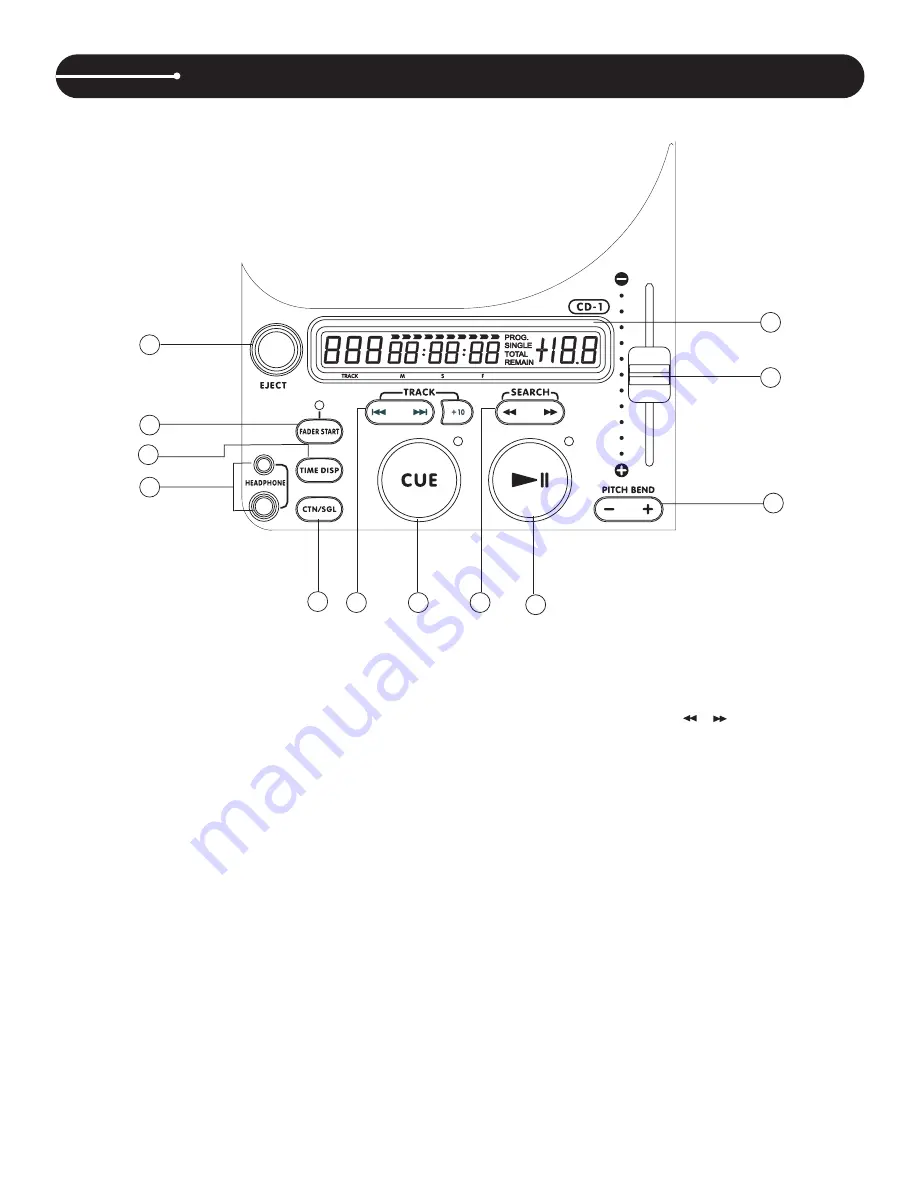
CD PLAYER FUNCTIONS
1. EJECT
– Opens the CD door.
2. FADER START
– You can use the crossfader to start and stop the CD
decks. The fader start switch activates the fader start feature. When in
the ON position, sliding the crossfader to either end will start the CD
on that side and pause the CD on the other side and return to the cue
point. Fader Start always starts from the cue point.
3. TIME
– LCD display reads the time remaining or time elapsed, accord-
ing to this button.
4. HEADPHONE INPUT
– Insert either 1/8” or 1/4” plug for your head-
phones here.
5. SGL/CTN
– Switches between Single or Continuous play mode.
6. TRACK
– Used to select the track to be played. The +10 button skips
10 tracks at a time.
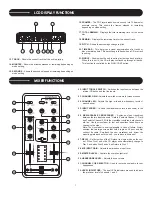
LCD DISPLAY FUNCTIONS
13. TRACK
– Shows the current track that the unit is playing.
14. MINUTES
– Shows the minutes elapsed or remaining depending on
mode setting.
15. SECONDS
– Shows the seconds elapsed or remaining depending on
mode setting.
16. FRAMES
– The CD Player breaks down a second into 75 frames for
accurate cueing. This shows the frames elapsed or remaining
depending on mode setting.
17. TOTAL REMAIN
– Displays the total remaining time for the entire
disc.
18. REMAIN
– Displays the remaining time for the current track.
19. PITCH
– Shows the percentage change in pitch.
20. TIME BAR
– This bar gives a visual approximation of a track’s or
disc’s remaining time. This bar will begin to flash when a CD or a track
is ending.
21. SINGLE
– Shows when the unit is set to play just one track at a time.
When this is not lit, the CD will play continuously through all tracks.
This function is controlled by the SING/CONT button.
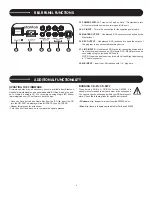
MIXER FUNCTIONS
22. INPUT TOGGLE SWITCH
– Switches the input source between the
internal CD decks and the line inputs.
23. CHANNEL GAIN
–Adjusts the pre-fader volume for cleaner sound.
24. CHANNEL EQ
– Adjusts the high, mid and low frequency levels of
each channel.
25. INPUT FADER
– Controls individual source levels (channels) in the
mix.
26. REPLACEABLE CROSSFADER
– Achieves clean transitions
between the two input channels. "Hard left" selects Channel 1. "Hard
right" selects Channel 2. With the crossfader centered, both channels
are live. Use the crossfader for fast and seamless fades from one
channel to the other.
Note: The crossfader is user replaceable in case of failure. Simply
unscrew the two large screws that hold it in place, lift it out and dis-
connect its cable. Re-attach the new crossfader and screw the
mounting plate back onto the unit - you’re back in business!
27. RELAY
–Set both sides of the CD player to single mode on the con-
trol. When Disc 1 ends the CD player will automatically change to
Disc 2 and when Disc 2 ends it will return to Disc 1.
28. MIC INPUT GAIN
– Adjusts the microphone input level.
29. MASTER LEVEL
– Controls the overall output level.
30. HEADPHONE LEVEL
– Adjusts the cue volume.
31. CHANNEL CUE SELECTOR
– Used to route channel audio to your
headphones.
32. LEVEL INDICATORS
– The dual LEDs indicators are used to indicate
the pre-fader level of channels 1 and 2.
cm205_face.qxd 6/9/06 5:38 PM Page 6
7. CUE
– Used to recall and preview cue points. A new cue point is set
every time playback is resumed.
8. SEARCH
– Scans forward or back through the current track. This unit
features four scan speeds. Keep the
or
button held for a few sec-
onds to scan faster. Tap the button for frame search.
9. PLAY/PAUSE
– Plays or pauses the CD. A new cue point is set every
time playback is resumed.
10. PITCH BEND
– Used to momentarily speed up or down the track. The
maximum pitch range is up to +/- 8% from pitch setting.
11. PITCH FADER
– Used to speed up or slow down current track. The
maximum pitch range is up to +/-8%.
12. LCD DISPLAY
– Shows time (minutes, seconds, frame), and pitch
information.
22
23
24
25
26
27
28
29
30
32
31
5
6
7
8
9
10
11
12
1
2
3
4
13
14
15
16 17 18
19
20
21


