11
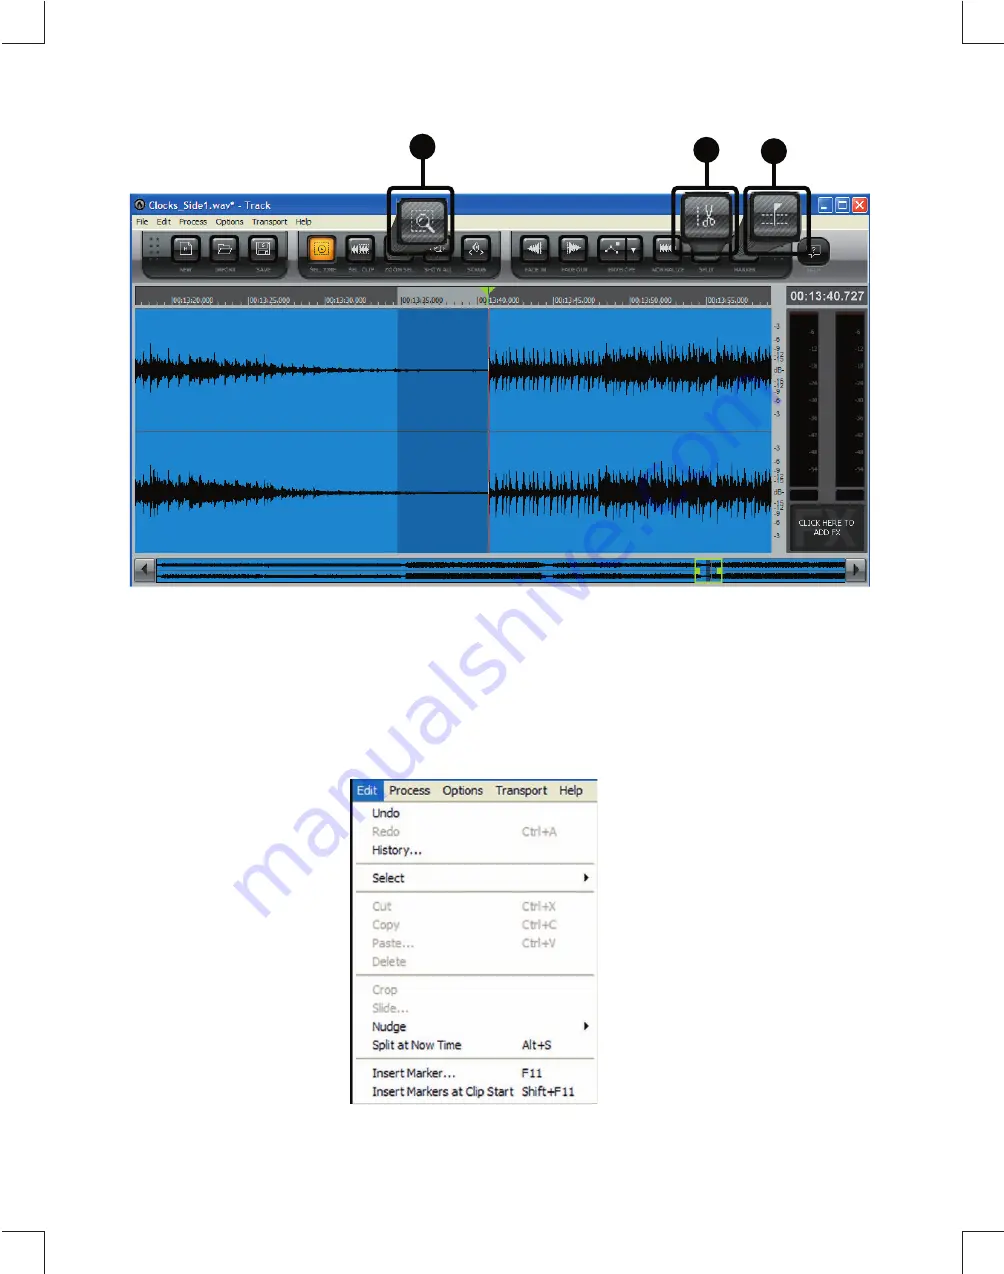
6. To make it easier to split up tracks or delete unwanted silence between songs, left-click the mouse and drag it over the areas between the songs. Press the
(6
) Zoom Selection button and the screen now zooms into the area between the songs.
7. You can place the playback cursor at the start of each song and then press the (7) Split button to create a new Clip, or you can use the mouse highlight a
Larger area to delete unwanted silence, and then press Delete on your keyboard. This will delete the unwanted audio and create a new Clip. Continue doing
This or each song to create new Clips. You can also delete the audio at the start of the record and at the end. Now you’re ready to create
Markers
that will
be
Used to define Clips as CD or MP3 tracks.
8. There are two ways to create Markers. The first is to place the Playback cursor at the start of each Clip and press the (8) Insert
Marker button. You can also
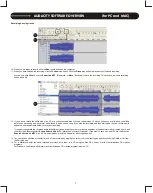
automatically create Markers at the start of each Clip. Under the Edit Menu, select the “Insert Markers at Clip Start.” This will create markers for every Clip.
6
7
8
7. You can place the playback cursor at the start of each song and then press the (7) Split button to create a new Clip,. or you can use the mouse
highlight a larger area to delete unwanted silence, and then press Delete on your keyboard. This will delete the unwanted audio and create a new Clip.
Continue doing this for each song to create new Clips. You can also delete the audio at the start of the record and at the end. Now you’re ready to create
Markers that will be used to defi ne Clips as CD or MP3 tracks.
8. There are two ways to create Markers. The fi rst is to place the Playback cursor at the start of each Clip and press the (8) Insert Marker button. You
can also automatically create Markers at the start of each Clip. Under the Edit Menu, select the “Insert Markers at Clip Start”. This will create markers for
every Clip.
Summary of Contents for T.55 USB
Page 1: ...5 0 3 0 5...


