8839615
V 1.4
Visit
for more information
9
UNPACKING AND ASSEMBLY
Step Description
10.
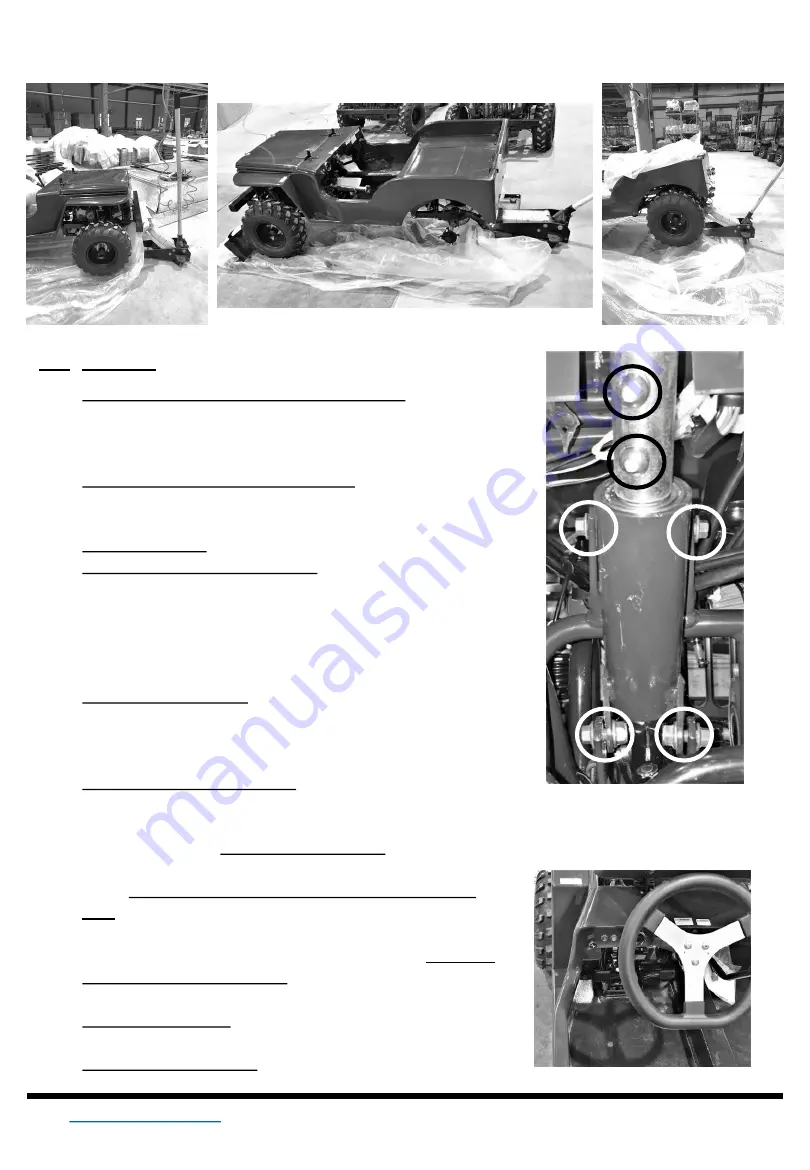
Lower the front end and chock the front wheels in the front to
prevent the vehicle from rolling forward. Use a jack and jack
stands to raise the rear of the vehicle to a height which will allow
the tires to be mounted to the hub (Fig. 9).
11.
Mount the rear tires onto the wheel hubs, and using four of the
supplied M10 self-locking nuts for each wheel, tighten the nuts
(Fig. 10) with a 14mm deep well socket wrench.
11.
Lower the rear end and remove the chocks.
12.
Secure the steering column in place If the four nuts and bolts
have not been assembled (Fig. 11, white circles) , use a 12mm
socket wrench and a box end wrench and the supplied four M8
x 20mm bolts and nuts to secure it in place. Otherwise, mount
the adjustable height steering tube using a 5mm hex key using
the screws (Fig. 11, black circles) on the steering column.
13.
Mount the steering wheel using a Philips head screwdriver and
the supplied three M6 x 16mm button head screws (Fig. 12). Be
sure that the flat on steering wheel is on the bottom and the
wheels are pointing straight. (Fig. 12)
14.
Adjust the steering wheel height using a 5mm hex key to
remove the screws (Fig. 11, black circles) and reinstall at a
comfortable height, be sure both screws are engaged.
15.
Put the transmission shift lever into the neutral position (see the
OPERATING - SHIFTER section in this manual).
16.
Gently roll the vehicle until it is completely off of the shipping
crate (either forward or reverse) , and remove the shipping crate
for disposal.
17.
Using a 14mm deep well socket and torque wrench, tighten the
nuts on each of the wheel hubs to a minimum of 29 N-m (21 ft-
lb). Be sure to cross-tighten the nuts.
18.
Unpack the windshield and remove the two M6 x 25mm button
head screws and M6 wing nuts (Fig. 13, Circled).
19.
Remove the protective film from both sides of the windshield.
Fig. 11
Fig. 12
Fig. 8
Fig. 9
Fig. 10


