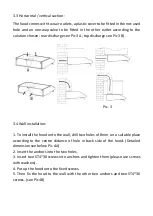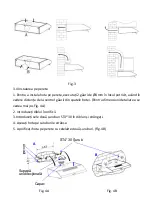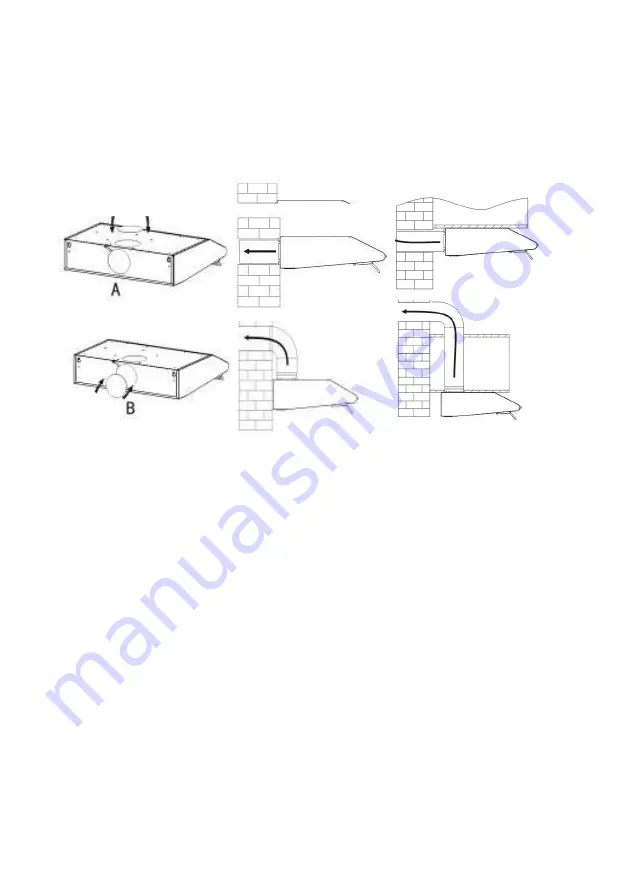
3.3 Horizontal / vertical suction:
The hood comes with two air outlets, a plastic cover to be fitted in the not-used
hole and an one-way-valve to be fitted in the other outlet according to the
solution chosen: rear discharge see Pic 3 A; top discharge see Pic 3 B).
Pic. 3
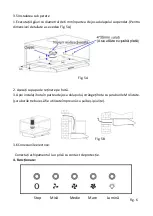
3.4 Wall installation:
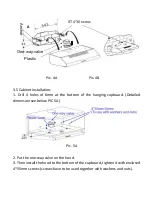
1. To install the hood onto the wall, drill two holes of 8mm on a suitable place
according to the centre distance of hole in back side of the hood. (Detailed
dimension see below Pic 4A)
2. Insert the anchors into the two holes.
3. Insert two ST4*30 screws into anchors and tighten them (please use screws
with washers).
4. Put up the hood onto the fixed screws.
5. Then fix the hood to the wall with the other two anchors and two ST4*30
screws. (see Pic 4B)
Summary of Contents for HA-260SS
Page 1: ......
Page 20: ...1 2 2 1 2 2 230V 2 3 2 4 2 5 2 6 2 7 2 8 2 9 2 10 2 11 2 12...
Page 21: ...2 13 8 2 14 2 15 8 2 16 2 17...
Page 22: ...65 cm 2 18 II 2 19 II 2 20 3 3 1 65 75 1 1...
Page 23: ...3 2 2A 2 2 3 3 3 3B...
Page 24: ...3 3 4 1 2 8 4A 2 3 ST4 30 4 5 4B 4A 4B B A ST4 30...
Page 25: ...3 5 1 4 6 5A 5A 2 3 4 5B 3 6...
Page 26: ...4 6 6 0 5 4 40 50 2 3...
Page 27: ...5 60 C 3 1 2 3 3 4 1 2 3...
Page 29: ...66 2014 65 2014 1 2 3 4...
Page 48: ......


