2.
Clean all the parts according to the section “
Cleaning and Maintenance
”.
3.
Please set the BAKE mode for the first time, run for 10 minutes to drain
smoke. Then let it cool down and clean all the detached parts again and
then restart to continue normal use.
4.
Dry all parts thoroughly and assemble them, the appliance is ready for
using.
USING YOUR BREAD MAKER
1.
Lay the appliance on the firm and even surface.
2.
Place the bread pan in position, open the lid by lifting any lid lug and fix the
kneading blades onto the drive shaft. It is recommended to fill hole with
heat-resisting margarine prior to place the kneading blade to avoid the
dough sticking the kneading blade, also this would make the kneading
blade be removed from bread easily.
3.
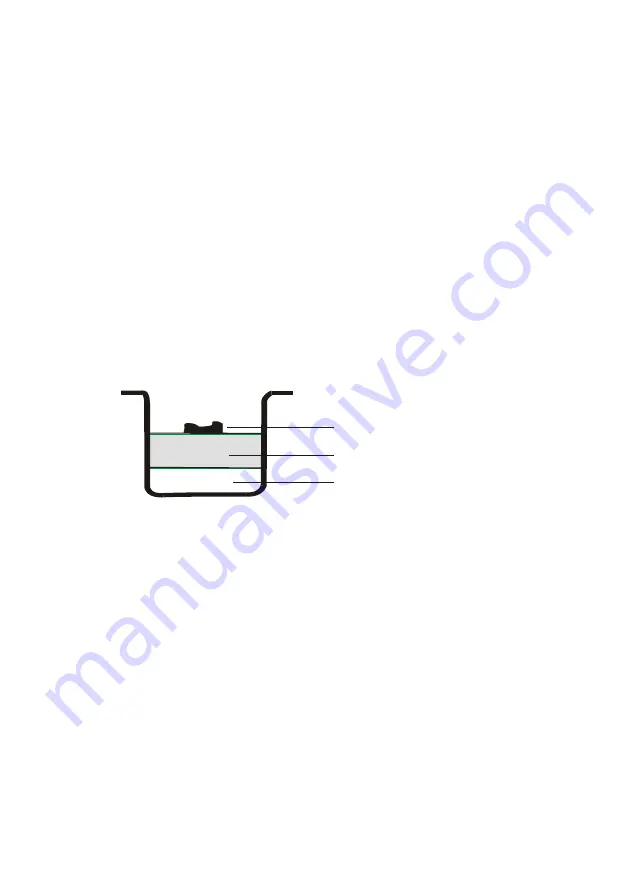
Place ingredients into the bread pan. Usually the water or liquid substance
should be put firstly, then add sugar, salt and flour, always add yeast or
baking powder as the last ingredient.
4.
Make a small indentation on the top of flour with finger, add yeast into the
indentation, make sure it does not come into contact with the liquid or salt.
NOTE
:
The maximum
quantity of flour and yeast is 700g and 6g.
5.
Close the lid gently and plug the power cord into a wall outlet.
6.
Press the
MENU
button until your desired program is selected.
7.
Press the
COLOR
button to select the desired crust color (if applicable).
8.
Press the
GRAM
button to select the desired size (if applicable).
9.
Set the delay time by pressing “
+
” or “
-
” button. This step may be
skipped if you want the bread maker to start working immediately.
10. Press the
START/STOP
button to start working.
11. Once the process has been completed, 10 beeps will be heard. Press
START/STOP button for approx. 2 seconds to stop the process and take
out the bread. With the oven mitts, Open the Lid, hold and lift the bread
pan, then take it out from the bread maker.
CAUTION
:
The Bread pan and bread may be very hot! Always handle with
care
.
12. Let the bread pan cool down before removing the bread. Then use
non-stick spatula to gently loosen the sides of the bread from the pan.
13. Turn bread pan upside down onto a wire cooling rack or clean cooking
surface and gently shake until bread falls out.
14. Let the bread cool for about 20 minutes before slicing. It is recommended
水 或 液 体
干 的 配 料
酵 母 或 苏 打
Ye a st o r so d a
Dry ing re d ie nts
Wa te r o r liq uid
11
Summary of Contents for MPD-800BL
Page 1: ......
Page 2: ......
Page 41: ...900 1200G MPD 800WH MPD 800BL 1...
Page 42: ...2...
Page 43: ...1 2 3 4 5 6 7 8 3...
Page 44: ...9 10 11 12 13 14 15 16 17 4...
Page 45: ...18 off 19 20 21 22 23 24 8 5...
Page 46: ...25 8 26 27 28 1 7 12 4 2 3 4 6...
Page 47: ...5 6 7...
Page 48: ...8...
Page 50: ...4 QUICK 5 SWEET 6 ULTRA FAST Quick 7 GLUTEN FREE 8 DOUGH 9 JAM START STOP 10...
Page 51: ...10 CAKE 11 SANDWICH 12 BAKE 1 10 60 COLOR 900 1200 LCD DELAY 10 13 11...
Page 53: ...2 LLL START STOP Bake 5 BAKE 3 0 START STOP START STOP EE0 LCD 1 1 2 3 10 4 1 2 3 4 5 13...
Page 55: ...1 17 1 2 3 4 15...
Page 56: ...1 2 3 4 5 6 7 16...
Page 57: ...8 1 3 4 1 5 1 2 1 5 1 45 50 C 2 1 2 3 10 4 9 10 11 12 Ultra fast Cake 17...
Page 58: ...13 14 20 C 25 C 2 1 2 3 18...
Page 59: ...1 2 3 10 4 5 H HH START STOP 19...
Page 60: ...START STOP 6 7 8 9 10 20...
Page 61: ...11 12 13 14 START STOP 5 10 20 21...
Page 62: ...MPD 800WH MPD 800BL 220 240 V 50 60 Hz 800 Watts 900g 1200G 22...
Page 82: ......
Page 83: ......

