


– 18 –
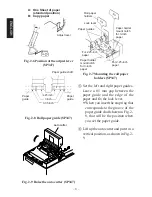
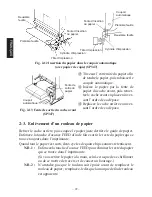
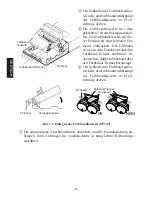
5
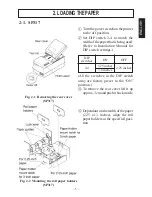
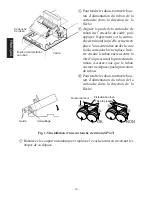
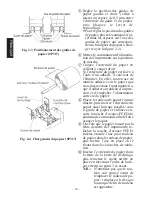
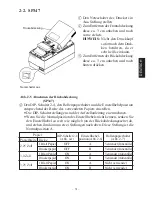
Réglez la position des guides de
papier gauche et droit. Veillez à
laisser un espace de 0,5 mm entre
l’extrémité du guide et du papier,
puis bloquez le levier de
verrouillage.
•
Pour régler la position des guides
de papier, placez les anneaux d’ar-
rêt dans les espaces sur l’axe des
guides de papier qui correspon-
dent à la largeur du papier à char-
ger (voyez la figure 2-3).
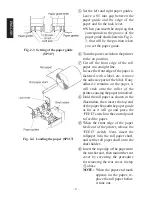
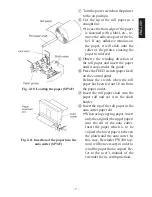
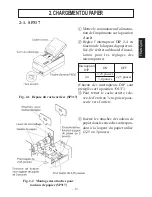
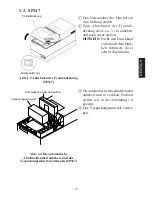
6
Mettez le commutateur d’alimenta-
tion de l’imprimante sur la position
de marche.
7
Coupez l’extrémité du papier en
veillant à couper droit.
Si l’extrémité du papier est fixée à
l’aide d’un adhésif, il convient de
l’éliminer. En effet, toute trace de
matière adhésive sur le papier que
vous insérez dans l’imprimante ris-
que d’adhérer au rouleau d’impres-
sion et d’empêcher l’alimentation
correcte du papier.
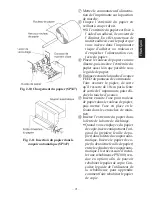
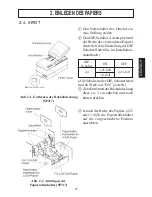
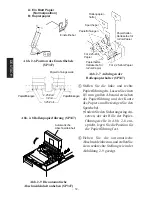
8
Placez le rouleau de papier comme
illustré, puis insérez l’extrémité du
papier aussi loin que possible sous
le guide de papier et enfoncez en-
suite la touche d’avance FEED du
panneau de commande afin de faire
avancer le papier.
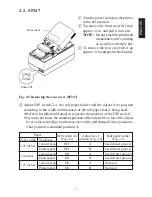
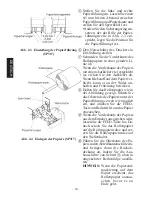
9
Une fois que le papier ressort par la
fente de sortie de l’imprimante, re-
lâchez la touche d’avance FEED.
Insérez ensuite l’axe pour rouleau
de papier dans le rouleau de papier,
puis mettez l’axe en place en le
fixant dans les encoches de main-
tien.
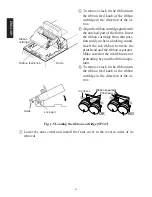
0
Insérez l’extrémité du papier dans
la fente de la barre de déchirage,
puis remettez le cache arrière en
place en inversant l’ordre de la dé-
pose décrit au point 3 ci-avant.
N.B. : N’attendez pas que le rou-
leau soit épuisé avant de
remplacer le rouleau de pa-
pier ; remplacez-le dès que
la marque de fin de rouleau
est apparente.
Fig. 2-3 Positionnement des guides de
papier (SP317)
Fig. 2-4 Chargement du papier (SP317)
FRANÇAIS
Summary of Contents for 347F
Page 14: ......
Page 26: ......
Page 38: ......
Page 50: ......
Page 55: ... 53 APPENDIX Peripheral Unit Drive Circuit Drive output 24V max 1 0 A Drive circuit ...
Page 61: ... 59 APPENDIX Overall dimensions mm SP347 169 W 330 D 176 H mm Approx 4 6 kg ...
Page 62: ...MEMO P 1996 01 P 1996 03 ...


