10
Installing the ribbon cartridge
Now install the ribbon by the following procedure.
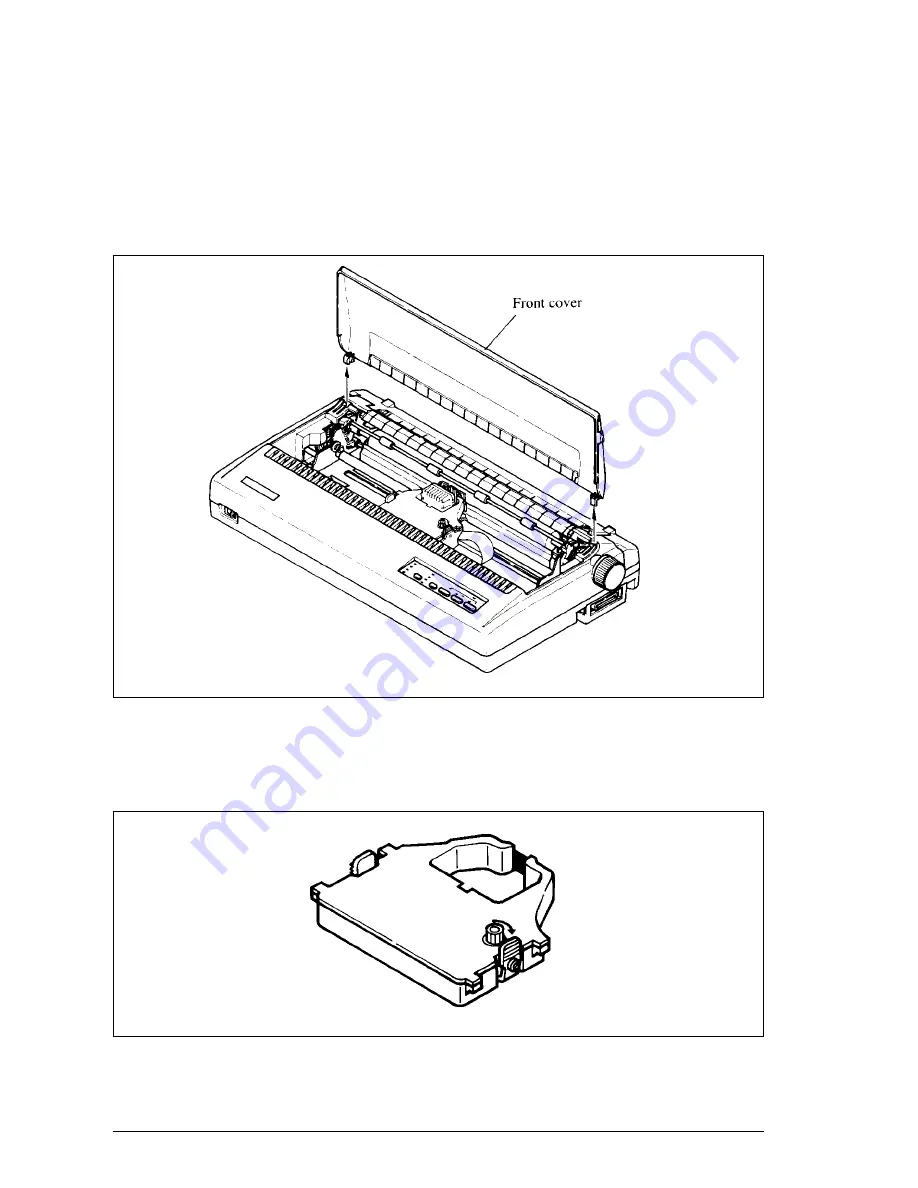
1. Remove the front cover by lifting the front (using the two grips at the
sides), and pulling towards you.
Figure 2-3.
Remove the front cover to install the ribbon cartridge.
2. Take up the slack in the ribbon by turning the tension knob on the ribbon
cartridge clockwise as shown by the arrow.
Figure 2-4.
Take up the slack in the ribbon by turning the tension knob on the ribbon cartridge.
Summary of Contents for LC24-15II
Page 1: ...LC24 15II MULTI FONT USERS MANUAL NOT INTENDED FOR SALE XBL 80825605 ...
Page 9: ...2 PRINTER COMPONENTS ...
Page 13: ...6 FONT STYLE EXAMPLE The following example shows the many font styles your printer can print ...
Page 23: ...16 MEMO ...
Page 112: ...105 ...
Page 118: ...111 ...
Page 119: ...112 MEMO ...
Page 124: ...117 ...
Page 125: ...118 ...
Page 126: ...119 ...
Page 127: ...120 ...
Page 128: ...121 ...
Page 136: ...129 Standard character set 2 ...
Page 137: ...130 ...
Page 139: ...132 IBM character set 2 Code Page 437 U S A ...
Page 140: ...133 ...
Page 141: ...134 Code Page 850 Mulch lingual Other characters are identical to Code Page 437 ...
Page 142: ...135 Code Page 860 Portuguese Other characters are identical to Code Page 437 ...
Page 143: ...136 Code Page 861 Icelandic Other characters are identical to Code Page 437 ...
Page 144: ...137 Code Page 863 Canadian French Other characters are identical to Code Page 437 ...
Page 145: ...138 Code Page 865 Nordic Other characters are identical to Code Page 437 ...
Page 147: ...140 IBM special character set Additional characters can be printed by special commands ...
Page 148: ...141 INDEX ...
Page 149: ...142 ...
Page 150: ...143 ...
Page 151: ...144 ...
Page 152: ...145 COMMAND SUMMARY Standard Mode The following commands take effect with the Standard mode ...
Page 153: ...146 ...
Page 154: ...147 IBM Mode The following commands take effect with the IBM mode ...
Page 155: ...148 ...


