background image

Summary of Contents for LC24-30 Colour

Page 1: ...LC24 30 COLOUR USERS MANUAL NOT INTENDED FOR SALE ...

Page 2: ...UTER DRUCKER 924 190s in ijbereinstimmung mit den Bestimmungen der VDE 0878 3 22 89 EN 55022 1987 BMPT Vf 243 1991 und 46 1992 funk entstijrt ist Dem Zentralamt fiir Zulassungen im Femmeldewesen wurde das Inverkehrbringen dieses Gerates angezeigt und die Berechtigung zur uberptifung der Serie auf die Einhal tung der Bestimmungen eingrr8umt Star Micronirs Deutschland GmbH WrsterbachstraCe 59 D 6048...

Page 3: ...e For normal everyday use you may never need to refer to Section II at all We strongly recommend however that you read all of Section I before connecting and using the printer for the first time Section I Chapter 1 Features and parts Chapter 2 Unpacking and setting up the printer including setting up your computer system software Chapter 3 Using the printer Including loading paper using the contro...

Page 4: ...ge 10 Fitting the paper support I2 Connecting the printer to your computer 13 Setting up the printer in Windows 15 Setting up the printer in MS DOS 17 Chapter 3 Using the printer Loading paper 19 Ready mode and Not Ready mode 24 Using the control panel 25 Printing out your documents 27 In Windows 27 In MS DOS 27 Using different fonts 29 In Windows 29 In MS DOS 30 Using other printer features 32 De...

Page 5: ...tmap fonts 51 Scalable fonts 52 In Windows 52 installing TrueType fonts 52 Selecting different fonts 53 In MS DOS 53 Selecting different fonts 53 Changing the character pitch 53 Preventing software font selection 54 Using different types of paper 55 Useful printing features 57 Portrait and landscape printing 57 Face up and face down printing 57 Manual by pass 57 Pausing printing 58 Parking fanfold...

Page 6: ...ter 83 Connecting the serial to parallel converter 83 Setting the converter s DIP switches 85 Setting up a serial connection 87 On a Windows computer 87 On an MS DOS computer 88 Chapter 6 Troubleshooting Common problems and solutions 90 Checking system software settings 102 In Windows I02 In MS DOS I03 Warning beeps 104 Chapter 7 Software commands Introduction 105 Font control commands I07 Charact...

Page 7: ...ts 153 Standard character set 2 I54 International character sets I56 IBM character set 2 I57 Code page 437 U S A 157 Code page 850 Multi lingual 159 Code page 860 Portuguese 160 Code page 861 Icelandic 161 Code page 863 Canadian French 162 Code page 865 Nordic 163 Character set I I64 IBM special character set 165 Glossary 167 Index 179 Customer service information Page iv ...

Page 8: ...an Sanserif Courier Pres tige Script and Draft Scalable fonts for users of Windows version 3 1 or later 15 TrueType fonts are supplied on a floppy disk High resolution the printer can print at resolu tions of up to 360 dots per inch Vibrant color the printer can print both text and graphics in a range of colors including magenta cyan violet yellow orange and green Each printer comes with a color r...

Page 9: ...on a single sheet of paper Landscape or portrait paper loading paper can be loaded into the printer in either landscape widthwise or portrait upright orientation band scape printing also facilitates the printing of wide documents Note Letter size paper can be loaded into the printer in either land scape or portrait orientation However the length of a printed line is limited to a maximum of 8 20 3c...

Page 10: ...nce Sin gle sheets can be up to 11 wide and fanfold paper can be up to 10 wide however the maximum length of a printed line is limited to 8 To use fanfold paper you need to install the push tractor unit which is available as an option A simple control panel operation lets you park fanfold paper so that you do not have to remove it from the printer when switching to single sheets When you want to r...

Page 11: ...Paper guides Paper delivery selector Release lever Extension cover Interlace connector The printer I The printer with the front cover removed Page 4 level ...

Page 12: ...printed output as it rests on the extension cover The paper tray holds up to 55 single sheets for feeding into the printer The paper delivery selector allows you to choose whether print outs are delivered face up in reverse for fanfold paper or face down in sequence for single sheets The control panel displays information about the print er s current working and allows you to control the print er ...

Page 13: ...he printer and provides a solid surface against which the print head can make an impression on the paper The adjustment lever lets you adjust the position of the print head for differing thicknesses of paper and for multi part forms Page 6 ...

Page 14: ...inter If you are going to use fanfold paper make sure that there is adequate space for paper behind the printer Make sure that the printer is not in direct sunlight Make sure that the printer is well away from heaters Make sure that the surrounding area is clean dry and free of dust Make sure the printer is connected to a steady power supply It should not be on the same electric circuit as applian...

Page 15: ...ere you bought the printer and ask them to supply the missing part It is a good idea to keep the original box and all the packing materials in case you later need to pack the printer up again and send it somewhere at a later date A push tractor unit PT 1OQ and a serial to parallel converter SPC 8K are available as optional accessories Installation of these two options is described in Chapter 5 Pag...

Page 16: ...over firmly and pull upwards The front cover should open Now pull the cover up and forwards so that it swings open as shown Note If you wish you can remove the front cover completely How ever we strongly recommend that you put it back on the printer again as soon as you have installed the ribbon car tridge This cover prevents objects that may damage the printer from getting inside it and also redu...

Page 17: ...ion knob on the cartridge clockwise to take the slack out of the ribbon Tension knob Gently lower the cartridge into the cartridge holder Make sure that the spindle on the cartridge holder fits into the socket on the base of the cartridge Page 10 ...

Page 18: ...nt of play about 1 10 2 5mm in the cartridge as you press down on it Check that the ribbon is properly in place between the print head and print head shield Turn the car tridge s tension knob clockwise again to take up any remaining slack Note It is important to make sure that the ribbon is properly posi tioned between the print head and print head shield Other wise the quality of printed output w...

Page 19: ... cover by swinging it down and push ing down on the raised parts at the rear so that it fits firmly into place Fitting the paper support Fit the two tabs on the paper support into the rear cover slots as shown Page 12 ...

Page 20: ...lel cable to connect the printer to your computer The type of parallel cable you need is a standard 36 pin Centronics parallel cable The parallel cable should be no longer than 6 2m Other wise the transfer of information between your computer and the printer may not work properly The parallel cable has a 25 pin D type plug at one end and a 36 pin Centronics connector at the other Plug the 25 pin p...

Page 21: ...Secure the connector with the clips as shown Note Connection using the optional serial to parallel converter is described in Chapter 5 Page 14 ...

Page 22: ... mouse Click and double click refer to the action of using the mouse to point at an item with the on screen pointer and then clicking either once or twice in quick succession If you are not using a mouse you can still carry out the installation Refer to the Microsoft Windows User s Guide to find out how to use the keyboard instead of a mouse to operate Windows To install the printer driver under W...

Page 23: ...which now includes the LC24 30 Colour Click on Set As Default Printer Click on Close to return to the Control Panel win dow For instructions on how to configure the printer see Chapter 5 of the Microsoft Windows User s Guide enti tled Control Panel If you cannot print from your application programs suc cessfully after installing the driver refer to the section Setting up the printer with a Windows...

Page 24: ...the screen press Enter or Return again The printer should print out the named text file If you cannot print refer to the section Setting up the printer with an MS DOS computer on page 48 of Chapter 4 To print from specific MS DOS applications refer to the section Setting up the printer with an MS DOS computer on page 48 of Chapter 4 and if necessary to the appli cation s own manual Note Unlike Win...

Page 25: ......

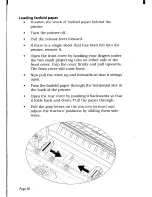
Page 26: ...ay can hold up to 55 sheets of paper To load the paper use the following steps for a description of how to load fanfold paper refer to page 76 of Chapter 5 Move the release lever towards the back of the printer and pull the paper tray cover forward Page 19 ...

Page 27: ... The paper guides move freely from side to side Adjust the left hand paper guide to the position you want Pick up your stack of paper Page20 ...

Page 28: ...this flick through the stack of paper with your thumb This helps ensure that each sheet of paper is loose within the stack and will be fed through the printer separately Now make sure that all the sheets are properly lined up by tapping the end of the stack gently but firmly on a flat surface such as a table top Page 21 ...

Page 29: ...guides Adjust the right hand paper guide so that the paper stack fits snugly between the guides The paper must be able to slide down freely into the printer but should not be able to move from side to side Push the paper tray cover closed Page 22 ...

Page 30: ...elivered in a stack face down When you turn the stack of printed pages right side up the sheets will be in the order in which they were printed Papa delivery Pull out the extension tray and pull out the stack wire to support the printed sheets Extensiontra Stack wire Page 23 ...

Page 31: ...ing When the printer is on the READY indicator light on the right hand side of the panel indicates whether the printer is in ready mode or not ready mode The light is on continuously if the printer is in ready mode It flashes when the printer is not ready Readylightis on Micro Feed ALT l Macro A Zoom FF Ready mode Readylightisflashing Roman m A EDS 1 m Zoom Sanserif B 2 j Courier m C 3 m Quiet Pre...

Page 32: ...h as font selection and zoom resolution determined by their computer rather than the printer s control panel If you try to make these settings using the control panel keys it will have no effect MS DOS users can use the control panel to change font and to take advantage of the printer s other features such as the zoom and quiet printing modes There are three keys on the panel FONT PAPER and READY ...

Page 33: ...ettings of these three lights on or off indicate the current font selection This is explained in the next section The three lights in the right hand column indicate whether the Zoom Quiet mode and Macro saved set tings features are currently in effect or not The Zoom and Macro settings do not apply if you are using Win dows The control panel can also be used to make Electronic DIP Switch EDS setti...

Page 34: ...ick the Printers icon Make sure LC24 30 Colour is selected in the Installed Printers list Click on Set As Default Printer Click on Close to return to the Control Panel win dow To print from your application select Print from the File menu Make the desired on screen selections such as the number of copies and click on OK In MS DOS To print from an MS DOS application you first need to select the pri...

Page 35: ...nters are not color printers You will not be able to print in color if you select one of them Note You cannot print in color unless you select the name of a printer which can print in color To print out your document follow the instructions for printing given in the manual Typically you will select the application s PRINT command Make any necessary selections such as the number of copies and press...

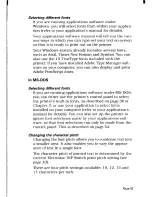
Page 36: ...re running Windows you will select fonts in your applications software Your Windows system version 3 1 or later already includes several fonts such as Arial Times New Roman and Symbol You can also take advantage of the fifteen TrueType fonts included on the floppy disk packaged with the printer For instructions on how to install these fonts see page 52 of Chapter 4 Jhndcani r3rcedwm lddl c P Damfh...

Page 37: ...DE abcde Prestige 1234567890 ABCDE abcde SC Lip t 1234567890 ABCDE aJxxk Draft 1234567890 ABCDE abcde The lights on the control panel s left hand column show the selected font The lights come on and off as you press the FONT key If a single light is on the font next to that light is the selected font For example if only the top light is on the Roman font is currently selected ALT 0 Macro FF A Zoom...

Page 38: ...hts is on the draft font is selected To select a font for printing use the following steps First put the printer in not ready mode by pressing the READY key Keep pressing the FONT key until the lights show the desired font is selected Press the READY key again to confirm your selection and put the printer back in ready mode To select fonts using your software application consult the application s ...

Page 39: ...are all described in Chapter 4 Printer reference Dealing with printing problems The LC24 30 Colour is designed to be easy to use and trouble free However from time to time you may come up against difficulties while printing If you have any problems it will be helpful to refer to Chapter 6 Troubleshooting Also you may need to refer to your MS DOS User s Guide or Microsoft Windows User s Guide and t...

Page 40: ...g Using the printer s control panel Making power on default settings Electronic DIP Switch settings Selecting which emulation to use Epson or IBM Setting up the printer to work with your computer Using different fonts Using different types of paper Useful printer features Feeding paper through the printer Selecting Zoom resolution Using Quiet mode Saving current settings for future use the Macro f...

Page 41: ...e keys are pressed to select and control printer functions Sometimes keys are pressed on their own and some times they are pressed in combination For example pressing the FONTJ key on its own selects a font Press ing the READY key while holding down the PAPER key feeds a sheet of paper through the printer The panel has seven green lights which give you infor mation on feature selections When the p...

Page 42: ...e font whose name is between the two lights is the selected font If the upper two lights are on Sanserif is the selected font If the lower two lights are on Prestige is selected If none of the three lights is on Draft font is selected Micro Feed ALT 0 Macro FF A Zoom Sanserif is the selected font To select a font from the control panel put the printer in not ready mode Press the FONT_ key until th...

Page 43: ...tings These feature settings come into effect each time the printer is switched on See the following section for an explanation of how to make Electronic DIP Switch settings Note If you are using Windows most printer settings such as Font and Zoom will be determined by the software you are using MS DOS users however will use the control panel to set these functions Page 36 ...

Page 44: ...e Windows ignores most of these settings Use the control panel to make the settings you want First switch the printer off Then switch it on again while holding down all three control panel keys The printer comes on in Electronic DIP Switch EDS mode and beeps once The FONTJ and PAPER keys can now be used to select a letter between A and E and a number between 1 and 5 respectively The three lights o...

Page 45: ...lumn are on and 1 press the PAPER key until the top light in the right hand column is on Press the READY key to turn the READY light off You can print out the current Electronic DIP Switch set tings by holding down the FONT key and pressing the READY key When you have made all the desired Electronic DIP Switch settings hold down the FONT key and press the PAPERJkey to save the new settings and exi...

Page 46: ...n A2 AEC Automatic Emulation Change Mode A3 A4 A5 Bl 82 83 B4 B5 Cl RAM usage Color and Zoom Auto LF with CR Graphics dIrectIon Paper out Ink Ribbon Type Reserved Time out pnntlng I I I I I I I I I Inabled lIsabled Disabled I Enabled I c2 c3 Page length See below c4 c5 Print pitch See below Dl D2 Print mode Character table Standard mode IBM mode LQ Graphics Set 2 Draft Italics Set I D3 D4 D5 IBM c...

Page 47: ... the Epson and IBM emulations are listed in the Appendix starting on page 153 If you want to use the printer in IBM emulation mode you will also need to select an IBM printer driver see page 27 of Chapter 3 A2 Automatic Emulation Change AEC mode If this function is ON the printer will automatically select the correct emulation mode Epson or IBM according to the printer driver selected in your appl...

Page 48: ...Most applications will do this automatically If A5 is set to OFF the printer will automatically perform a line feed each time it receives a carriage return As a result your software only needs to send a carriage return at the end of a line If your output is double spaced when it should not be you may need to set this setting to ON If a line of your output is printed on top of another line you shou...

Page 49: ...should only use a monochrome ribbon You can use a monochrome ribbon with B3 ON however its life will be shorter If you try to use a color ribbon with B3 OFF colors will be printed in unexpected ways B4 Reserved This switch should be left ON B5 Time out printing If B5 is ON the printer prints data as soon as it is received from the computer If B5 is OFF the printer accumulates data in its buffer an...

Page 50: ... Draft quality text is printed Letter Quality allows you a choice of different fonts Draft text is less attrac tive but can be printed faster than Letter Quality text D2 Character table The D2 setting selects which characters can be printed Selectable characters are grouped into sets known as character tables The character table selected depends on the current emulation switch Al Emulation Standar...

Page 51: ...he printer is in IBM emulation mode Al is OFF or if it is in Epson emulation mode Al is ON and the Epson graphic character set is selected D2 is ON settings D3 to D5 select a code page as shown in the following table If the printer is in Epson emulation mode Al is ON and the Italic character set is selected D2 is OFF settings D3 to D5 select a character set as shown in the following table These co...

Page 52: ...nter is powered on Settings El to E3 select a font as shown in the table Font El E2 E3 Roman ON ON ON Sanserlf OFF ON ON Courier Prestige ON OFF ON OFF OFF ON Script ON ON OFF If you change the font setting after saving settings using the macro function see page 62 the new font setting will replace the original font in the macro settings E4 and E5 Reserved These are both reserved Page 45 ...

Page 53: ...gly provided that Electronic DIP Switch setting A2 is ON However you may wish to set the emulation mode to IBM This could be done in case the Automatic Emula tion Change setting is ever turned off or if you know that the printer will always be used in IBM mode When you first take delivery of the printer it will be set to Epson emulation mode To change the emulation setting to IBM mode use the foll...

Page 54: ...hase as an option with the LC24 30 Colour Connecting the printer to a computer using a parallel cable is generally simpler However the length of the parallel cable should not be more than 6 2m Other wise the transfer of information between your computer and the printer may not work properly A serial connec tion can be as long as you like but it is a little more complicated to set up To summarize i...

Page 55: ...er IBM PC s and compatibles running MS DOS should print automatically to a printer connected to the parallel port However you must first select a printer from your application program If you are using the serial to parallel converter you will need to enter some set up statements into a file on your computer named AUTOEXEC BAT See page 88 of Chapter 5 for details If you are using a parallel cable y...

Page 56: ...ograms select printers individually You will have to select the printer in each application before you can print a file from it Setting up the printer with a Macintosh You can connect the printer to a Macintosh using spe cial commercially available kits such as Orange Micro Inc s Grappler which include all necessary equipment and software Buy the Serial RS 422 to Centronics Parallel converter vers...

Page 57: ...the characters These hooks are known as seriLfsand make body text more readable by leading the eye on from one letter to the next Other typefaces for example Univers and Helvetica do not have these hooks and are referred to as sans sery without serr typefaces Characters in these typefaces stand out on their own Generally fonts with seriftypefaces are used for body text and sans serif typefaces are...

Page 58: ...nt characters have different widths Weight Font weight is the thickness of the lines which make up the font s characters The standard weight is known as medium Bold fonts with thicker lines are commonly used Bold text is often used for emphasis or for head ings Light stroke weight fonts have lines that are nar rower than the standard weight Some examples of different stroke weights are shown below...

Page 59: ...k in your computer s floppy disk drive Select the drive by letter this is usually A some times B The names of the fonts stored on the disk are displayed in the List ofFonts window Each font name is followed by the word TrueType Select the fonts you wish to install If you want to install all of them click SelectAll Click OK The Fonts dialog box reappears and instal lation is carried out The names o...

Page 60: ...ts If you are running applications software under MS DOS you can either use the printer s control panel to select the printer s built in fonts as described on page 30 of Chapter 3 or use your application to select fonts installed on your computer refer to your application s manual for details You can also set up the printer to ignore font selections made by your applications soft ware so that font...

Page 61: ...e application and to ensure that selections can be made from the control panel only power up the printer while holding down the FONT key The printer will sound a very short beep as it comes on Now you can put the printer in not ready mode and select a font Put the printer back in ready mode again and begin printing From now on the font selection will not be affected by any commands received from y...

Page 62: ... fed through Fanfold paper is also sometimes referred to as computer paper continuous forms or sprocket forms If you want to use fanfold paper you will need to install the optional push tractor unit FT 1OQ Installation of the push tractor unit is described on page 72 of Chapter 5 When using fanfold paper be careful not to print too close to the perforations at the top and bottom of each sheet This...

Page 63: ...ls We recom mend that single sheet labels are used in preference to fanfold label paper Note Do not reverse feed label sheets Fanfold forms Single sheets 5mm Bottom FClnll Smm 119mm Printable areas for single sheet and fanfold paper Page 56 ...

Page 64: ... single sheet printed output will be delivered face up only one page or face down in sequential order To do this simply adjust the position of the paper delivery selector Push the paper delivery selector towards the back of the printer to select face down printing Pull it forward to select face up printing Manual by pass If one type of paper is loaded in the paper tray but you wish to print on a s...

Page 65: ... If you are using fanfold paper and want to switch to sin gle sheets temporarily you can do so without removing the fanfold paper This is known as parking the fanfold paper When you are ready to resume using the fanfold paper you can unpark it again These operations are described on page 81 of Chapter 5 The tear off function If you are using fanfold paper you can remove printed output without dist...

Page 66: ...o that the print head is positioned ready to resume print ing at the top of form position on the next page If you are using single sheets of paper this operation will sim ply eject the current page If you are using continuous fanfold paper the paper is fed through so that printing can continue from the top of the next sheet To perform a form feed operation put the printer in not ready mode by pres...

Page 67: ...sheet of paper ready for printing Note You can only alter this setting immediately after loading paper If you feed the top sheet further through the printer by pressing the PAPER key more than once a new auto load setting cannot be saved Put the printer in not ready mode Hold down the READY key and adjust the position of the paper by pressing either the PAPER key to advance the paper or the FONT k...

Page 68: ...he 1 key to confirm your selection and put the printer back in ready mode The printer beeps once to indicate that 50 zoom has been selected twice for 67 or sounds a very short beep to indicate that Zoom mode has been cancelled that is 100 has been selected You can disable the Zoom feature by setting Electronic DIP Switch setting A4 to OFF see page 41 Note This setting has no effect if you are prin...

Page 69: ...a description of how to set the auto load position refer to page 60 Put the printer in not ready mode hold down the FONT key then press and hold down the PAPER key Wait until the printer beeps twice and then release both keys The current settings are saved and the Macro indicator lights up to indicate that the settings have been saved From now on each time you switch on the printer the saved setti...

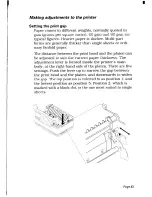
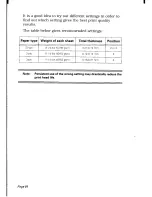
Page 70: ...e between the print head and the platen can be adjusted to suit the current paper thickness The adjustment lever is located inside the printer s main body at the right hand side of the platen There are five settings Push the lever up to narrow the gap between the print head and the platen and downwards to widen the gap The top position is referred to as position 1 and the lowest position as positi...

Page 71: ...s The table below gives recommended settings Paper type Weight of each sheet Total thickness Position Single 14 24 Ibs 52 90 gsm 0 07 0 12 mm 2or3 2 PlY 1I 14 Ibs 40 52 gsm 0 12 0 14 mm 3 3 P Y 1l l4 lbs 40 52 gsm 0 18 0 21 mm 4 Note Persistent use of the wrong setting may drastically reduce the print head life Page 64 ...

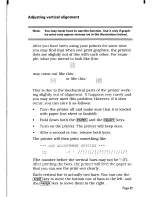
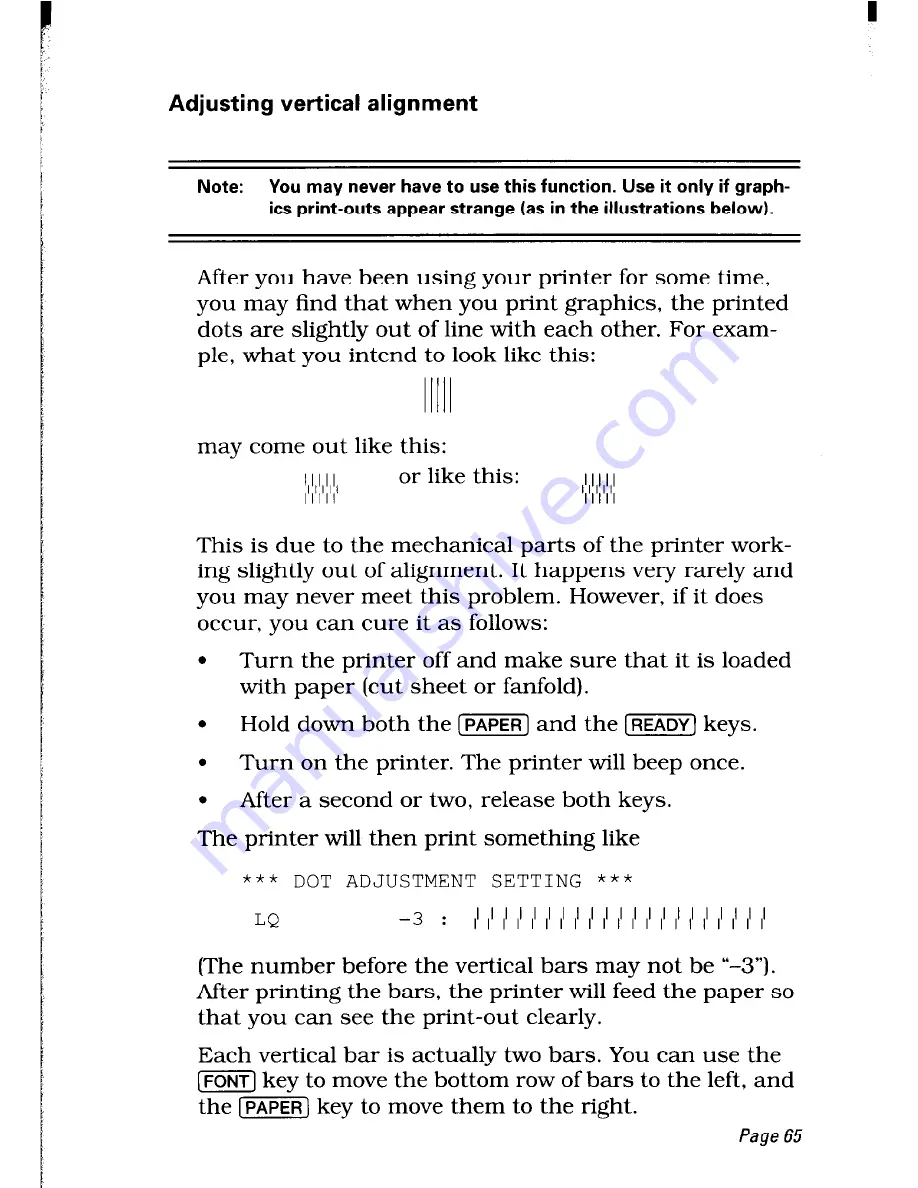
Page 72: ...u may never meet this problem However if it does occur you can cure it as follows Turn the printer off and make sure that it is loaded with paper cut sheet or fanfold Hold down both the PAPER and the READY keys Turn on the printer The printer will beep once After a second or two release both keys The printer will then print something like DOT ADJUSTMENT SETTING LQ 3 I I I I I I I I I I I I I I I I...

Page 73: ... rows are aligned You have now aligned the printer in Letter Quality LQ mode By pressing the READY key you can now correct the dot alignment of draft mode There are five modes in which the dot alignment may need to be corrected LQ DJ3 R DFUWT COND con densed GRAPHICS A and GI F HICS B Each mode must be adjusted separately Cycle through these modes by pressing the READY key cycling means that if yo...

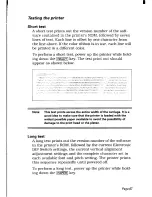
Page 74: ...t prints across the entire width of the carriage It is a good idea to make sure that the printer is loaded with the widest possible paper available to avoid the possibility of damage to the print head or the platen Long test A long test prints out the version number of the software in the printer s ROM followed by the current Electronic DIP Switch settings the current vertical alignment adjustment...

Page 75: ...s useful to print out the raw data that the printer is receiving When you perform a hexadecimal dump all codes char acter codes and control codes are printed out in hexa decimal format The printer does not execute any of the normally executable codes it receives such as OA line feed It simply prints them out Perform a hexadecimal dump as follows Turn off the printer Turn on the printer while holdi...

Page 76: ...e printer in not ready mode The printer now prints the final line of the hexadecimal dump To resume normal operation turn the printer off and on again Unless you switch it off and on the printer will continue to print in hexadecimal Page 69 ...

Page 77: ......

Page 78: ...you to print on fanfold paper continuous stationery and the serial to parallel inter face converter SPC 8K which allows you to connect the printer to your computer via your computer s 25 pin serial port Note Make sure that the printer is switched off when installing either the push tractor unit or the serial to parallel interface converter Page 71 ...

Page 79: ...ding support piece mounted on them Install the push tractor unit using the following steps Make sure the printer is switched off Open the front cover by hooking your fingers under the two small projecting tabs on either side of the front cover Grip the cover firmly and pull upwards The front cover will come loose Now pull the cover up and forwards so that it swings open Open the rear cover by push...

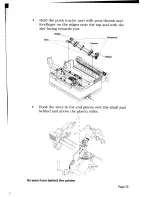
Page 80: ...with your thumb and forefinger on the ridges near the top and with the slot facing towards you Ridges_ Hook the slots in the end pieces over the shaft just behind and above the platen roller As seen from behind the printer Page 73 ...

Page 81: ...rs against the rear part of the end pieces Rotate the tractor feed unit downwards until the bottom of the levers fit snugly into the indentations in the metal plate inside the printer body As seen from behind the printer As seen from behind the printer Page 74 ...

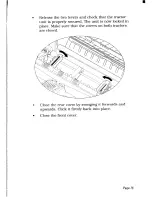
Page 82: ...the tractor unit is properly secured The unit is now locked in place Make sure that the covers on both tractors are closed Close the rear cover by swinging it forwards and upwards Click it firmly back into place Close the front cover Page 75 ...

Page 83: ...projecting tabs on either side of the front cover Grip the cover firmly and pull upwards The front cover will come loose Now pull the cover up and forwards so that it swings open Pass the fanfold paper through the horizontal slot in the back of the printer Open the rear cover by pushing it backwards so that it folds back and down Pull the paper through Pull the gray levers on the tractors forward ...

Page 84: ...rs If necessary make any final adjustments to the paper position Release one or both of the tractors by pulling the gray levers for ward and moving the tractors sideways Push the gray levers backwards again to fix the paper in position Close the rear cover by swinging it forwards and upwards Click it firmly back into place Close the front cover Pull the paper delivery selector forwards and down Tu...

Page 85: ... fed in to the starting position if you want to adjust this position use the procedure for setting the auto load position described on page 60 of Chapter 4 Note Keep the release lever in the forward position while printing on fanfold paper Page 78 ...

Page 86: ...an also set a new auto load position the distance from the top of each new page at which the printer auto matically starts printing specifically for fanfold paper This is independent of the cut sheet auto load position Both auto load positions can be saved as part of a macro so that you do not have to reset them each time you switch the printer off and on again Setting the auto load position is de...

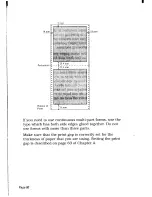
Page 87: ...multi part forms use the type which has both side edges glued together Do not use forms with more than three parts Make sure that the print gap is correctly set for the thickness of paper that you are using Setting the print gap is described on page 63 of Chapter 4 Page80 ...

Page 88: ...is forward Press the PAPER key The printer now automatically feeds the paper backwards until it is no longer in contact with the platen Push the release lever backwards Now you can load and print on single sheets When you want to resume using fanfold paper you can unpark it as described in the following section Unparking paper To resume using fanfold paper you can unpark the fanfold paper as follo...

Page 89: ...d down the PAPER key Keep both keys held down The printer starts to feed the paper through the printer Release both keys The printer automatically goes into not ready mode Tear off the paper using the paper delivery selec tor s tear assist edge Press the READY key again The printer winds the paper back to its former position so that printing can be resumed The printer remains in ready mode I Page ...

Page 90: ... this you will also need an additional serial converter cable To connect the printer to your computer using the serial to parallel converter proceed as follows you will also find it helpful to refer to the SPC 8K User s Manual and your MS DOS or Windows User s Guide Connecting the serial to parallel converter Turn off the printer and unplug the printer s power cable Page 83 ...

Page 91: ... the serial converter cable into one of your computer s serial ports The computer s serial ports are usually labelled COM 1 COM2 etc COMl is normally a g pin serial port and COM2 is normally a 25 pin port COM2 Make sure that the serial to parallel converter is resting on a stable level surface so that it will not be prone to vibration or damage Note Consult your dealer if you are unsure about the ...

Page 92: ...s AUTOEXEC BAT file or in the Ports option in Win dows Control Panel are also listed The converter s default settings are shown in gray Switch 1 Function 1 Data length 2 Parity 3 Protocol 4 Protocol 5 Panty 6 Baud rate 7 Baud rate 8 Baud rate Data length is the length in bits of the data unit or byte that the computer transmits Normally this is set to 8 OFF 1 7 bit 7 Parity is a means of checking ...

Page 93: ...only used protocol I OFF ON ETXIACK Baud rate is the rate in bits per second at which data is sent to the printer Typically 9600 or 19200 is used Switch 6 Switch 7 Switch 8 Baud rate DOS Windows setting OFF OFF OFF 150 bps 150 OFF OFF ON 300 bps 300 ON 1 OFF I 600 bps 1 OFF ON ON ON OFF OFF 1200 bps I 2400 bps 1200 2400 ON ON OFF ON ON 1 4800 bps OFF 9600 bps 4800 9600 Page 86 ...

Page 94: ...erial to parallel converter is connected Click OK to return to the Printers window Click Close to return to the Control Panel window Double click on Ports The Ports dialog box appears Click on the name of the port to which the serial to parallel converter is connected Click on Settings For each setting Baud Rate Data Bits Parity Stop Bits and Flow Control protocol select the appropri ate setting f...

Page 95: ...he COMn serial port Also add a line of the form MODE COMn baud parity data length stopbits p to set up the COMn port to match the DIP switch set tings on the serial to parallel converter For example MODE COM2 9600 N 8 l p will set up COM2 to run at 9600 baud with no parity a data length of 8 bits and 1 stop bit an MS DOS byte terminating convention The p indicates that the printer will continually...

Reviews: