background image

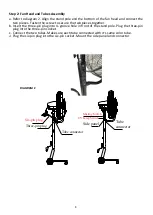
Step 2: Fan Head and Tubes Assembly 

a.

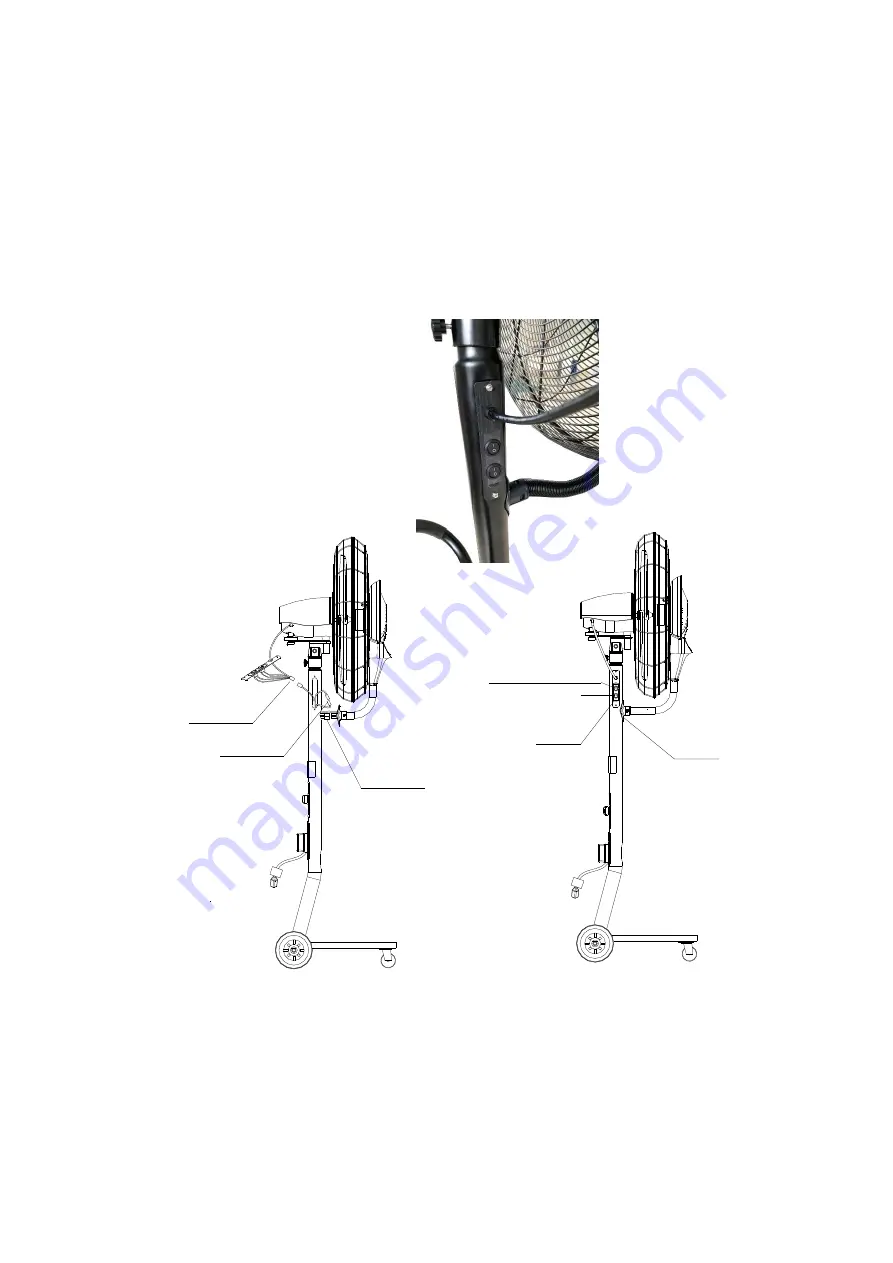
Refer to diagram 2. Align the stand pole and the bottom of the fan head and connect the

two pieces. Fasten the screw to secure the two pieces together.

b.

Insert the three-pin plug into U-groove hole in front of the stand pole. Plug the three-pin

plug into the three-pin socket.

c.

Connect the two tubes. Make sure each tube connected with it's same color tube.

d.

Plug the six-pin plug into the six-pin socket. Mount the side panel and connector

.

Tube
connector

Tube connector

Side panel

Three-pin plug

Six-pin plug

Misting Switch

UV Lamp Switch

Diagram 2

DIAGRAM 2 

8

Summary of Contents for FRE326N

Page 1: ...STAR BRUMA MISTING FAN NEW WITH UV DEVICE FOR WATER STERILIZATION ...

Page 2: ...oduct because it must be treated separately from household waste must be taken at the end of its useful life to a collection center for electrical and electronic equipment or redelivered to the retailer on purchase of a new equivalent appliance The user is responsible for delivering the appliance to the appropriate collection structure at the end of its life on penalty of the measures provided for...

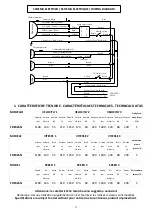
Page 3: ...m3 min Rumore dB Potenza W Velocità rpm Vol aria m3 min Rumore dB Potenza W FRE326N 1100 143 55 210 1250 174 60 220 1400 220 68 240 5 MODELE VITESSE 1 VITESSE 2 VITESSE 3 Volume de brume max L H Vitesse rpm Volume d air m3 min Bruit dB Puissan ce W Vitesse rpm Volume d air m3 min Bruit dB Puissan ce W Vitesse rpm Volume d air m3 min Bruit dB Puissan ce W FRE326N 1100 143 55 210 1250 174 60 220 140...

Page 4: ...safety 10 Children should be supervised to ensure that they do not play with the appliance 11 Damaged supply cords to be replaced by the manufacturer service agent or similarly qualified person to avoid hazard 12 Unplug the appliance during filling and cleaning 13 Before any manual water filling operation cleaning and maintenance turn off the device and remove the plug from the electric socket als...

Page 5: ...place 3 CAUTION 1 Follow the diagram to take out the fan body when open the packing carton of fan 2 Do not insert objects or let fingers to enter to the fan guard 3 Adjust the pitch angle of the fan within a predetermined range 4 Do not place the fan to unsteady floor or near curtains drapes or any other materials easily to be involved in the misting fan s grills 5 Children elders and weak people ...

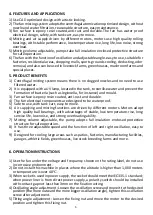
Page 6: ...rical components are designed to be waterproof 5 Safe to use with tank cart easy to move 6 Air supplying and misting functions are driven by different motors Motors adopt high quality ball bearings with advantages of stable low temperature rise long service life low noise and strong overloading ability 7 Misting volume adjustable the pump adopts full insulation enclosed protective structure for sa...

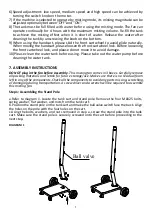
Page 7: ...ing Please take out the water pump before cleaning the water tank 7 ASSEMBLY INSTRUCTIONS DO NOT plug in the fan before assembly This misting fan comes in 3 boxes Carefully remove all packing materials and retain for future storage use Make sure there is no residual foam left in any of the components Check all the components to avoid any parts missing scratching or damaging during transportation A...

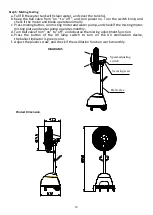
Page 8: ...he three pin plug into U groove hole in front of the stand pole Plug the three pin plug into the three pin socket c Connect the two tubes Make sure each tube connected with it s same color tube d Plug the six pin plug into the six pin socket Mount the side panel and connector Tube connector Tube connector Side panel Three pin plug Six pin plug Misting Switch UV Lamp Switch Diagram 2 DIAGRAM 2 8 ...

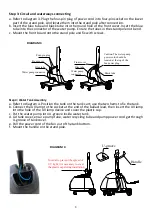
Page 9: ...r Blue tube Front cover Water pump connector Blue tube Front cover Four pin plug Diagram 5 Step 4 Water Tank Assembly a Refer to diagram 4 Position the tank on the tank cart use the two hems to fix the tank b Connect the UV lamp to the socket at the end of the ballast lead then insert the UV lamp into the hole of the UV lamp device and cover the plastic cap c Put the water pump into U groove insid...

Page 10: ...or and water pump and check if the misting motor misting plate and water pump operate smoothly d Turn ball valve from on to off and observe the misting adjustment function e Press the button of the UV lamp switch to turn on the UV sterilization device the ballast indicator is green color f Adjust the plastic screw and check if the oscillation function work smoothly Product Dimension Securing scew ...

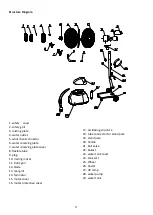
Page 11: ... plate cover 8 flexible tube 9 plug 10 misting motor 11 front grill 12 blade 13 rear grill 14 fan motor 15 motor cover 16 motor protective cover 17 oscillating structure 18 tube connector for stand pole 19 stand pole 20 handle 21 ball valve 22 ballast 23 water tank cover 24 tank cart 25 Wheel 26 Caster 27 UV lamp 28 water pump 29 water tank 11 ...

Page 12: ...12 ...

Page 13: ...13 ...

Page 14: ...liance be dismantled or repaired by unauthorized people or in case of negligence or accidental damage during transport or elsewhere or in case of misuse failure to comply with the instructions for use maintenance carried out by unauthorized people faulty installation not in conformity with the laws in force Replacement of the appliance is excluded from this guarantee The eventual repairs recognize...

Reviews: