38
620-7925 Rev x1
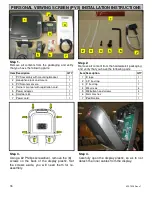
Step 1.
Remove all contents from the packaging and verify
that you have the following parts:
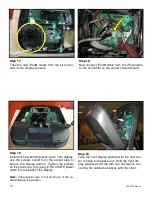
Step 3.
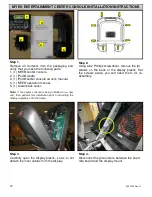
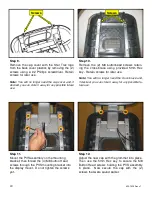
Using a #2 Phillips screwdriver, remove the (8)
screws on the back of the display plastic. Set
the screws aside, you will need them for re-
assembly.
Step 4.
Carefully open the display plastic, so as to not
detach the inner cables from the display.
PERSONAL VIEWING SCREEN (PVS) INSTALLATION INSTRUCTIONS
Step 2.
Remove all content from the hardware kit packaging
and verify that you have the following parts:
1
2
3
4
5
6
7
Item Description
QTY
1 5” tape
1
2 3.5” tie strap
1
3 5” tie strap
1
4 M4 screws
4
5 M8 button head screws
4
6 5mm Hex hex
1
7 iPod® cable
1
1
2
3
4
5
6
7
Item Description
QTY
1 PVS assembly with mounting bracket.
1
2 Headphone jack and mount.
1
3 PVS center console.
1
4 Owner’s manual with registration card.
1
5 Power adaptor.
1
6 Hardware kit.
1
7 Power cord.
1
Summary of Contents for E-STe
Page 10: ...11 620 7925 Rev x1 THIS PAGE INTENTIONALLY LEFT BLANK...
Page 17: ...18 620 7925 Rev x1 THIS PAGE INTENTIONALLY LEFT BLANK...
Page 27: ...28 620 7925 Rev x1 THIS PAGE INTENTIONALLY LEFT BLANK...
Page 36: ...37 620 7925 Rev x1 THIS PAGE INTENTIONALLY LEFT BLANK...
Page 50: ...Star Trac E ST Stepper O W N E R S M A N U A L...

