6
620-7925 Rev x1
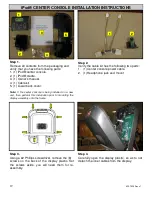
Step 1.
Using provided screwdriver, remove the (2) M4
x 0.7 screws that hold the display assembly to-
gether, then separate the back of the display
from the front.
Note:
Retain the screws for later use.
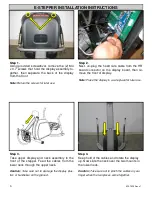
Step 3.
Take upper display and neck assembly to the
front of the stepper. Feed the cables from the
lower neck through the upper neck.
Caution:
Take care not to damage the display plas-
tics or handlebar on the ground.
Step 4.
Keep hold of the cables and rotate the display
up. Now slide the neck over the two mounts in
the lower neck.
Caution:
Take care not to pinch the cables or your
finger when the two pieces come together.
E-STEPPER INSTALLATION INSTRUCTIONS
Step 2.
Next, un-plug the heart rate cable from the HR
board connector on the display board, then re-
move the front of display.
Note:
Place the display in a safe place for later use.
Summary of Contents for E-STe
Page 10: ...11 620 7925 Rev x1 THIS PAGE INTENTIONALLY LEFT BLANK...
Page 17: ...18 620 7925 Rev x1 THIS PAGE INTENTIONALLY LEFT BLANK...
Page 27: ...28 620 7925 Rev x1 THIS PAGE INTENTIONALLY LEFT BLANK...
Page 36: ...37 620 7925 Rev x1 THIS PAGE INTENTIONALLY LEFT BLANK...
Page 50: ...Star Trac E ST Stepper O W N E R S M A N U A L...


