Technical Primer - Aurora
6
Instructions for Charging
The Charger’s operation is divided into two parts,
• Charging connection from EVSE to EV through Type 2 cable.
• Starting and Ending the charging operation using authentication.
The user must first connect the charging device to the vehicle and then the LED light will turn from
green in standby to blue after the connection is completed.
6.1
Summary of charging operation
• Insert the charging connector into the vehicle and confirm that it is connected properly (Case
B), the blue LED lights up means the charger is in connection status.
• When the brightness of the blue LED changes gradually, it means that the charging process
has started.
6.1.1
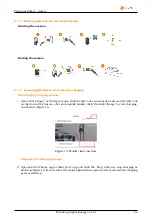
RFID-charging station with user authorization
Starting the session
Ending the session
6.1.2
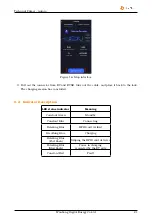
Swiping card to start and stop charging
Starting the Charging process
1. Placing the card above the RFID reader, the status light will flash blue if it has detected the
card. Then the EVSE will do the authentication. If the authentication is successful, the status
light will start pulsing blue, which means the charging process has begun.
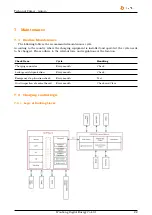
2. Place the RFID card above the reader area; the indicator light will flash blue if the reader has
detected the card. Then it will authenticate to stop. If the authentication is successful, the
status light will turn green (free mode). The charging process will stop. If the startup by card
swiping is not successful due to network reasons, please restart the card swiping process.
3. Pull out the connector from EV and EVSE, take out the cable, and place it gun holder. The
charging session has concluded.
Wanbang Digital Energy Co.Ltd
19


