background image

Quick Start Guide 


5 Appendix B: Updating Firmware and u-boot 

www.starfivetech.com


Page 29


V1.1 (2022-03-01)


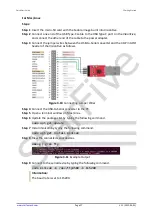
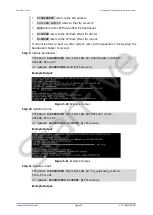
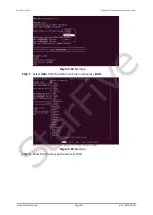
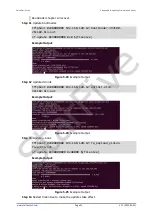
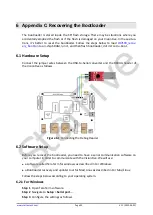
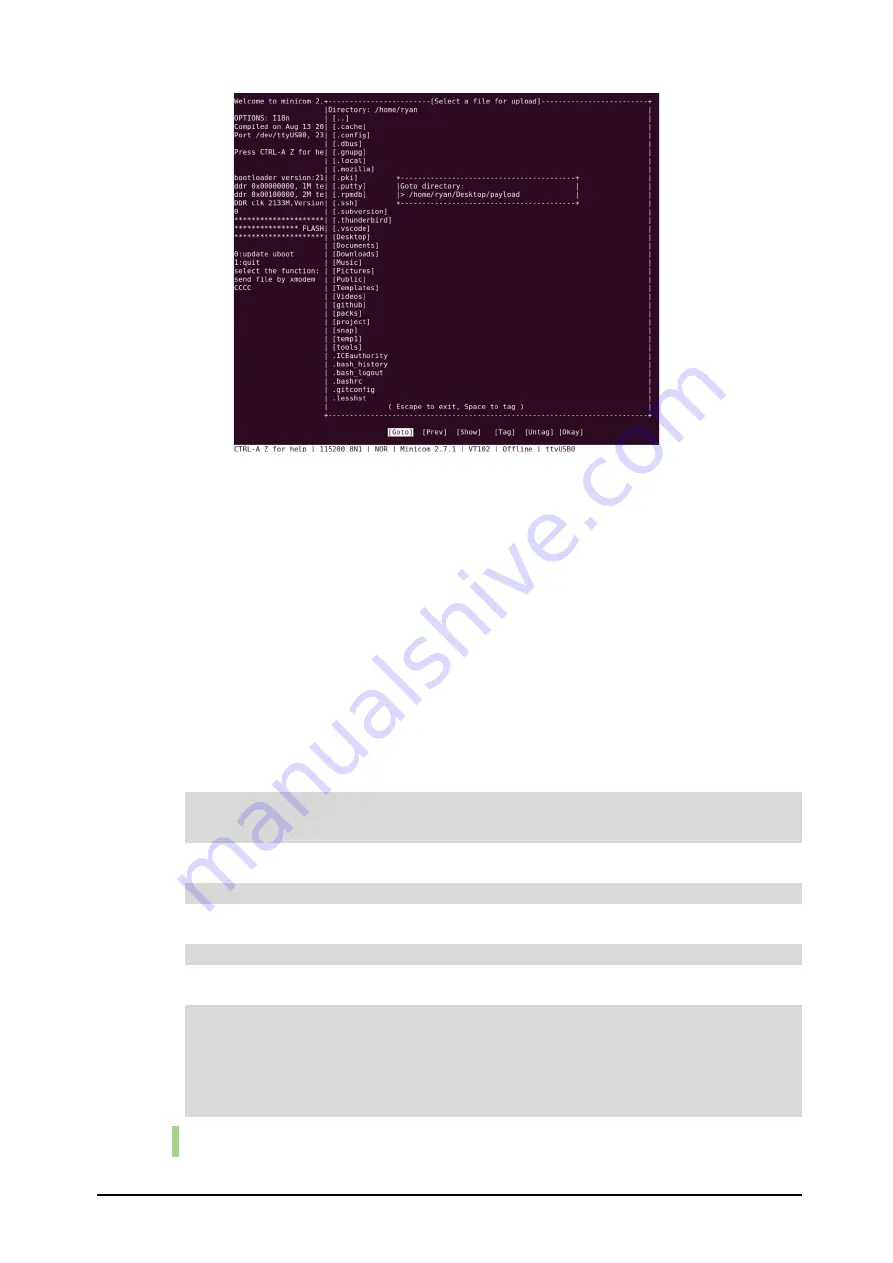
Figure 5-20


Example


Step 9


 Select 

bootloader-JH7100-211102.bin.out

  by  navigating  using  arrow  keys,  press 

Space

 and press 

Enter

.


Step 10


 Repeat the steps from 4 to 9 to update the ddr init as well according to the following:


Type 

1

 - update ddr init [Filename: 

ddrinit-2133-211102.bin.out

]


Step 11


 Repeat the steps from 

4  

to 

9

 to update the u-boot as well according to the following:


Type 

2

 - update u-boot [Filename: 

fw_payload.bin.out

]


Using Ethernet


Step 1


Connect one end of an Ethernet cable to the VisionFive RJ45 connector, and connect 
the other end of the cable to a router.


Step 2


Install a tftp server on the host PC by executing:


sudo apt-get update 

sudo apt install tftpd-hpa 

Step 3


Check the server status:


sudo systemctl status tftpd-hpa 

Step 4


Execute the following to enter the tftp server:


sudo nano /etc/default/tftpd-hpa 

Step 5


Configure the tftp server as follows:


TFTP_USERNAME="tftp" 

TFTP_DIRECTORY="/home/user/Desktop/tftp_share" 

TFTP_ADDRESS=":69" 

TFTP_OPTIONS="--secure" 

Information:


StarFive

Summary of Contents for VisionFive SBC

Page 1: ...www starfivetech com NO VisionFive QSGEN 001 V1 1 VisionFive SBC Quick Start Guide Version V1 1 Date 2022 03 01...

Page 2: ...ility fitness for a particular purpose and non infringement StarFive does not assume any liability rising out of the application or use of any product or circuit and specifically disclaims any and all...

Page 3: ...operation system Revision History Version Released Revision V1 2021 12 08 The first official release V1 1 2022 03 01 Added new steps to use Ethernet to prepare software under Windows and Mac Linux en...

Page 4: ...For Mac Linux 11 3 4 Logging in to Fedora 12 3 4 1 Using Xfce Desktop over HDMI 12 3 4 2 Using SSH over Ethernet 12 3 4 3 Using a USB to Serial Converter 14 4 Appendix A VisionFive Boot Flow 19 5 App...

Page 5: ...ctors for video hardware It has wireless capabilities with Wi Fi and Bluetooth BLE and has a wide software compatibility including support for Fedora 1 1 Features Truly open source hardware software a...

Page 6: ...G encoder decoder Dedicated Audio Processing DSP and Sub system Ultra low power Voice Activity Detector for audio bit stream as a Voice Trigger On chip Audio DAC Support DMIC and AMIC up to 4 channels...

Page 7: ...www starfivetech com Page 6 V1 1 2022 03 01 2 Hardware Overview 2 1 Board Appearance Figure 2 1 Top View of VisionFive Figure 2 2 Bottom View of VisionFive S t a r F i v e...

Page 8: ...ype A 5 MIPI DSI Connector 13 2 x USB 3 0 Host Type A 6 PMIC 14 3 5 mm Audio Jack 4 pole stereo audio output 7 USB Type C Connector 15 Micro SD SDXC Card Slot 8 LCD to HDMI IC 16 Fan Header for a 2 pi...

Page 9: ...mum current draw when all GPIOs are combined should be less than 100 mA Please take this into account or otherwise you will end up destroying the GPIO pins All GPIOs can be configured to support diffe...

Page 10: ...O Ethernet cable Power adapter 5 V 3 A USB Type C Cable 3 2 Connecting a Fan It s recommended to use a fan with VisionFive You can connect a 2 pin 5 V fan to the board as follows Figure 3 1 Connecting...

Page 11: ...c tory that you just extracted Step 6 Open Windows Powershell and navigate to the zstd directory Example cd D Downloads zstd Step 7 Type the following command to unzip the Fedora image zstd exe d Fedo...

Page 12: ...ation If you are a Mac user type brew install zstd Step 5 Navigate to the location of the downloaded Fedora image directory before Example Command cd Downloads Step 6 Run the following command to unzi...

Page 13: ...Five Step 3 Enter the credentials as follows Username riscv default Password starfive Result You will see the following interface Figure 3 3 UI Example 3 4 2 Using SSH over Ethernet After installing F...

Page 14: ...ve Putty installed Step 4 Open Putty to log in to Fedora Step 5 Select SSH under the Connection Type Step 6 Configure the settings as follows Host Name IP address of your VisionFive Port 22 Step 7 Cli...

Page 15: ...isionFive using a USB to Serial converter Please follow the following steps For Windows Steps Step 1 Insert the micro SD card with the Fedora image burnt into VisionFive Step 2 Connect one end of the...

Page 16: ...oad and install Putty by visiting this link Information Putty is an SSH and telnet client through which you can connect to the Carrier Board via SSH You can skip this step if you already have Putty in...

Page 17: ...mple Configuration Step 11 Click Open Step 12 Power on the VisionFive Step 13 Type username and password in the prompt as follows Username riscv Password starfive Result Now you have connected with th...

Page 18: ...the 40 Pin GPIO header of the VisionFive as follows Figure 3 10 Connecting Jumper Wires Step 4 Connect the USB to Serial converter to the PC Step 5 Open a terminal window on Mac Linux Step 6 Update th...

Page 19: ...gure 3 12 Example Output Step 10 Power on the VisionFive Step 11 Type username and password in the prompt as follows Username riscv Password starfive Result Now you have connected with the VisionFive...

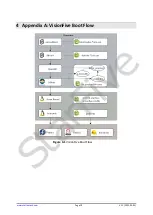
Page 20: ...www starfivetech com Page 19 V1 1 2022 03 01 4 Appendix A VisionFive Boot Flow Figure 4 1 VisionFive Boot Flow S t a r F i v e...

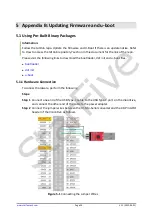
Page 21: ...Please visit the following links to download the bootloader ddr init and u boot files bootloader ddr init u boot 5 1 1 Hardware Connection To connect hardware perform the following Steps Step 1 Connec...

Page 22: ...g Xmodem as described in the Using Xmodem section or using Ethernet as described in the Using Ethernet section For Mac Linux 1 Install minicom on Mac Linux as described in Installing Minicom 2 Update...

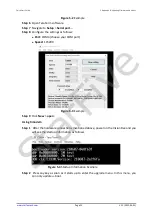
Page 23: ...settings as follows Port COM4 choose your COM port Speed 115200 Figure 5 3 Example Step 9 Click New open Using Xmodem Step 1 After the hardware connections mentioned above power on the VisionFive and...

Page 24: ...Step 6 Repeat the steps 4 and 5 to update the ddr init as well according to the following Type 1 update ddr init Filename ddrinit 2133 211102 bin out Step 7 Repeat the steps 4 and 5 to update the u b...

Page 25: ...DHCP server of the router and use the VisionFive IP as 192 168 120 xxx However if your router IP is different for example 192 168 2 1 make sure the server IP and VisionFive IP are in the same IP doma...

Page 26: ...r restart refer to the Appendix C Recovering the Bootloader chapter to recover Step 9 Update bootloader tftpboot 0x90000000 192 168 120 12 bootloader JH7100 211102 bin out sf update 0x90000000 0x0 fil...

Page 27: ...pe the following to install minicom sudo apt get install minicom Step 4 Connect the USB to Serial converter to the PC Step 5 Type the following in the terminal to view the connected serial devices dme...

Page 28: ...In this menu you can only update u boot Figure 5 16 Example Step 3 Type root s5t and press Enter to enter the extended version of the upgrade menu and in this menu you can update u boot bootloader and...

Page 29: ...ating Firmware and u boot www starfivetech com Page 28 V1 1 2022 03 01 Figure 5 18 Example Step 7 Select Goto from the bottom tab menu and press Enter Figure 5 19 Example Step 8 Enter the directory pa...

Page 30: ...well according to the following Type 2 update u boot Filename fw_payload bin out Using Ethernet Step 1 Connect one end of an Ethernet cable to the VisionFive RJ45 connector and connect the other end o...

Page 31: ...r IP is different for example 192 168 2 1 make sure the server IP and VisionFive IP are in the same IP domain for example 192 168 2 xxx Step 9 Check the connectivity by pinging the host PC from Vision...

Page 32: ...0x90000000 0x0 filesize Example Output Figure 5 23 Example Output Step 12 Update ddr init tftpboot 0x90000000 192 168 120 12 ddrinit 2133 211102 bin out Example Output Figure 5 24 Example Output Step...

Page 33: ...ix B Updating Firmware and u boot www starfivetech com Page 32 V1 1 2022 03 01 Information The methods to compile and update u boot are included in the following Vision Five_Software_Technical_Referen...

Page 34: ...umper wires between the USB to Serial converter and the DEBUG header of the VisionFive as follows Figure 6 1 Connecting the Debug Header 6 2 Software Setup Before you recover the bootloader you need t...

Page 35: ...tep 6 You will see the following output on Tera Term C SiFive Step 7 Type the following load 0x18000000 Result You will see an output like this Step 8 Navigate to File Transfer XMODEM Send and choose...

Page 36: ...includes a bootloader recovery and updater tool git clone https github com xypron JH71xx tools Step 2 Navigate to the cloned repo and build the tool cd JH71xx tools gcc o jh7100 recover jh7100 recover...

Page 37: ...Output Information You may change the serial port according to yours and also the file locations if you haven t moved them into the JH71xx tools directory Step 6 Press on the BOOT button while turning...

Page 38: ...Quick Start Guide 6 Appendix C Recovering the Bootloader www starfivetech com Page 37 V1 1 2022 03 01 Figure 6 6 Example Output S t a r F i v e...

Page 39: ...nary for recovering SPI flash starfive tech bootloader_re covery secondboot First stage bootloader starfive tech JH7100_sec ondBoot ddrinit First stage bootloader starfive tech JH7100_ddrinit RISC V S...

Reviews: