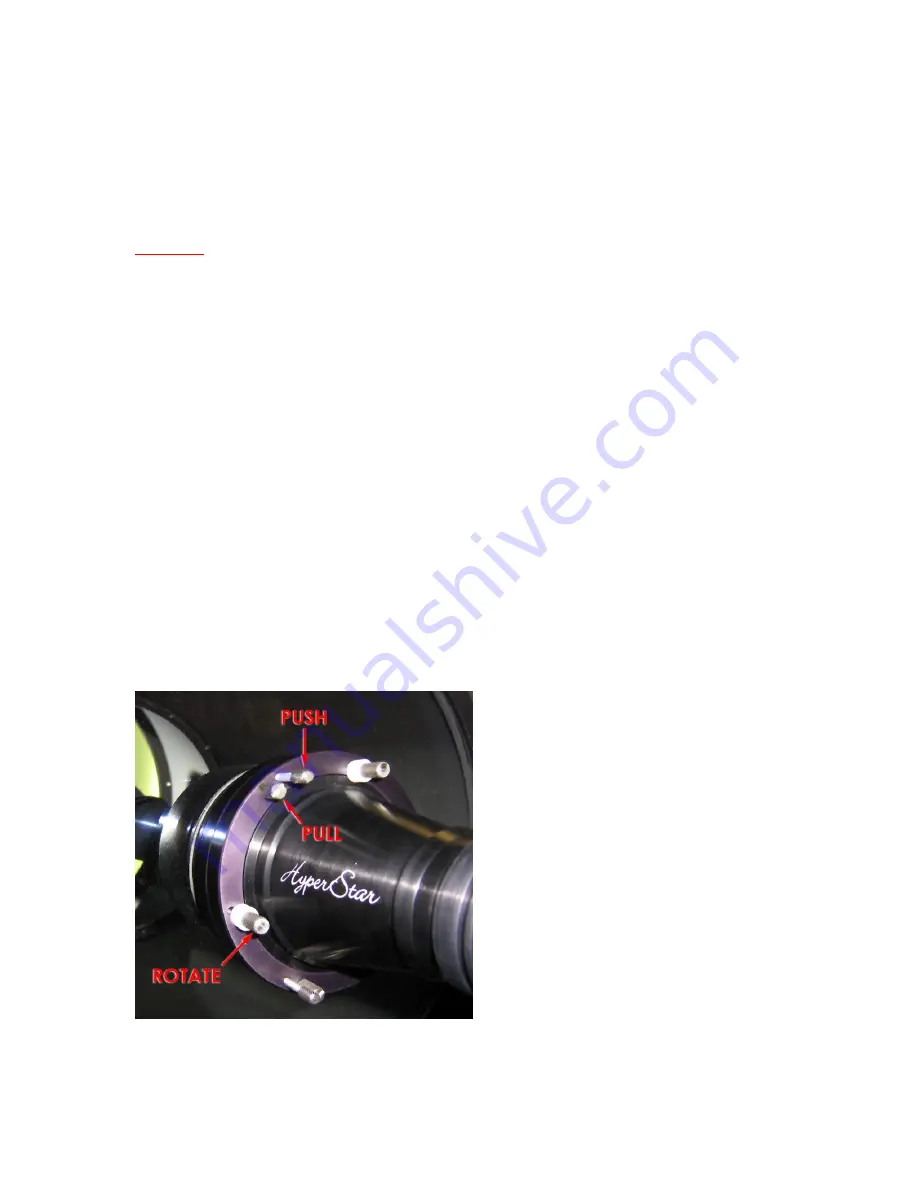
Collimating the HyperStar Lens
The HyperStar incorporates a simple collimating system. The three pairs of screws
around the base of the HyperStar push and pull to tilt the lens and correct for any
alignment error.
Warning
:
Keep in mind that the three pull screws (shown on next page) hold the lens in
place on the telescope. Do not loosen these screws too much. Small adjustments should
be all that is necessary to collimate the HyperStar.
You will only need to make a collimation adjustment if there is a noticeable coma effect
(flaring of the star images to one side) on one edge or corner of the field while the rest of
the stars appear sharp. This implies the primary mirror is slightly tilted and not perfectly
aligned with the optical axis of the HyperStar. This is normally compensated by
adjusting the secondary mirror, but with the mirror removed it now needs to be
compensated for with the HyperStar.
The easiest method is to take a single short exposure of a star field (1-3 seconds is usually
enough). Make an adjustment by loosening one of the pull screws (shown below) and
tightening one of the push screws. This will tip that side of the HyperStar outward. Take
a second image and see if there was an improvement. If things got worse, return the pair
of screws to their original position and try a different set. Continue until the stars are
sharp across the full field. It may be necessary to refocus during adjustment to see the
best results.
Tip:
Try adjusting the screws about ¼ turn at a time. Very little adjustment is all that is
usually necessary.


