background image

S T A I N L E S S   S T E E L

10

ELECTRICAL INSTALLATION 

Remove terminal box cover. Make sure that the 

O-ring seal and threads will not be damaged.

1

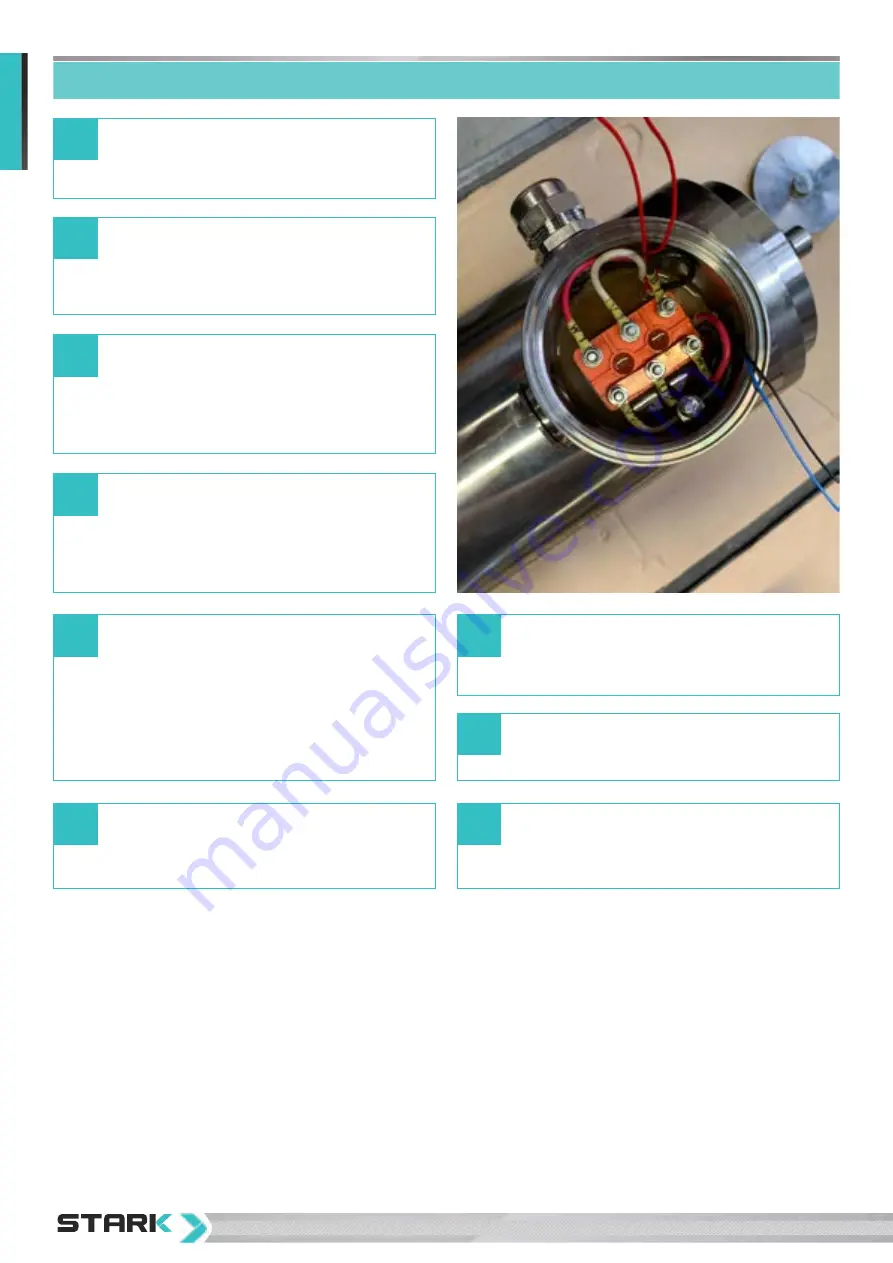
Setup motor cables in star or delta connection 

according to nameplate. The black/blue marked 

wires are for the PTCs. The red marked wires are 

for the anti-condensation heater 230V.

2

Carefully remove the insulation from the earthing 

cable and get an eye-type cable lug suitable for the 

cable used, with the corresponding diameter. 

3

Strip back all supply cables to a sufficient length. 

Attach shrink sleeve to cover completed connection 

thoroughly.

4

Route the cable through a suitable stainless 

steel cable gland into the terminal box. Check 

that the cable gland diameter matches the cable 

diameter you are using. Ensure that the assembly 

and connection are performed so as to maintain the 

protection class. If the second cable entry will not be 

used, it must be thoroughly sealed with the supplied 

stainless steel blind nut and a O-ring.

5

Connect the power cable leads to the motor 

terminal block in accordance with the wiring 

diagram. 

6

Connect the built in PTC’s and anticondensation 

heater with suitable crimp connections.

7

Connect the earth wire to the earth connection 

in the motor. Crimp the cable eye to the earthing 

cable.

8

Lightly grease the O-ring and close the terminal box 

with the terminal box cover. Prevent damage to the 

O-ring and make sure the cover is closed firmly.

9

Summary of Contents for KBQ301A

Page 1: ...A I N L E S S S T E E L Gegründet in der Schweiz Founded in Switzerland STARK Stainless Steel Motors Foodsafe quality drives OPERATING MAINTENANCE INSTRUCTIONS EBS ECONOMY SERIES IEC EBS ECONOMY SERIES IEC ...

Page 2: ...tion 5 Motor nameplate 6 Configuration type 6 Packaging transport delivery storage and preparation 7 Mechanical installation 7 Electrical installation 9 Anti condensation heater 11 Temperatute monitoring elements PTCs 11 Frequency inverters 12 Maintenance 12 Motor drawing parts 13 S T A I N L E S S S T E E L 2 ...

Page 3: ...short delivery times via European distribution network Data Support Accurate data R D testing and native support within one working day Price Quality Very favorable price to quality ratio for all STARK Stainless Steel motors Foodsafe Quality Drives 3 Fast Delivery Safe Packaging International Distribution ...

Page 4: ...f fault free operation and fulfilment of any rights to claim under guarantee is that you adhere to the information in the operating instructions Consequently read the operating instructions before you start operating the motor Keep the oper ating instructions in the vicinity of the motor since they contain important information about servicing the motor The manufacturer disclaims all liability for...

Page 5: ...ocally applicable standards The following point must be given consideration in particular Inappropriate usage Faulty installation or handling Impermissible removal of necessary protective covering or housing In particular cases the motors show surface temperatures of up to 110 C depending on design operation and cooling In these cases a touch protection must be placed on the surface of the motor S...

Page 6: ...motor the specified construction form must always be in accordance with the set up in connection with the protection class and bearing construction If it concerns a flange motor it is necessary to specify the desired type of mounting holes FF or FT with the corresponding M size pitch circle mounting holes FF Flange Free Holes through holes according to B5 flanges FT Flange Tapped Holes tapped hole...

Page 7: ...70 and a maximum daily temperature fluctuation of 10 C 3 To prevent damage during storage effective vibration Veff must not exceed 0 2 mm s Preparation After unpacking remove dust from the motor surface and rust preventive coating from shaft extension end Please remove ex isting transport securities before use Check whether the data on the nameplate is correct The fasteners should all be fixed The...

Page 8: ...ngs on the shaft the bearings may be irreparably damaged Mount only carefully dynamically balanced pulleys or couplings on the shaft end Machines that are connected to the motor by a coupling must be aligned in accordance with the instructions provided by the coupling manufacturer Installation in humid environments 1 Terminal box should possibly be fixed so that the cable entries are positioned do...

Page 9: ...ator has to fit connection cables apt for above mentioned temperature range 2 Unused openings must be sealed with the supplied stainless steel plugs and matching O rings 3 Applied wire clamps connecting sleeves and cable glands must be suitable for the applied cable diameters 4 Follow the recommendations in the instructions of use provided by the manufacturer of the cable and the cable glands Conn...

Page 10: ...ough a suitable stainless steel cable gland into the terminal box Check that the cable gland diameter matches the cable diameter you are using Ensure that the assembly and connection are performed so as to maintain the protection class If the second cable entry will not be used it must be thoroughly sealed with the supplied stainless steel blind nut and a O ring 5 Connect the power cable leads to ...

Page 11: ...KBQ301A KBQ302A KBQ303A KBQ304A Dimensions l w thickness 220x12x2 5x4 5 mm 260x14x2 5x4 5 mm 350x14x2 5x4 5 mm 460x14x2 5x4 5 mm Length outgoing line 160 mm 340 mm 440 mm 740 mm Power 10W 20W 30W 40W Rated Voltage 220V 220V 220V 220V Rating Motor H63 H71 H90 H100 H112 H132 H160 TEMPERATURE MONITORING ELEMENTS PTC The PTC thermistors for protecting the motor windings meet the global requirements wi...

Page 12: ...s are equipped with NSK double sided sealed deep groove ball bearings The ball bearings are lubricated with high temperature 40 C 160 C long life grease ENS Grease Under normal operating conditions the lubricant is adequate for 40 000 hours of operation for 4 and 6 pole motors and 20 000 hours for 2 pole motors STARK Stainless steel motors are fitted with ball bearings according to the table below...

Page 13: ...semble the motor all four cap nuts on the rear shield must be loosened several turns Several gentle taps on the cap nuts with a plastic hammer will push the front shield out of the motor housing Once the O ring is free of the motor housing the shield can be pulled out of the motor together with the rotor 10 When replacing motor winding correct data of winding turns wire gauges coil types must be r...

Page 14: ...Gemeinsam sind wir STARK Together we are strong S TA R K S TA I N L E S S S T E E L E L E C T R I C M OTO R S C O M S T A I N L E S S S T E E L Gegründet in der Schweiz Founded in Switzerland ...

Reviews: