background image

Instruction Manual

3

Hardware Installation

WARNING! 

Hard drives and storage enclosures require careful handling, especially 

when being transported. If you are not careful with your hard disk, lost data may 

result. Always handle your hard drive and storage device with caution. Be sure that 

you are properly grounded by wearing an anti-static strap when handling computer 

components or discharge yourself of any static electricity build-up by touching a large 

grounded metal surface (such as the computer case) for several seconds.
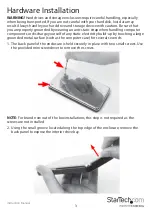
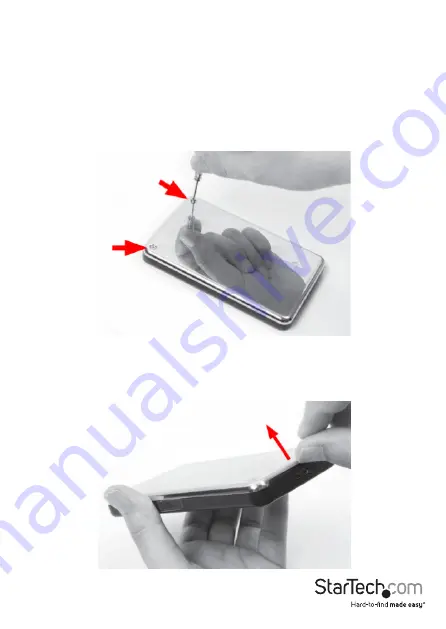
1.  The back panel of the enclosure is held securely in place with two small screws. Use  

  the provided mini screwdriver to remove the screws. 

NOTE:

 For brand new out of the box installations, this step is not required as the 

screws are not installed.
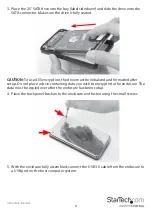
2.  Using the small groove located along the top edge of the enclosure, remove the  

  back panel to expose the interior drive bay.

Summary of Contents for 8STS2510BU33PW

Page 1: ...ngsanleitung de startech com FR Guide de l utilisateur fr startech com ES Gu a del usuario es startech com IT Guida per l uso it startech com NL Gebruiksaanwijzing nl startech com PT Guia do usu rio p...

Page 2: ...FCC Rules Operation is subject to the following two conditions 1 This device may not cause harmful interference and 2 this device must accept any interference received including interference that may...

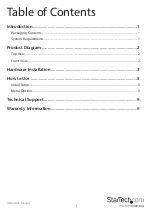
Page 3: ...e of Contents Introduction 1 Packaging Contents 1 System Requirements 1 Product Diagram 2 Top View 2 Front View 2 Hardware Installation 3 How to Use 5 Initial Setup 5 Menu Options 6 Technical Support...

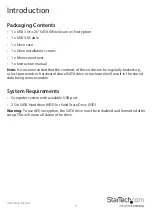
Page 4: ...recommended that the contents of this enclosure be regularly backed up as lost passwords or hardware failure SATA drive or enclosure will result in the stored data being unrecoverable System Requireme...

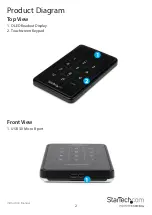
Page 5: ...Instruction Manual 2 Product Diagram Top View 1 OLED Readout Display 2 Touchscreen Keypad Front View 1 USB 3 0 Micro B port 2 1 1...

Page 6: ...en handling computer components or discharge yourself of any static electricity build up by touching a large grounded metal surface such as the computer case for several seconds 1 The back panel of th...

Page 7: ...ve must be initialized and formatted after setup Do not place a drive containing data you wish to encrypt into the enclosure The data must be copied over after the enclosure has been setup 4 Place the...

Page 8: ...mputer in Vista 7 8 then select Manage In the new Computer Management window select Disk Management from the left window panel 6 A dialog window should automatically appear asking your to initialize t...

Page 9: ...0 Write Protection Enable write protection on the installed SATA drive which prevents data from being written to or deleted from the SATA drive Data can only be read User Info Configuration options fo...

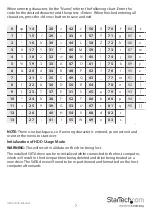
Page 10: ...7 m 91 8 22 6 36 D 50 R 64 78 n 92 9 23 7 37 E 51 S 65 a 79 o 93 10 24 8 38 F 52 T 66 b 80 p 94 11 25 9 39 G 53 U 67 c 81 q 95 12 26 40 H 54 V 68 d 82 r 13 27 41 I 55 W 69 e 83 s NOTE There is no back...

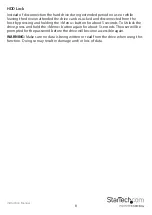
Page 11: ...rom the host by pressing and holding the Menu button for about 5 seconds To Unlock the drive press and hold the Menu button again for about 5 seconds The user will be prompted for the password before...

Page 12: ...returned for repair or replacement with equivalent products at our discretion The warranty covers parts and labor costs only StarTech com does not warrant its products from defects or damages arising...

Page 13: ...ts and we quickly deliver them wherever they need to go Just talk to one of our tech advisors or visit our website You ll be connected to the products you need in no time Visit www startech com for co...

Reviews: