background image

Instruction Manual

4

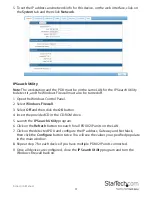
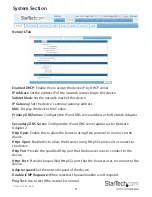
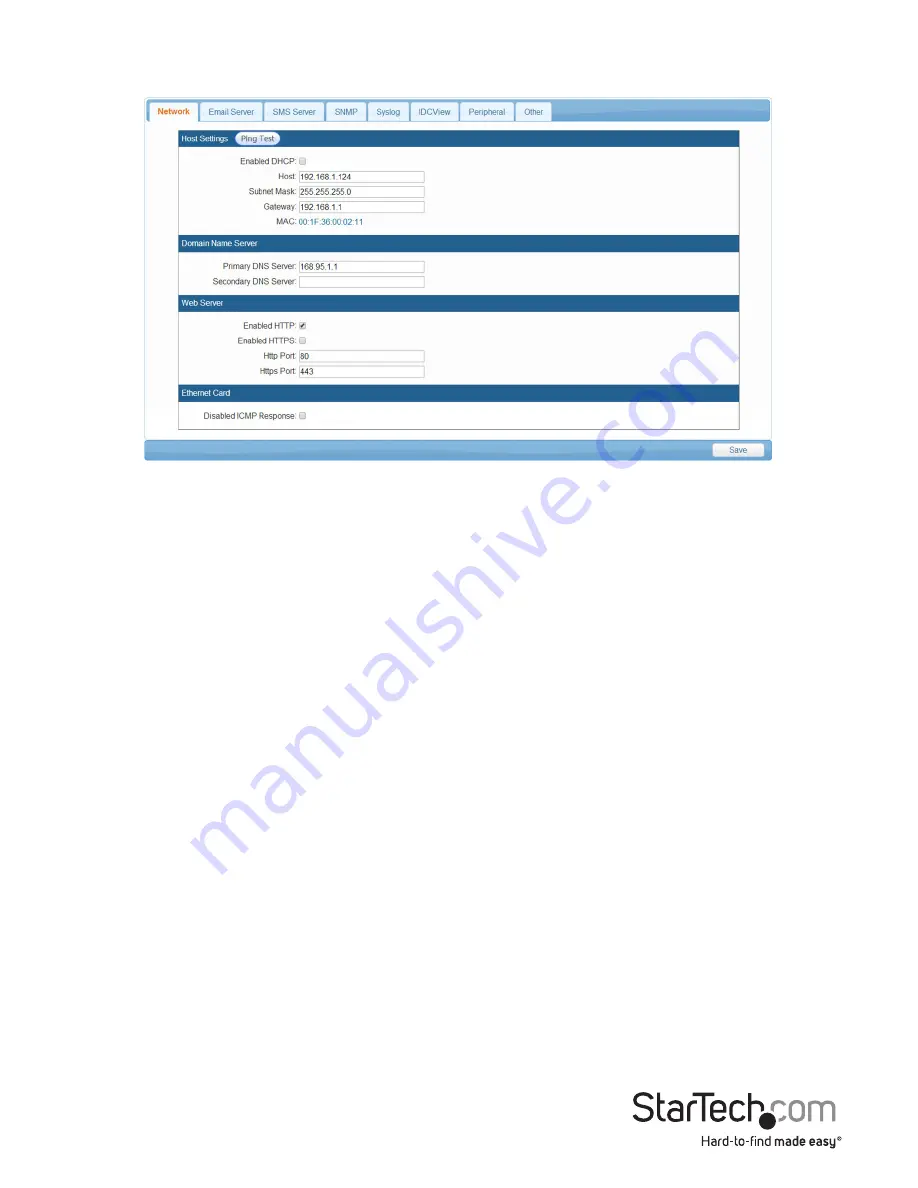
5.  To set the IP address and network info for this device, on the web interface, click on 

the 

System

 tab and then click 

Network

.

IP Search Utility

Note:

 The workstation and the PDU must be on the same LAN for the IP Search Utility 

to detect it, and the Windows Firewall must also be turned off.
1.  Open the Windows Control Panel.
2.  Select 

Windows Firewall

.

3.  Select 

Off

 and then click the 

OK

 button.

4.  Insert the provided CD in the CD-ROM drive.
5.  Launch the 

IP Search Utility

 program.

6.  Click on the 

Refresh 

button to search for all PDU02IP units on the LAN.

7.  Click on the detected PDU and configure the IP address, Gateway and Net Mask, 

then click the 

Configure

 button twice. You will see the values you specified populate 

in the main window.

8.  Repeat step 7 for each device if you have multiple PDU02IP units connected.
9.  Once all devices are configured, close the

 IP Search Utility

 program and turn the 

Windows Firewall back on.

Summary of Contents for PDU02IP

Page 1: ...U02IP DE Bedienungsanleitung de startech com FR Guide de l utilisateur fr startech com ES Gu a del usuario es startech com IT Guida per l uso it startech com NL Gebruiksaanwijzing nl startech com PT G...

Page 2: ...ent into an outlet on a circuit different from that to which the receiver is connected Consult the dealer or an experienced radio TV technician for help Industry Canada Statement This Class A digital...

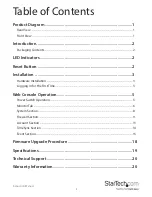
Page 3: ...Reset Button 2 Installation 3 Hardware Installation 3 Logging In for the First Time 3 Web Console Operation 5 Power Switch Operation 5 Monitor Tab 6 System Section 8 Firewall Section 11 Account Sectio...

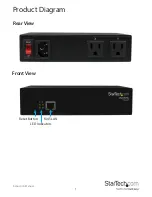
Page 4: ...Instruction Manual 1 Product Diagram Rear View Front View Reset Button LED Indicators RJ45 LAN...

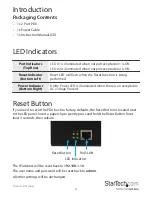
Page 5: ...there is an acceptable AC voltage Present Reset Button If you need to reset the PDU back to factory defaults the Reset Button is located next to the LED panel Insert a paperclip to gently press and ho...

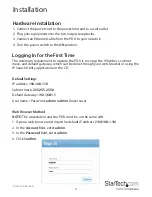
Page 6: ...rate the PDU is to set up the IP Address subnet mask and default gateway which can be done through your web browser or using the IP Search Utility application on the CD Default Settings IP address 192...

Page 7: ...3 Select Off and then click the OK button 4 Insert the provided CD in the CD ROM drive 5 Launch the IP Search Utility program 6 Click on the Refresh button to search for all PDU02IP units on the LAN...

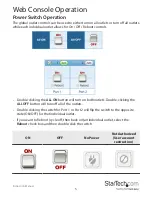
Page 8: ...clicking the ALL ON button will turn on both outlets Double clicking the ALL OFF button will turn off all of the outlets Double clicking the switch for Port 1 or Port 2 will flip the switch to the opp...

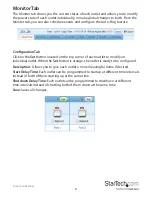
Page 9: ...ocated on the top corner of each outlet to modify an individual outlet When the Set button is orange the outlet is ready to be configured Description Allows you to give each outlet a more meaningful n...

Page 10: ...gure the Auto PING feature to ping an IP addressable device and detect when that device has stopped communicating Click on the Set button located on the top corner of each outlet to modify an individu...

Page 11: ...dary DNS Server Configure the IP and DNS server addresses for Network Adapter 2 Http Open Enable this to allow the browser using Http protocol to connect to the device Https Open Enable this to allow...

Page 12: ...ort Enter the port number for the SMTP server The default port is 25 From Address This must be a legitimate email address Subject Enter a subject line to easily identify the device Authorization Selec...

Page 13: ...d System Logs to be sent to different Network Management Stations NMS SysName Enter the name of the SNMP device SysContact Enter the name of the System Administrator SysLocation Enter the location of...

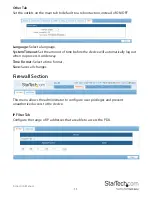
Page 14: ...the amount of time before the device will automatically log out when no process is underway Time Format Select a time format Save Saves all changes Firewall Section IP Filter Tab Configure the range...

Page 15: ...ed address range in the table Delete To delete a specific IP address range click X Save Saves all changes MAC Filter Tab Configure a specific list of MAC addresses that are able to access the PDU Enab...

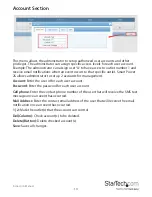
Page 16: ...Power 2S allows administrator to set up 2 accounts for management Account Enter the user id for each user account Password Enter the password for each user account Cell phone Enter the contact phone n...

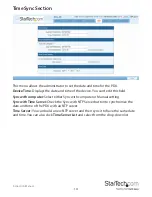
Page 17: ...t edit this field Sync with computer Select either Sync with computer or Manual setting Sync with Time Server Check the Sync with NTP Server button to synchronize the date and time of the PDU with an...

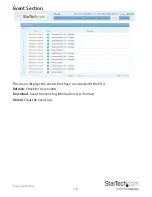
Page 18: ...struction Manual 15 Event Section This menu displays the events that have occurred with the PDU Refresh Check for new events Download Save the event log information csv format Delete Clear the event l...

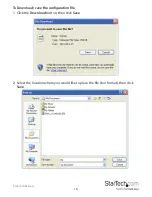
Page 19: ...Instruction Manual 16 2 Select the location where you would like to place the file bin format then click Save To Download save the configuration file 1 Click the Download button then click Save...

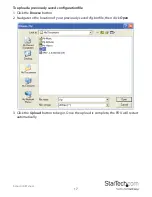
Page 20: ...viously saved configuration file 1 Click the Browse button 2 Navigate to the location of your previously saved cfg bin file then click Open 3 Click the Upload button to begin Once the upload is comple...

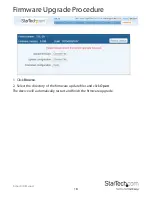
Page 21: ...Instruction Manual 18 Firmware Upgrade Procedure 1 Click Browse 2 Select the directory of the firmware update files and click Open The device will automatically restart and finish the firmware upgrade...

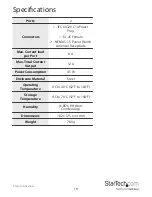
Page 22: ...5 Power North America Receptacle Max Current load per Port 8 A Max Total Current Output 12 A Power Consumption 4 5 W Enclosure Material Steel Operating Temperature 0 C to 40 C 32 F to 104 F Storage Te...

Page 23: ...returned for repair or replacement with equivalent products at our discretion The warranty covers parts and labor costs only StarTech com does not warrant its products from defects or damages arising...

Page 24: ...ts and we quickly deliver them wherever they need to go Just talk to one of our tech advisors or visit our website You ll be connected to the products you need in no time Visit www startech com for co...

Reviews: