background image

7

To view manuals, videos, drivers, downloads, technical drawings, and more visit www.startech.com/support

Installing a Hard Drive

Warning! 

Hard Drives should be handled carefully, especially 

when they’re transported. If you’re not careful with your 

drives, you may lose data as a result. Make sure that you are 

properly grounded by wearing an anti-static strap when you 

install any computer component. If an anti-static strap isn’t 

available, touch a large grounded metal surface for several 

seconds to discharge any built-up static electricity.

1. 

Using the 

Screwdriver

 (included), remove the two 

Drive 

Tray Screws

 from the 

Faceplate

.

2. 

Slide the 

Drive Tray

 out of the 

Hard Drive Enclosure

.

3. 

Place your 

Hard Drive 

next to the 

Drive Tray

 measuring the 

length of the 

Hard Drive

 to determine the 

Drive Length 

Hole

 that match the length of the 

Hard Drive

 (30, 42, 60 or 

80 mm).

4. 

Place the 

Mounting Hardware

 (Standoff) and 

Nut

 in the 

Drive Length Hole

 that matches the length of the 

Hard 

Drive

 and tighten them.

5. 

Gently slide the 

M.2 Connector

 on the

 Hard Drive

 into the 

M.2 Connector

 on the 

Hard Drive Enclosure

.

Note: 

The connector on your drive is keyed so that it only fits 

one way.

6. 

Gently press the 

Hard Drive

 down aligning it with the 

Standoff

.

7. 

Place the 

Screw

 into the 

Standoff

 and tighten the screw to 

secure the

 Hard Drive

 in place.

Summary of Contents for SM21BMU31C3

Page 1: ...l Revision 06 20 2019 User Manual For the latest information and specifications visit www startech com SM21BMU31C3 M 2 NGFF SATA Enclosure USB 3 1 10Gbps Actual product may vary from photos SKU SM21BM...

Page 2: ...etween the equipment and receiver Connect the equipment into an outlet on a circuit different from that to which the receiver is connected Consult the dealer or an experienced radio TV technician for...

Page 3: ...is les c bles d alimentation et de chargement doivent tre plac s et achemin s de fa on viter tout risque lectrique de chute ou de s curit Misure di sicurezza I terminiali dei fili elettrici non devono...

Page 4: ...support Table of Contents Compliance Statements 1 Safety Statements 2 Product Diagram 4 Front View 4 Internal View 5 Product Information 6 Package Contents 6 Requirements 6 Installing a Hard Drive 7...

Page 5: ...4 To view manuals videos drivers downloads technical drawings and more visit www startech com support Product Diagram Front View 1 Drive Tray Screw 2 USB 3 1 Micro B Port 3 Drive Tray Screw 1 2 3...

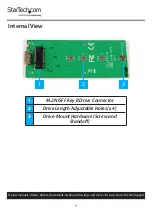
Page 6: ...s videos drivers downloads technical drawings and more visit www startech com support Internal View 1 M 2 NGFF Key B Drive Connector 2 Drive Length Adjustable Holes x 4 3 Drive Mount Hardware Screw an...

Page 7: ...2 NGFF SATA Enclosure USB 3 1 x 1 USB C to Micro B Cable x 1 Assembly Screws x 4 Set of M 2 Drive Mount Hardware x 1 Screwdriver x 1 User Manual x 1 Requirements System requirements are subject to ch...

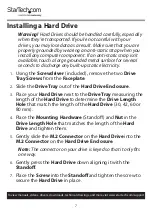
Page 8: ...included remove the two Drive Tray Screws from the Faceplate 2 Slide the Drive Tray out of the Hard Drive Enclosure 3 Place your Hard Drive next to the Drive Tray measuring the length of the Hard Dri...

Page 9: ...e Tray Screws Connecting the Hard Drive Enclosure Note The Hard Drive Enclosure does not require an exter nal power supply as it receives enough power through the USB port on the Host Computer After y...

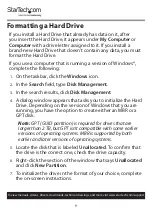
Page 10: ...ement 3 In the search results click Disk Management 4 A dialog window appears that asks you to initialize the Hard Drive Depending on the version of Windows that you are running you have the option to...

Page 11: ...dware and Eject Media icon 2 Click the storage device that you want to remove 3 When the message appears indicating that it s safe to remove the device disconnect the drive Warning If you remove the d...

Page 12: ...damages whether direct or indirect special punitive incidental consequential or otherwise loss of profits loss of business or any pecuniary loss arising out of or related to the use of the product exc...

Page 13: ...tools StarTech com is an ISO 9001 Registered manufacturer of connectivity and technology parts StarTech com was founded in 1985 and has operations in the United States Canada the United Kingdom and Ta...

Reviews: