Instruction manual
5
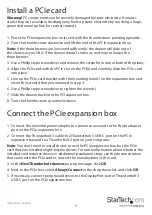
Install a PCIe card
Warning!
PC components can be severely damaged by static electricity. If an anti-
static strap isn’t available, discharge any built-up static electricity by touching a large,
grounded metal surface for several seconds.
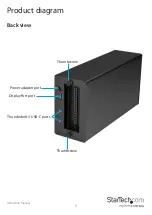
1. Place the PCIe expansion box on its end with the thumbscrews pointing upwards.
2. Turn the thumbscrews clockwise and lift the end of the PCIe expansion box.
Note:
If the thumbscrews are loosened sufficiently, the drawer will slide out of
the chassis as you lift it. If the drawer doesn’t slide out, continue to loosen the
thumbscrews.
3. Use a Phillips type screwdriver and remove the screw from one or both of the plates.
4. Align the PCIe card with the PCIe slot on the PCBA and carefully slide the PCIe card
into place.
5. Line up the PCIe card bracket with the mounting hole(s) on the expansion box and
insert the screw(s) that you removed in step 3.
6. Use a Phillips type screwdriver to tighten the screw(s).
7. Slide the drawer back into the PCI expansion box.
8. Turn the thumbscrews counterclockwise.
Connect the PCIe expansion box
1. Connect the universal power adapter to a power source and to the Power adapter
port on the PCIe expansion box.
2. Connect the Thunderbolt 3 cable to a Thunderbolt 3 USB-C port on the PCIe
expansion box and to a Thunderbolt 3 port on your computer.
Note:
You don’t need to install drivers to use the PCIe expansion box, but the PCIe
card that you installed might require drivers. For more information about whether the
installed card requires drivers or additional installation steps, see the documentation
that came with the PCIe card or contact the manufacturer of the card.
3. In the
New Thunderbolt devices
pop-up message, click
OK
.
4. Next to the PCIe box, select
Always Connect
in the drop-down list, and click
OK
.
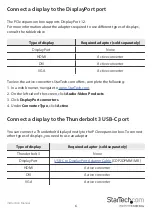
5. If necessary, connect peripheral devices to the DisplayPort port or Thunderbolt 3
USB-C port on the PCIe expansion box.


