background image

i.  The default path depicted by the Configuration 

Menu is “C:\Recordings”. This can be changed 
in the Configuration Menu setup by changing the 
“Default Directory” section. 

ii.  The file name can be entered if the “Default 

Naming Conventions” on the Configuration 
Menu setup have not been set up. 

iii.  If a file that is currently on disk is chosen and the 

“Default Suppress Overwrite File” options on the 
“Configuration Menu” is set to unchecked, a 
prompt asking if you would like to overwrite the 
file will appear.  Other wise no prompt will 
appear and the file will be over written.  If this 
option is checked there is not a second chance to 
save the original file. Use caution when selecting 
a file if this option is “Checked”.  

c.  Bottom of form 2

nd

 panel will give the properties of the 

file. (Type, HS, Bit, Stereo/Mono). 

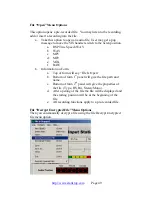
i.  The default file type depicted by the 

Configuration Menu at install is “MP3 
Frequency 8 KHZ Mono”.  Taking the Defaults 
Menu and changing the section “Default File 
Types” can change the default file types. 

d.  This file may be recorded up to any size as long as your 

storage maximum on your hard drive has not been met. 

e.  Recording time is calculated and is displayed in “Time 

Elapsed” and “Audio Length” while the file is being 
recorded. 

f. 

At the end of the recording if “Stop” is selected, the file 
will be displayed and the starting position will be at the 
end of the file, waiting to start recording again.  

g.  If the rewind button on the handset is hit once then the 

file’s last three seconds will be played and the file will be 
positioned at the end ready to continue recording.  

h.  The file may also be rewound to any position by 

continually holding down the rewind button. When the 
rewind button is released the file will start playing from 
that point automatically. 

i. 

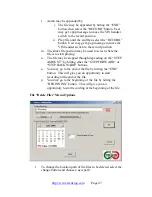
Audio may be inserted at the beginning of the file by:  

i.  Moving the manual slider to the beginning of the 

file then Selecting the “Add Comments To 
Beginning Of File” button on the console. .  
Then select the “RECORD” button on the 


http://www.startstop.com

         Page 44 

Summary of Contents for HTH-VIS-1

Page 1: ...Instruction Manual for the Start Stop Voice Input Station Digital Recording System http www startstop com Page 1...

Page 2: ...POP3 SMTP Setup 30 Advanced Email Options 31 Default Outgoing SMTP Server Options 32 Contact Setup 33 Auto Send FTP 34 TCP Communications 35 Activate Recovery Module 37 Default Overwrite File 37 Acti...

Page 3: ...ons 50 File Save AS Menu Options 51 File Recover Temporary Files Menu Options 51 File Close Menu Options 52 File Exit Menu Options 52 File Recently Opened Files Menu Options 52 APPENDIX B 53 Command L...

Page 4: ...mode Eight Console buttons provide automated One Touch functions Windows XP Windows 2000 Windows 98 SE compatible Ergonomically designed Slide Switch with Recording Insert Overwrite Modes Quick Revie...

Page 5: ...mainly on the plain As long as in and on have the same recording time Overwrite checked capabilities on a file being recorded or a pre recorded file is overwriting from current position causing any pr...

Page 6: ...onfigure EOL functionality When finished with the dictation one quick End of Letter button and optionally sends file to one or two local or remote locations Email or FTP site EOL functionality When fi...

Page 7: ...the Start Stop Screen has a pop up help window when you hover the mouse over the control Step Back Step Forward STEPAMOUNT adjustment window Software automatically records your configuration preferen...

Page 8: ...ce Station Model HTH VIS 1 QTY Description 1 Voice Input Station Base and Handset 2 User Manual and CD ROM with Software Voice Station w Andrea USB Audio Adapter Model HTH VIS 1B 1 Voice Input Station...

Page 9: ...when running under limited rights Default application path is c Program Files HTH Engineering Inc Start Stop VIS Digital Recorder 2 Insert the Start Stop Voice Input Station Digital Recorder System S...

Page 10: ...een 7 Connect the SS VIS s pink plug to the MICROPHONE input jack of your PC s sound card usually also colored pink 8 Connect the SS VIS s USB cord to your PC s USB connector 9 Connect the SS VIS s US...

Page 11: ...HOW TO USE THE SS VIS User Controls Base Unit http www startstop com Page 11...

Page 12: ...User Controls Handset http www startstop com Page 12...

Page 13: ...bargraph that lights up usually in the yellow area occasionally peaking up to the red zone If the level always stays in the green zone and doesn t slowly move upwards to the yellow red zone adjust th...

Page 14: ...Sally Jones 0003 mp3 that you want using the Default File Save Options menu explained later in the manual You can also manually name the file by instead pressing Button Number 1 on the Base Unit befo...

Page 15: ...REW followed by LISTEN and then STOP you can tap the INS OVR button to initiate Insert operation When you tap the INS OVR button the SS_VIS will announce Insert Mode if voice prompts are turned on an...

Page 16: ...een area up to the yellow and perhaps 1 or two bars occasionally into red area As shown in the picture of the main screen the first segment of the red is lit this represents a typical normal level wit...

Page 17: ...g up your voice from the SS VIS handset s microphone If you select Line in Jack then if your PC is equipped with a separate Line or Aux input sound jack you can record from another source such as a te...

Page 18: ...verwrite mode based on the file save options The Factory default is Overwrite unchecked Overwrite unchecked capabilities on a file being recorded or a pre recorded file is overwrite from current posit...

Page 19: ...http www startstop com Page 19...

Page 20: ...your preferences A blank white card overlay can be removed and written on by removing the clear plastic cover To see the default assignments of each button Top Row Buttons 1 4 Bottom Row Buttons 5 8...

Page 21: ...s ones Button 5 Toggle Audio Source Toggles the Audio Source between Microphone Handset s microphone or Line Input such as a telephone recording adapter Button 6 Send to Destination 1 In addition to s...

Page 22: ...r example your hard drive you can also send the dictation to any second destination or path you specify see section on Explanation of Optional Settings Button 8 Delete Current File Prompts you if you...

Page 23: ...d Rewind functions that would normally be handled by the handset Both handset and foot pedal can be used at once interchangeably You can change the pedal assignments to suit your preferences Powerful...

Page 24: ...selected by clicking on Defaults from the main screen then Select External Foot Pedals There are separate setup screens for USB Serial and Gameport pedals A USB Pedal assignment screen is shown COMBI...

Page 25: ...then please your scroll bars You may not ever need to change these settings but the SS VIS Defaults Screen makes it easy to customize where files are saved recording quality and file type WAV MP3 WMA...

Page 26: ...ange this directory to another folder local to your PC or any remote Network Folder by clicking Change If you want to return the default directory c Recordings just click the Restore Default Directory...

Page 27: ...WAV Truespeech WAV VOX or OGG We recommend that only advanced users change these settings Default Naming Convention for automatic file naming Files can start with any alphanumeric characters you desi...

Page 28: ...ialog box will be displayed The user will then enter a valid file name Volume Defaults You can decide based on your preferences how loud you want the playback to be Playback volume and how sensitive y...

Page 29: ...ecordings will be saved To select these optional Save locations just check the box and a dialog box will pop up to prompt you to choose the optional location s Select or create new folder then select...

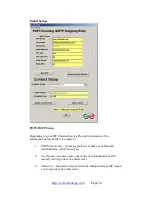
Page 30: ...tered 1 POP Server Name incoming mail server name your Network Administrator or ISP issued you 2 User Name the user name your Network Administrator or ISP issued you to sign on to the mail server 3 Pa...

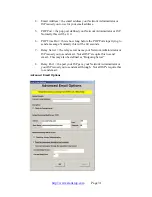
Page 31: ...rt stops trying to send a message Normally this will be 60 seconds 7 Relay Server the relay server name your Network Administrator or ISP issued you to send email Not all ISP s require this to send em...

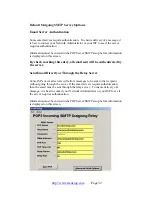
Page 32: ...all email sent will be authenticated by the server Send Email Directly or Through the Relay Server Some ISP s or email servers will allow messages to be sent to the recipient without going through the...

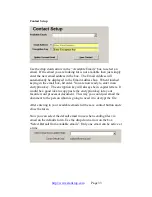
Page 33: ...ption key will always be in capital letters It would be a good idea to copy paste the encryption key into your favorite word processor document This way you could just email the document to the person...

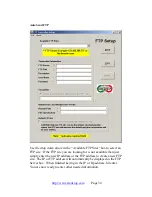
Page 34: ...for is not available then just simply enter the new IP address or the FTP address to create a new FTP site The IP or FTP address will automatically be displayed in the FTP Server box When finished ke...

Page 35: ...ord processor document This way you could just email the document to the person whom is going to need it to decrypt the file 6 FTP Upload Remote Path This is the path on the FTP Server Normally the de...

Page 36: ...If the user has Host IP software to communicate then there is the opportunity to send a file or a message to this location http www startstop com Page 36...

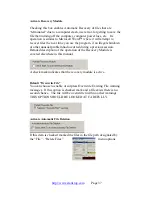
Page 37: ...ous session Detailed description of the operation of the Recovery Module is covered elsewhere in this manual A check mark indicates that the recovery module is active Default Overwrite File You can ch...

Page 38: ...me currently recording leaving any previously remaining recording if current recording does not exceed previous recording i e Before The rain in Spain falls mainly in the plain Overwriting the word in...

Page 39: ...t or overwrite depending on which option below is selected Please use this option with care Defaults Save File In Progress Options Menu Options This option turns on or off the saving of a file while a...

Page 40: ...You may enter in as many encryption keys as you like Then you can manually decrypt a file using the file Decrypt Encrypted file menu option from the main screen http www startstop com Page 40...

Page 41: ...k the button labeled second to select and decrypt the file Defaults Reset Defaults Menu Options This option is used to reset options that have been changed in a session back to the original settings V...

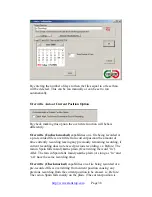
Page 42: ...d under Files from the Main Screen If you click RUN the files older than N days will be deleted If you want this action to be automatic go to Defaults File Save Options from the Main screen the check...

Page 43: ...rocess 1 When starting SS VIS is launched a blank file will automatically be crated for you and ready to start the recording process 2 The Information available on the Form a Top of form will say File...

Page 44: ...e Defaults Menu and changing the section Default File Types can change the default file types d This file may be recorded up to any size as long as your storage maximum on your hard drive has not been...

Page 45: ...ere in the middle of the file and selecting the button INSERT AUDIO AT CURRENT POSITION Then select the RECORD button on the console The user may get a pop message to move the VIS handset switch to th...

Page 46: ...le stopping the file then selecting OVERWRITE AUDIO AT CURRENT POSITION button Then select the RECORD button on the console The user may get a pop message to move the VIS handset switch to the record...

Page 47: ...o start playing n The file may be stepped through depending on the STEP AMOUNT by hitting ether the STEP FORWARD or STEP BACKWARD buttons o You may go to the end of the file by hitting the END button...

Page 48: ...restore factory default select the Restore Default Directory Button 3 The file date equal to and less than will be delete when the run button is selected To change the date http www startstop com Pag...

Page 49: ...n Form a Top of form will say File Is Open b Bottom of form 1st panel will give the file path and name c Bottom of form 2nd panel will give the properties of the file Type HS Bit Stereo Mono d After o...

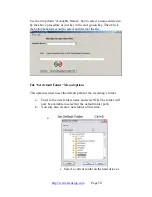
Page 50: ...d decrypt the file File Set default Folder Menu Options This option is used to set the default path for the recording s folder a Enter in the new folders name and select OK The folder will now be avai...

Page 51: ...is activated on the configuration menu This option will enable the recovery of temporary files after an abnormal shut down This screen also appears if the program has had an abnormal shut down The fi...

Page 52: ...ned Files Menu Options This option is used to open a recently opened file 1 This option will display the last 15 files that have been opened This also includes recorded files If a file is selected the...

Page 53: ...and load a New dictation in the default format example MP3 In above example after the calling application issues the command the User just clicks REC on the handset to begin a recording session that...

Page 54: ...is now available This new way of providing tech support utilizes Microsoft Net Meeting Net Meeting allows the tech support technician to view your computer remotely and allows them to assist you just...

Reviews: