26
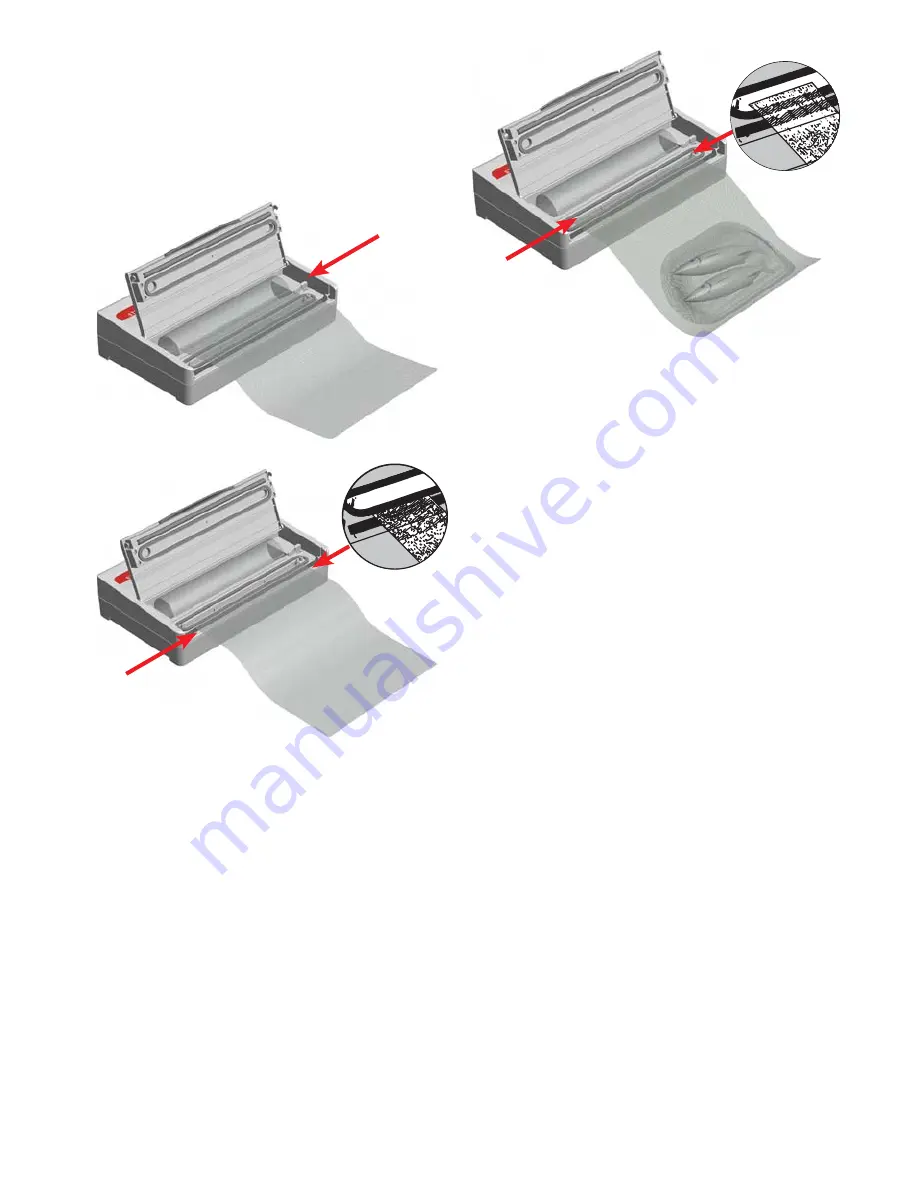
Figure 6
:
For vacuum packing place the filled bag in the
middle of the Vacuum Channel. (between black foam
seals)
c.) Place the filled bag on the work surface in front of
the machine and pull it to the middle of the Vacuum
Channel (
Figure 6
).
d.) Make sure that the bag placed on the Sealing Strip
is completely smooth (not creased).
e.) Close the machine and lock it with pressing on both
arrows on the rims of the lid until you hear a click.
Press the
Vacuum Packing of Bags
button (
Item
2 in Figure 1
).
RECOMMENDATION
: If the machine
does not start with the process right after you press
the
Vacuum Packing of Bags
button, then press
gently on the middle of the lid with your finger.
f.) The bag will be vacuum packed and sealed automa-
tically. Due to high vacuum pressure the lid stays
closed while the machine operates.
g.) After the procedure (when the indicator no longer
illuminates 100%), press on the middle of the red
handle with your thumb and lift it with your forefin-
ger (
Figure 3
). Check the vacuum packed bag. The
sealing edge should be smooth and clean.
* RECOMMENDATION
: When vacuum packing greasy
products (especially bacon) it is strongly recommended
to reverse the outside edges of bag, put the item inside
and reverse the edges back again. This keeps the area
to be sealed free of grease.
WHAT TO DO IN CASE THE MACHINE STARTS TO SUCK
LIQUID OUT OF THE BAG DURING VACUUM PACKING?
If you notice that the machine starts to suck liquid out
of food during vacuum packing,
IMMeDIATeLY
interrupt
the process of vacuum packing by pressing the
Stop
button (
Item 2 in Figure 1
). You can press the Stop
middle of the lid with your finger.
TIP:
You can seal the foil first and then cut it off with
the included cutter. Set the foil roll into the space
provided for it (
Item 10 in Figure 1
). Pull the foil over
the Sealing Strip (
Item 7 in Figure 1
) and lower the
lid. Lock with pressing on the marked arrows on the
lid and then on the
Seal
button.
Figure 4:
Cut the roll with incorporated cutter.
Figure 5:
Place the roll on the Sealing Strip and extend
it to the Black Gasket to seal.
f.) When the indicator no longer illuminates 100%, lift
the lid. Press on the middle of the red handle with
your thumb and lift it with your forefinger (
Figure
3
). Check the sealing edge on the bag. It should be
smooth and even across its width and not creased.
2.2.3.
WheN The BAG IS
MADE, PLACE FOOD
IN IT AND VACUUM PACK
The bag should always be
at least 5 cm longer
than the
space occupied by the item to be vacuum packed.
a.) Place the items to be vacuum packaged in the bag.
b.) Make sure that inner surfaces (for the sealing edge)
are clean, dry and free from food materials.*
Summary of Contents for sv1000
Page 2: ......
Page 3: ...STATUS SV1000 APARAT ZA VAKUUMIRANJE IN VARJENJE NAVODILA ZA UPORABO slo ...
Page 19: ...STATUS SV1000 VACUM PACKING MACHINE USER MANUAL EN ...
Page 35: ......


