background image

7

ASSEMBLY / ADJUSTMENT OF THE ABRASIVE SUPPORT 

If it is not assembled yet, install it according to the “Maintenance” chapter. 
If it is already assembled, check that it is taut without any folds. 
Check that it is positioned exactly in the centre of the plate (pos.6) and that any holes 
present correspond exactly to the suction holes on the plate.  

DUST COLLECTION BOX ASSEMBLY (pos.5) 

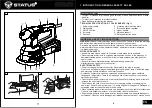
The coupling is of the pressure. Carefully observe fig.2 and install it.

STARTING AND STOPPING


IMPORTANT!


Before starting the electrical tool it is compulsory to wear 

protection goggles, headphones and a dust repelling mask (not provided). 
IMPORTANT! Make sure nobody is approaching the working area while the tool 
is running. 


Starting 


 Plug the tool into the electric power supply. 

 Grip the main handle firmly (pos.2); for models with a double handle, also grip the 

  upper handle (pos.8). 

 To start up move the switch button (pos.3) to “ON” “I”.   

Stopping


 To stop move the switch button to “OFF” “O”. 

We recommend repeating these operations several times before starting work, 
in order to familiarise yourself with the controls as far as possible. If you notice any 
working defects, switch off the electrical tool and consult the chapter “Problems, 
causes and solutions”. 
When not using the tool, turn it off and disconnect the plug from the socket.

OPERATIONAL TIPS


After reading the previous chapters carefully, apply these tips scrupulously to 
obtain maximum performance. 
Proceed calmly so as to become familiar with all the controls; after having gained 
sufficient experience you will be able to make full use of its potential. 

SPEED ADJUSTMENT

 (pos.7, when fitted) 

Turn the grain roller in order to increase or decrease the speed. 
The speed is to be adjusted based on the type of process, material and grain of 
the abrasive support; do some tests. 

ABRASIVE SUPPORT 

Use the suitable abrasive support for the sanding operation 

to be carried out. The choice depends on the material to be processed and the required 
finishing degree; there are different types on the market marked with a number defining 
the surface “grain”, printed on the back. Ask your retailer to give you the best advice 
on this.  Our company produces a wide range of abrasive supports suitable for the 
various uses.

 Roughing out with rough finish                                  Grain - Coarse (40- 60)
 Sanding with medium finish                                  Grain - Medium (80-100-120)
 Sanding with fine finish                                         Grain - Fine (from 150 to 400)
 Polishing                                                              Grain - Very fine (600 and over)

SANDING OPERATION


 Before working on important objects (e.g. furniture, vehicles, etc.) do a sanding test to 

  ensure you have installed the right abrasive support. 

 If the item is small and light always fasten it with a vice while working; if it is not faste-

  ned well, the action of the machine could throw it against you. 

 Do not work on damp or wet items or with wet abrasive supports. - Initially use an 

  abrasive support with a coarse grain (e.g. 40), then finish processed surfaces with a 
  finer grain abrasive support (e.g. 120 or higher). 

 Make sure the abrasive support is correctly assembled and perfectly flat against the 

  orbital plate. 

 Always use the sander connected to a vacuum system with a filter for dust or to the 

  bag provided. 

 Only start the sander once you have a firm grip on the handle(s). Rest it on the item 

  and operate it with circular movements exerting light pressure. Do not insist on sanding 
  one point keeping the machine still. 

 Excessive pressure with the hand(s) on the sander does not improve its performance 

  and causes a risk of the motor overheating with subsequent breakdowns not covered 
  by the warranty, or can cause fire due to the high temperatures produced on the item. 

 Do not cover the sander’s ventilation slots with your hand(s). 

 Replace the abrasive support as soon as it is worn or deteriorated; do not let the 

  sander work under excessive loads, avoid damaging the backing plate and you will 
  obtain a better result with less effort and time.


IMPORTANT! Before any inspection, adjustment or maintenance, always discon-

 nect the tool from the power supply by unplugging it. 
 IMPORTANT! Do not tamper or attempt to repair the electrical tool.


 The working life and costs also depend on constant and meticulous maintenance. 
 Take good care of your electrical tool and clean it regularly. In this way its efficiency will 
 be ensured and its lifespan extended. 


6

   3. USE

EN


When sanding metal, sparks are generated; do not use dustbox/vacuum cleaner 

  and keep other persons and combustible material from work area.


Do not touch the moving sanding sheet.


Do not continue to use worn, torn or heavily clogged sanding sheets.


Wear protective gloves, safety glasses, close-fitting clothes and hair protection 

  (for long hair).


Always disconnect plug from power source before making any adjustment or 

  changing any accessory.

WHEN CONNECTING NEW 3-PIN PLUG (U.K. ONLY):


Do not connect the blue (= neutral) or brown (= live) wire in the cord of this tool to 

  the earth terminal of the plug.

USE

EN

4. MAINTENANCE / SERVICE 

MAINTENANCE / SERVICE

Summary of Contents for OS300/150

Page 1: ...R LEVIGATRICE ROTORBITALE ЕКСЦЕНТЪР ШЛАЙФ ОРБИТАЛЬНАЯ ВИБРОШЛИФМАШИНА ENG DE IT BG RU www status tools com Original instructions Original instructions Istruzioni originali Оригинална инструкция за използване Оригинальная инструкция по эксплуатации ...

Page 2: ... create sparks which may ignite the dust or fumes Keep children and bystanders away while operating a power tool Distractions can cause you to lose control ELECTRICAL SAFETY Power tool plugs must match the outlet Never modify the plug in any way Do not use any adapter plugs with earthed grounded power tools Unmodifed plugs and matching outlets will reduce risk of electric shock Avoid body contact ...

Page 3: ...roperly maintained cutting tools with sharp cutting edges are less likely to bind and are easier to control 2 SAFETY INSTRUCTIONS FOR SANDERS Use the power tool accessories and tool bits etc in accordance with these instruc tions taking into account the working conditions and the work to be performed SERVICE Have your power tool serviced by a qualified repair person using only identical replacement...

Page 4: ...om 150 to 400 Polishing Grain Very fine 600 and over SANDING OPERATION Before working on important objects e g furniture vehicles etc do a sanding test to ensure you have installed the right abrasive support If the item is small and light always fasten it with a vice while working if it is not faste ned well the action of the machine could throw it against you Do not work on damp or wet items or wi...

Page 5: ...hat the belt is taut and if necessary adjust the centring using the knob For all At the end carry out a trial run ENVIRONMENT Do not dispose of electric tools accessories and packaging together with household waste material only for EU countries in observance of European Directive 2012 19 EC on waste of electric and electronic equipment and its implementation in accordance with national law electr...

Page 6: ...r Körper geerdet ist Halten Sie Elektrowerkzeuge von Regen oder Nässe fern Das Eindringen von Wasser in ein Elektrogerät erhöht das Risiko eines elektrischen Schlages Zweckentfremden Sie das Kabel nicht um das Elektrowerkzeug zu tragen auf zuhängen oder um den Stecker aus der Steckdose zu ziehen Halten Sie das Kabel fern von Hitze Öl scharfen Kanten oder sich bewegenden Geräteteilen Beschädigte od...

Page 7: ...rzeugt während des Betriebs ein elektromag netisches Feld Dieses Feld kann unter bestimmten Umständen aktive oder pas sive medizinische Implantate beeinträchtigen 3 WEITERFÜHRENDE SICHERHEITSHINWEISE DE Tragen Sie geeignete Kleidung Tragen Sie keine weite Kleidung oder Schmuck Halten Sie Haare Kleidung und Handschuhe fern von sich bewegenden Teilen Lockere Kleidung Schmuck oder lange Haare können ...

Page 8: ... ernsthaften oder tödlichen Verletzungen zu verringern emp fehlen wir Personen mit medizinischen Implantaten ihren Arzt und den Hersteller des medizinischen Implantats zu konsultieren bevor die Maschine bedient wird MONTAGE WARNUNG Ziehen Sie vor allen Arbeiten an dem Gerät den Netzstecker Gefahr durch elektrischen Schlag SCHLEIFBLATT ANBRINGEN ENTFERNEN Säubern Sie die Schleifplatte bevor Sie ein...

Page 9: ...nglichen Stellen Exzenterschleifplatte Zum Feinschleifen von Flächen und Bearbeitung von Innenrundungen REINIGUNG WARTUNG WARNUNG Ziehen Sie vor jeglicher Einstellung Instandhaltung oder Instandsetzung den Netzstecker WARNUNG Lassen Sie Instandsetzungsarbeiten und Wartungsarbeiten die nicht in dieser Anleitung beschrieben sind von unserem Service Center durchführen Verwenden Sie nur Originalteile ...

Page 10: ...lvere può ridurre lo svilupparsi di situazioni pericolose dovute alla polvere 1 INTRODUZIONE ISTRUZIONI GENERALI DI SICUREZZA MANEGGIO ED IMPIEGO ACCURATO DI UTENSILI ELETTRICI Non sovraccaricare l utensile Impiegare l utensile elettrico adatto per sbrigare il lavoro Utilizzando l utensile elettrico adatto si potrà lavorare meglio e con maggior sicurezza nell ambito della gamma di potenza indicata...

Page 11: ...sare l utensile al termine di un lavoro estrarre sempre la spina dalla presa della corrente e o estrarre la batteria ricaricabile Tale precauzione eviterà che l utensile possa essere messo in funzione inavvertitamente Custodire gli utensili elettrici non utilizzati al di fuori della portata dei bambini Non fare usare l utensile a persone che non sono abituate ad usarlo o che non abbiano letto le p...

Page 12: ...lettrico e consultate il capitolo Problemi cause e rimedi Quando non lavorate spegnete e staccate la spina dalla presa Dopo aver letto attentamente i capitoli precedenti seguite scrupolosamente questi consigli che vi permetteranno di ottenere il massimo delle prestazioni Procedete con calma in modo da prendere familiarità con tutti i comandi solo dopo aver acquisito una buona esperienza riuscirete...

Page 13: ...tensionamento estrarre il nastro pulire inserire il nastro nuovo facendo attenzione a rispettare il senso di rotazione confrontando la freccia stampigliata sulla macchina con quella del nastro chiudere la leva di tensionamento verificare che il nastro sia ben teso eventualmente regolare la centratura sui rulli azionando la manopola Per tutti al termine effettuare una prova di funzionamento a vuoto I...

Page 14: ...крито Използването на удължител предназначен за работа на открито намалява риска от възникване на токов удар Ако се налага използването на електроинструмента във влажна среда използвайте предпазен прекъсвач за утечни токове Използването на предпазен прекъсвач за утечни токове намалява опасността от възникване на токов удар 3 БЕЗОПАСЕН НАЧИН НА РАБОТА Бъдете концентрирани следете внимателно действи...

Page 15: ...нти в обработвания детайл отстpанете ги пpеди да започнете pабота Винаги отвеждайте захранващият кабел далеч от движещите се звена на електроинструмента пpexвъpлeтe кабeла отзад далeч от електроинструмента Обезопасете работния материал материал затегнат в затягащ инструмент или в менгеме е поустойчив отколкото ако се държи в ръка Пpеди да пpибеpете инструмента изключете мотоpа и се увеpете че всич...

Page 16: ...аметър на накрайника за отвеждане на прах е 34 5 мм Модел 0S300 150 Входна мощност W 450 Напрежение V Hz 220 240 50 Брой обороти при празен ход Мин 6000 12000 Тегло съгласно ЕРТА Процедури 01 2003 кг 1 75 Клас сигурност ІІ Информации за шума и вибрациите Внимание Нивото на вибрациите посочено в настоящите инструкции е измерено следвайки процедура за измерване съответна на норма EN 60745 и може да ...

Page 17: ...л Христо Ботев 28 ет 7 BG BG ОБЩИЕ ПРАВИЛА БЕЗОПАСНОСТИ ВНИМАНИЕ Внимательно изучите инструкцию Несоблюдение изложенных в ней правил может стать причиной поражения электрическим током или получения травмы Сохраните эту инструкцию 1 БЕЗОПАСНОСТЬ РАБОЧЕГО МЕСТА Соблюдайте чистоту и поддерживайте надлежащую освещенность на рабочем месте Беспорядок на рабочем месте или его плохое освещение могут приве...

Page 18: ... 3 ЛИЧНАЯ БЕЗОПАСНОСТЬ Будьте внимательны следите за тем что Вы делаете и выполняйте работу обдуманно Не пользуйтесь электроинструментом если Вы устали или находитесь под воздействием транквилизаторов алкоголя или медицинских препаратов Секундная потеря концентрации в работе с электроинструментом может привести к серьезным травмам Используйте средства индивидуальной защиты Защитные очки обязательн...

Page 19: ...тверстия на корпусе Система удаления пыли Данное изделие укомплектовано пластиковым контейнером для сбора пыли 5 Контейнер устанавливается на патрубок в задней части изделия При установке на место контейнера пылесборника выступы на наружном диаметре патрубка должны совпадать с пазами на контейнере 37 RU 3 РАБОТА Обязательно убедитесь что напpяжение питания соответствует напpяжению указанному на фи...

Page 20: ...36060 Pianezze VI ITALY Изделие соответствует требованиям следующих технических регламентов Таможенного Союза ТР ТС 004 2011 ТР ТС 010 2011 ТР ТС 020 2011 Информация о сертификате находится на сайте www status tools com Представитель в России ООО ИНСТАТУС 119590 г Москва ул Мосфильмовская д 52 корп 1 Cделано в КНР Карон Джиасинто Директор STATUS ITALIA S R L 6 КОМПЛЕКТАЦИЯ Шлифмашина OS300 150 кон...

Reviews: