9
Operation
Set the tool base on the workpiece to be cut without the bit making any contact. Then
turn the tool on and wait until the bit attains full speed. Move the tool forward over the
workpiece surface, keeping the tool base flush and advancing smoothly until the cutting is
complete.
When doing edge cutting, the workpiece surface should be on the left side of the bit in the
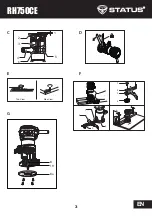
feed direction (Fig. E).
Moving the tool forward too fast may cause a poor quality of cut, or damage to the bit or
motor. Moving the tool forward too slowly may burn and mar the cut. The proper feed rate
will depend on the bit size, the kind of workpiece and depth of cut. Before beginning the
cut on the actual workpiece, it is advisable to make a sample cut on a piece of scrap lumber.
This will show exactly how the cut will look as well as enable you to check dimensions.
When using the the straight trimmer guide, be sure to keep it on the right side in the feed
direction. This will help to keep it flush with the side of the workpiece.
Straight guide (Fig. F)
The straight guide is effectively used for straight cuts when chamfering or grooving.
Attach the guide plate to the straight guide with the bolt and the tighten nut.
•
Attach the straight guide with the clamp screw (A). Loosen the tighten nut on the
straight guide and adjust the distance between the bit and the straight guide. At the
desired distance, tighten the tighten nut securely.
•
When cutting, move the tool with the straight guide flush with the side of the
workpiece. If the distance (a) between the side of the workpiece and the cutting
position is too wide for the straight guide, or if the side of the workpiece is not straight,
the straight guide cannot be used. In this case, firmly clamp a straight board to the
workpiece and use it as a guide against the trimmer base. Feed the tool in the direction
of the arrow.
Using the curved trim guide
The curved trimmer guide is designed to help finely cut on the decorative surface of thin
boards for furniture; or to process trimming and bevelling work on the plywood. It also
provides a handy work for curve cutting.
•
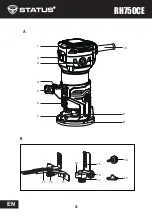
Fix the curved trim guide (15) on the base assembly by using fixing knob(18). (fig B)
•
Set the guide height (Adjusting cutting depth).
•
Loosen the lock knob(4) to move the curved trim guide(15) until the distance between
the bit and roller(14) is approxoximate 19mm to 25mm.
•
Tighten the lock knob(4) to fix the position of the curved trim guide(15).
•
Loosen the depth adjustment lock knob(17) and rotate the depth adjustment knob(16)
to set the curve angle and depth. When done retighten the depth adjustment lock
knob(17).
•
Slide the trimmer along the edge of a workpiece to start trimming.
EN
OPERATION
Summary of Contents for RH750CE
Page 2: ...2 RH750CE EN 11 12 13 18 19 14 15 16 17 2 1 3 5 4 9 8 10 7 6 A B ...
Page 3: ...3 RH750CE EN 1 2 3 4 5 6 C E F G D Top View Side View 1 2 3 4 1 2 3 4 a 19 8 8a ...
Page 38: ...38 ...
Page 39: ...39 ...
Page 40: ......


