


20 / 48
48
A
A
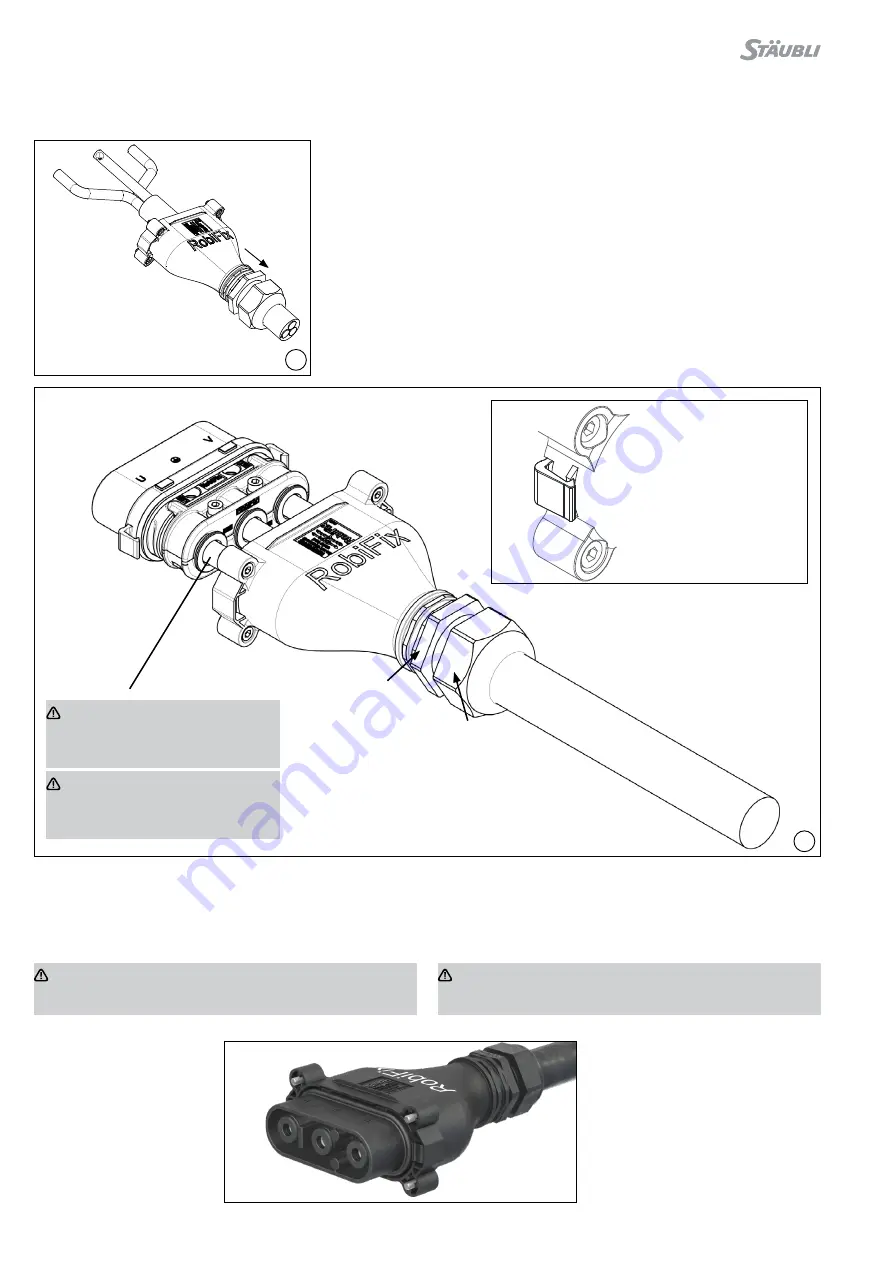
20 N m
17 N m
49
(ill. 48)
■
Kabelverschraubung öffnen und
FZEM-Rückteil mit Kabelverschrau-
bung auf Leitung auffädeln�
(ill. 48)
■
Open the cable gland and pull on the
FZEM housing back shell over the
cable�
■
Buchsen BP8/xx auf jeder Leitung
crimpen (ill� 11, Seite 7)�
■
Leitung mit angecrimptem Kontakt
von Hand hinten in die Isolation stos-
sen bis zum spürbaren Einrasten am
zweiten Rastpunkt (E2) (siehe Kon-
trollmaß, ill� 13, Seite 8)�
■
Crimp the sockets BP8/xx on each
conductor (ill� 11, page 7)�
■
By hand press cable with crimped-on
contact part into the insulation from
the back until it perceptibly engages
into place to the second detent (E2)
(see control dimension, ill� 13, page 8)�
(ill. 49)
■
Vorderteil und Rückteil bis zum spürbaren Verrasten zusam-
menschieben
A
�
■
Nach dem Einrasten Kabelverschraubung mit Gabelschlüssel
SW53 (18�0350/18�0351) anziehen�
(ill. 49)
■
Push the front and back parts together until they engage
A
�
■
After locking, tighten cable gland with an open-end wrench
53 mm (18�0350/18�0351)�
Wichtig:
Manche Leitungen zeigen Setzverhalten, daher ca� 6 Wochen
nach Erstmontage die Hutmutter nachziehen�
Important:
For some cable types, tighten cap nut again approx� 6 weeks
after initial installation�
Important:
Note possible necessary diameter
adjustment with rubber rings, see
page 6�
Wichtig:
Mögliche notwendige Durchmes-
seranpassung mit Gummiringen
beachten, siehe Seite 6�
Schnitt im verrasteten Zustand
Section in mated condition


