ENGLISH
13
13
This manual is consistent with the manufacture date of the
purchased tool, information you will find on the technical
data label on the tool. Find user guide updates in our
website:
www.grupostayer.com
Safety instructions
Always properly fix the workpiece with a
clamp.
Never hold the workpiece with your
hands or make cuts without the workpiece
fixed.
When tightening the clamp (clockwise)
make sure it is on the right position.
Otherwise the
workpiece may not be properly fixed.
Never adjust, release or tighten the clamp while the
tool is functioning.
Keep your hands and body away from the cutting
zone and from the disc. Don’t try to reach for objects
around, under or through the saw.
Check the blade protector after every use. Don’t
use the tool if the protector doesn’t moove freely or
doesn’t close instantly.
Never fix the blade protector in an open position.
Check that the carter is working as intended. If it’s not
it must be checked before using the tool.
The carter
may malfunction if it has damaged components or due to
debris accumulation.
Do not use abrasive discs with this tool. This tool
is specifically designed to be exclusively used with
metal cutting widia discs.
Always use shrapened discs with the right size. No
fitting blades will spin excentrically, loosing disc
control.
Never use clamps or tools that have not been supplied
by the manufacturer or that are damaged.The included
accessories have been specially designed for the best
performance and safety with this chop saw.
Always check the blade maximum speed and make
sure it exceeds the maximum tool speed.
Don’t use damaged or blunt discs.
There may be recoil.
Be careful to not bend or force the disc.
The blade may
be damaged.
Keep the tool on an isolated surface where it can be
held or fixed avoiding contact with cables or hidden
objects.
Cable contact may cause an electrical surge
through the tool damaging the user.
Recoil
If the disc is bent or misaligned during the cutting process,
the teeth may excesively bite the cutting material causing
the disc to jump or to eject the cutting material at high
speeds, injuring the user. Recoil is the outcome of tool
missusage or a wrong working procedure. This can be
avoided following this guidelines:
Keep the chop saw firmly held and position your arm
and body in order to be able to resist recoil forces.
Recoil forces can be contained by the user if this guidelines
are followed.
When the disc gets stuck or the cut is interrupted ,
release the trigger and hold the chop saw still until
the disc stops completely
. Never try to remoive the disc
while it’s still spinning as there may be recoil. Check the
tool and the circumstances that may have caused the
situation.
When restarting a cutting task that was interrupted,
center the disc in the same cut and check that it
doesn’t get stuck on the cutting material.
If the disc
stops, it may pass over the surface or cause recoil while
the saw gets restarted.
Propperly fix and hold big workpieces to reduce recoil
risks.
Big workpieces tend to fall under their own weight.
Supports must be placed under the workpiece on both
sides close to the cutting line and the worpiece edges.
Never use damaged discs.
Damaged discs may cause
excesive friction, causing recoil.
The disc spindle must be propperly tightened and
fixed when making cuts.
If the nut loosens during the
cut, it may cause recoil and the workpiece ejection at
great speed.
Only use suitable metal cutting widia discs.
Propperly tighten all the fixing nuts and bolts to
secure the disc before cutting.
Propperly fix the workpiece.
The piece must be firmly
and tightly fixed to avoid movements.
Allow the disc to completely stop before changing it
or changing the cutting angle.
Check the disc surface
as well as both sides and teeth
to remove ani debris there may be stuck.
Check that de disc
is not defective or broken before
starting each cut. Replace broken discs with new ones
immediately.
Never switch on the tool
with the workpiece in contact
with the disc.
Allow the motor to reach its maximum speed before
starting to cut.
Summary of Contents for TD355B
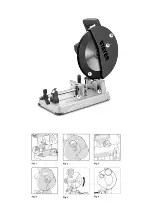
Page 2: ...4 5 1 6 2 3 7...
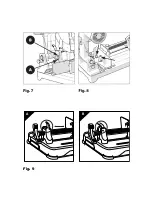
Page 3: ...A B Fig 9...


