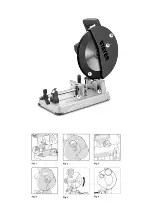
background image

ENGLISH

16

16

Tool usage

NOTE

: Remember that despite being really similar to 

an abrasive chop saw, this tool requires less force and 

pressure to be operated.

Make sure the workpiece is fixed and tightened according 

to the users guide. The workpiece must be completely 

fixed and straight before making any cut. Make sure the 

workpiece has the proper support to avoid accidents.
Check the lower guards to make sure they work as 

intended. Press the trigger and allow the motor to reach 

its maximum speed. Press the carter lever with your thum 

and slowly lower the tool head until the disc touches the 

workpiece and starts cutting. remember to stay sideways 

towards the saw. Always be careful. As you cut do not make 

excessive force, there is no need to force the cut. Allow 

the saw to complete the cut at its own speed according 

to the material to be cut. Increase pressure over thicker 

materials. Do not apply pressure over thin materials.

Warning: If the saw blade gets stuck while cutting 

release immediately the trigger to swithc the tool off.

After completing the cut, rise the cutting head until the disc  

is no longer in contact with anything before releasing the 

trigger. Make sure the tool has completely stopped before 

removing the workpiece or making any further actions.

Maintenance

use compressed air to blow the tool holes periodically. 

Clean every plastic component with a damp cloth. NEVER 

use chemicals to clean the plastic pieces, they may get 

damaged. Use protection glasses while using compressed 

air. We recommend taking the tool to a technical support 

once a year for a full clean & check.

Maintenance and service

Before any work on the machine itself, pull the 

mains plug.

Clean the ventilation slots of your power tool 

regularly with a soft brush.

If the machine should fail despite the care taken in 

manufacturing and testing procedures, repair should be 

carried out by an after-sales service centre for 

STAYER


power tools.

Repair service

Our after-sales service responds to your questions 

concerning maintenance and repair of your product as 

well as spare parts. Exploded views and information on 

spare parts can also be found under: 

info@grupostayer.com

Our customer consultants answer your questions 

concerning best buy, application and adjustment of 

products and accessories.

Warranty

Warranty card

Included in the documentation that accompanies this 

equipment, you should find the warranty card. You should

fill  out  the  card  completely  and  return  to  vendor  with  a 

copy of purchasing receipt or invoice and you should 

receive a receipt.

Note: 

If  you  cannot  find  the  warranty  card  within  the 

documentation, you must ask for it through your supplier.

The warranty is limited only to manufacturing defects and

expire if pieces have been removed or manipulated or 

repaired other than the manufacturer.

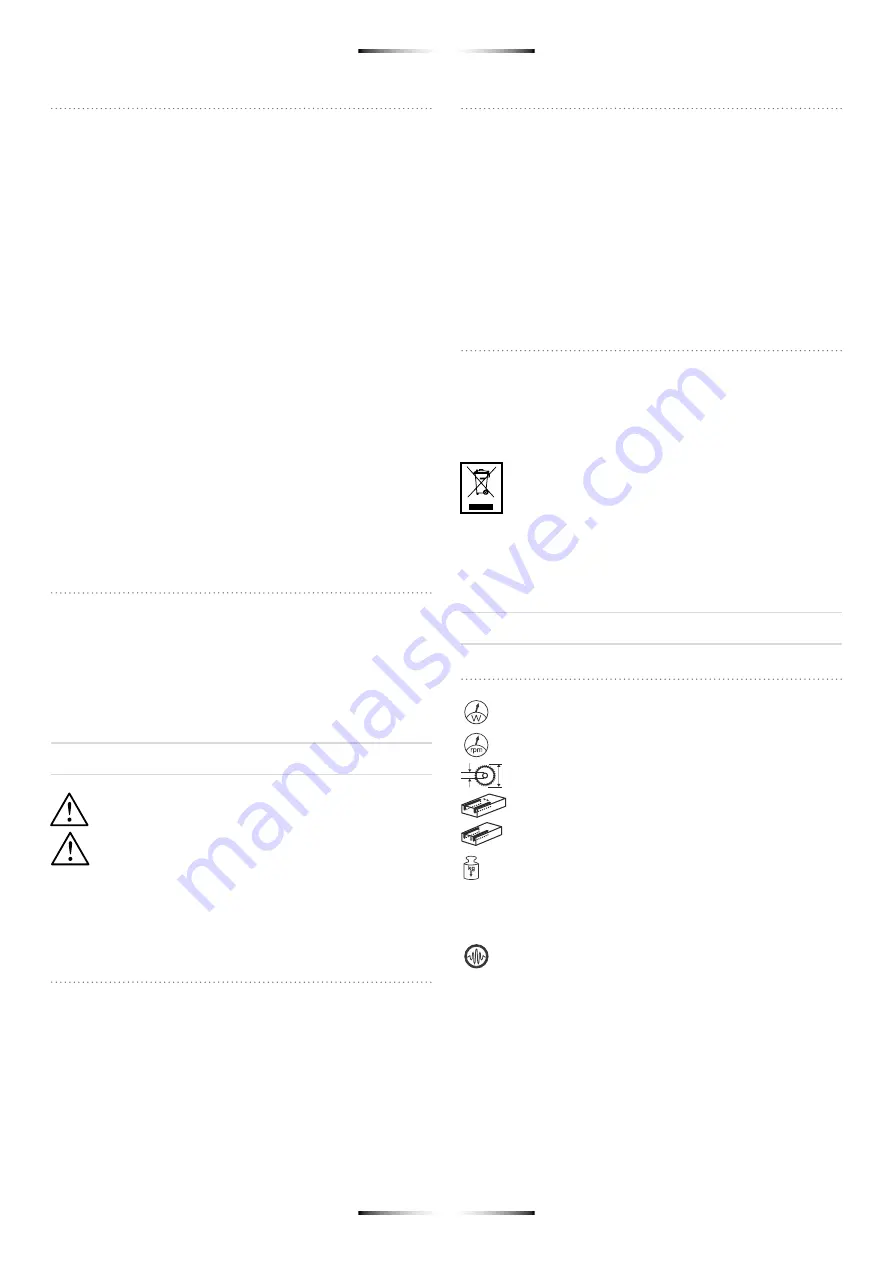
Disposal and recycling

The machine, accessories and packaging should be sor-

ted for environmental-friendly recycling.

Only for EC countries:

Do not dispose of power tools into household waste!

According the European Guideline 2012/19/EC for 

Waste Electrical and Electronic Equipment and its 

implementation into national right, power tools that 

are no longer usable must be collected separately 

and disposed of in an environmentally correct 

manner.

Subject to change without notice.

6. Regulations

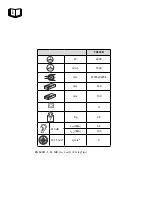
6.1 Technical features

Ø

Ø

x

y

  = Power


= No load speed


= Disc size


= Cutting width


= Cutting depth


= Mass

L

WA


= Sound power level

L

PA


= Sound pressure level


= Vibration

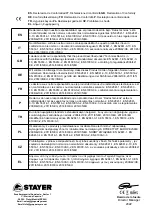
The values given are valid for nominal voltages [U] 

230/240  V  ~  50/60  Hz  -  110/120  V  ~  60Hz.  For  lower 

voltage  and  models  for  specific  countries,  these  values 

can vary. Please observe the article number on the type 

plate of your machine. The trade names of the individual 

machines may vary.

Summary of Contents for TD355B

Page 1: ...ostayer com ES GB Manual de instrucciones Operating instructions rea Empresarial Andaluc a Sector 1 C Sierra de Cazorla 7 28320 Pinto Madrid SPAIN Email sales grupostayer com Email info grupostayer co...

Page 2: ...4 5 1 6 2 3 7...

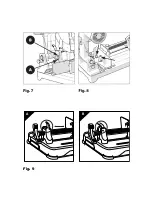
Page 3: ...A B Fig 9...

Page 4: ...TD355B W 2200 min 1 1500 mm 355x3x25 4 mm 180 mm 130 II Kg 28 K 3 dB LpA dB A 82 LWA dB A 105 K 1 5 m s2 ah m s2 9 x y EN 62841 1 K 3dB LpA LWA K 2 m sg2 ah...

Page 5: ...U P Declaro sob nossa responsabilidade que o produto des crito em Dados t cnicos est em conformidade com as seguintes normas ou documentos normativos EN 62841 1 EN 62841 3 10 EN 55014 1 EN 55014 2 EN...

Page 6: ...patos de seguridad con suela antideslizante casco o protectores auditivos c Evite una puesta en marcha fortuita del aparato Aseg rese de que la herramienta el ctrica est apa gada antes de conectarla a...

Page 7: ...anejar y operar con la misma y pueda entrar en contacto con cables ocultos o con su mismo cable El contacto con un cable puede exponer las partes met licas de la herramienta y crear una descarga al op...

Page 8: ...ue lo haya consultado con su proveedor y ste le haya aconsejado Las virutas de metal a menudo suelen estar muy afiladas y calientes Nunca las toque con la mano L mpielas con un im n o con cualquier ot...

Page 9: ...centro de la gu a La gu a gira para crear cortes hasta 45 grados y el tornillo gira libremente para alcanzar el ngulo de la gu a Ajustar el ngulo de corte Nota la mordaza trasera puede girarse 45 La...

Page 10: ...ondiente enganche de la cabeza del motor Protectores inferiores de la sierra Estos protectores son un dispositivo muy importante para su protecci n Cadavezqueutilicelasierraaseg resequelosprotectores...

Page 11: ...i n ac stica Vibraci n Estos datos son v lidos para tensiones nominales de U 230 240 V 50 60 Hz 110 120 V 60 Hz Los valores pueden variar si la tensi n fuese inferior y en las ejecuciones espec ficas...

Page 12: ...ck picking up or carrying the tool Carrying power tools with your finger on the switch or energising power tools that have the switch on invites accidents d Remove any adjusting key or wrench before t...

Page 13: ...ent or misaligned during the cutting process the teeth may excesively bite the cutting material causing the disc to jump or to eject the cutting material at high speeds injuring the user Recoil is the...

Page 14: ...RELEASE the CUTTING HEAD The cutting head will automatically lift up once the lower lock is released Releasing the head from the lower lock Carefully press down the cutting head Remove the lock from...

Page 15: ...workpiece is properly fixed before working Cutting head course The cutting depth is set from factory and may not need further adjustments If the tool is disassembled or for any other reason the cutti...

Page 16: ...hine should fail despite the care taken in manufacturing and testing procedures repair should be carried out by an after sales service centre for STAYER power tools Repair service Our after sales serv...

Page 17: ...n emission level represents the main applications of the tool However if the tool is used for different applications with different accessories or poorly maintained the vibration emission may differ T...

Page 18: ...ucto que haya sufrido alg n desgaste en alguna de sus piezas por el uso normal de la herramienta siendo esta pieza un consumible accesorios o elemento sujeto al desgaste que deber a de cambiarse por s...

Page 19: ...onents consumables accessories or components subject to wear that must be replaced by the owner g Products that show any kind of misuse or application which deviates from its original intended uses li...

Page 20: ...www grupostayer com rea Empresarial Andaluc a Sector 1 C Sierra de Cazorla 7 28320 Pinto Madrid SPAIN Email sales grupostayer com Email info grupostayer com...

Reviews: