background image

11 | 

P a g e


REV 03/2012 

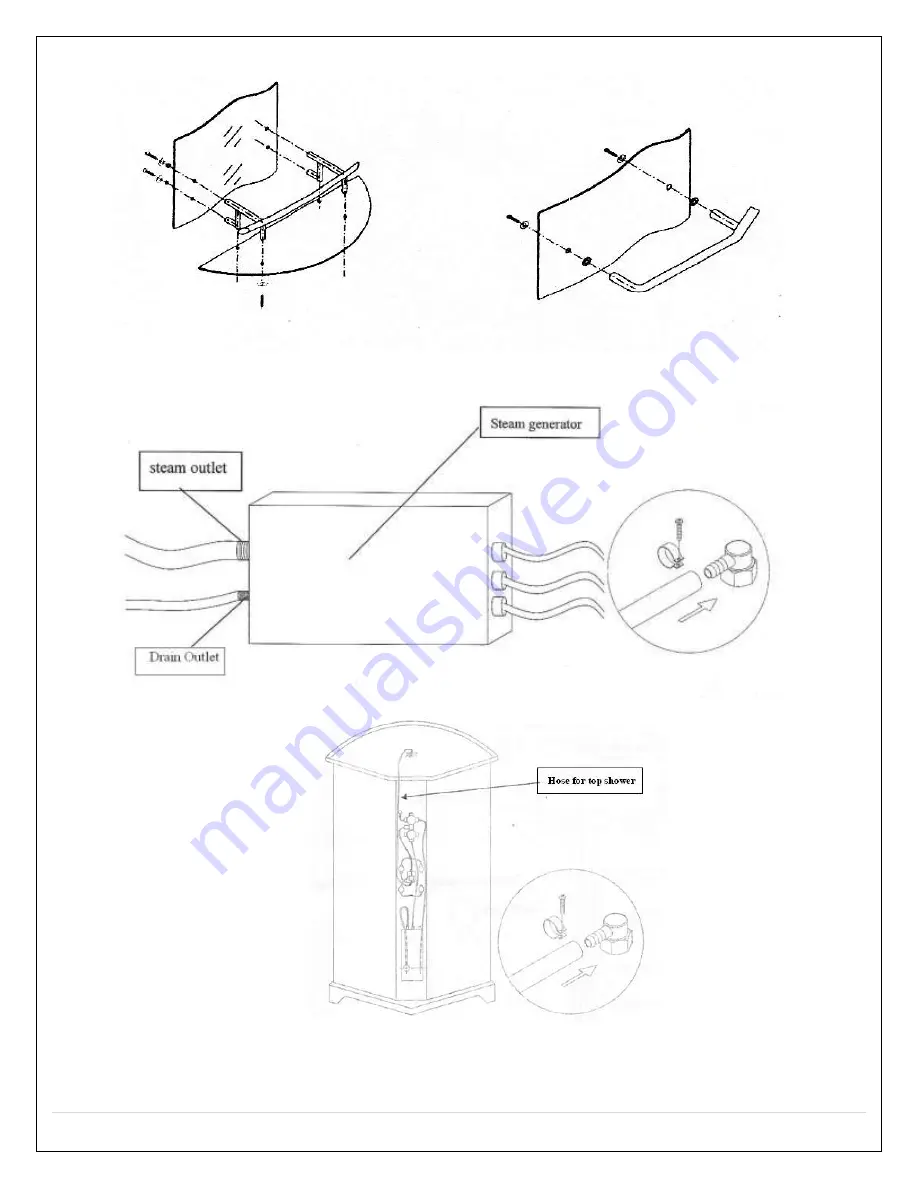
7.


Attach shelf and rail as shown.  


8.


Connect the pipes in the package with the drain outlet on the steam generator and 
the drain exit; fasten it with the M4X16 round head screw; as shown.


9.


Pull the top shower pipe through hole on the top cover.  Connect to the shower head.   


Summary of Contents for M-A021

Page 1: ...1 P a g e REV 03 2012 Installation Operation Manual for M A021...

Page 2: ...uterized Steam Room we hope that our exquisite design will meet your life s needs it s our honor to promote your health and longevity with comfortable enjoyment In order to operate and use the product...

Page 3: ...Note The flexible drain hose included with this unit is for installation into a floor drain only Substituting the existing drain setup for a setup of the installers choice will not void the warranty o...

Page 4: ...caulking Note All shower bases need to be leveled in its final resting position mark the placement then pull base out and begin assembly It is advised to have base onsite before preparing drain locat...

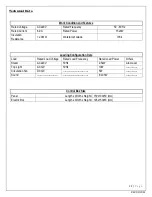
Page 5: ...Frequency Length Width Height 220V 2 5kW 50 60Hz 47 33 87 Drain Disclosure NOTE a flexible drain hose is provided with the unit We strongly recommend taking off the flex drain hose and hard pipe the...

Page 6: ...Attention do not put anything in the safe area the distance between the top shower cover and ceiling should be greater than the safe area Room must be left clear on both sides of the shower Tools Nee...

Page 7: ...arrives Note if there is any shipping damages then notify the distributor 2 Check the water and the electronic system and ground are suitable for installation 3 At least two people will be needed for...

Page 8: ...8 P a g e REV 03 2012 Installation 1 Connect the shower hose with shower outlet on the back panel then put the hand held shower on the sliding bar 2 When using the foot massage open the cover first...

Page 9: ...then adjust the foot screws under the shower tray to make sure it is leveled Note level all feet on the supporting bar 4 Slide the left and right fixed glass into the aluminum column just as shown in...

Page 10: ...2012 5 Place all the glass onto the acrylic shower base 6 Place the roof of the unit on top of all glass and attach it with ST4x10 to glass doors M6x25 screws are used to attach top with control colum...

Page 11: ...l as shown 8 Connect the pipes in the package with the drain outlet on the steam generator and the drain exit fasten it with the M4X16 round head screw as shown 9 Pull the top shower pipe through hole...

Page 12: ...Please refer to the labels on the wires connect the wires sharing the same sign 11 Connect the braided cold and hot water hoses the red one is for hot water blue is for cold 12 Seal the connection wit...

Page 13: ...t o If the temperature control faucet has been equipped in the steam room a sudden change of water temperature which may leads to burn the body by hot water or stimulate the skin by cold water will be...

Page 14: ...lace with a new one 4 Check the inlet valve 5 Remove the obstruction or replace the pipe 6 Wait for a while 2 3minutes 7 Set a higher temperature or wait for it to cool down Self protection 1 Lack of...

Page 15: ...ver from roller 2 Loosen the nut 3 Turn the 6 sides plastic cover Left or Right for release the door on Top and Bottom of door Note the roller is off set to loosen or tighten the door to the frame 4 T...

Page 16: ...40 C hot water in the tub to the necessary water level right to the level that can ensure to get the tub working b According to the proportion of mixing 2 gram of liquid detergent into 1 liter of wate...

Page 17: ...17 P a g e REV 03 2012 User Manual for BF1102 Fits Models M A020 M A021...

Page 18: ...nction 7 Top Light Function 8 ON OFF 9 Steam Function 10 Function Key 11 Key 12 Key 13 Band Storage Key 14 Radio Frequency Remote Control 1 ON OFF 2 Circulation Fan 3 Decrease Key 4 Steam Function 5 F...

Page 19: ...ll be turned on when the system is activated press on the control panel or remote to turn on or off the top light Caution The light power must be under 12V and the power has to be less than or up to 1...

Page 20: ...remote control will start the radio function LCD panel will display the current radio frequency see sample icon Pressing the key for the second time will turn off the radio When the radio is on press...

Page 21: ...nsulation Resistance 20M Waterproof Grade IPX4 Loading Configuration Data Load Rated Load Voltage Rated Load Frequency Rated Load Power Others Steam AC220V 50Hz 2 5kW Aroma Jar Top Light AC12V 50Hz 10...

Reviews: