background image

Top Innovations

13

C

are

 & s

torage

 g

uIdeLInes

PROPER STORAGE

Preparing your 

Fabric Steamer

 for storage is quick and simple.  When you have finished your 

steaming tasks, follow the steps listed below.

1.

 Set Lighted On/Off Switch to “OFF” position, and unplug power cord from electrical outlet.

2.

 Allow unit to cool completely (at least 30 minutes is recommended).

3.

 Remove Water Tank from unit.  Unscrew Valve Cap and drain remaining water into sink or tub.

    Replace Valve Cap when finished.

    NOTE: It is not necessary to empty Water Tank after each use if you do not wish.  However,

    it is recommended that it be drained for storage and filled with fresh distilled water for each

    use.
4.

 Remove Drain Plug and drain any remaining water in Water Reservoir into a sink or tub to prevent

    overfilling during your next use.  Flush out Water Reservoir with fresh water to minimize potential 

    mineral build-up in Water Reservoir.  Replace empty Water Tank.

5.

 For storage convenience, you may wish to collapse Telescopic Pole to its most compact height

    (refer to Page 7 for details).

6.

 Wrap power cord loosely around unit, and store 

Fabric Steamer

 in a cool dry location.

MINERAL BUILD-UP

A common maintenance need for steam appliances is the removal of build-up caused by high

mineral content in many municipal water supplies.  This mineral build-up may limit the effectiveness 

and reduce the life of your 

Fabric Steamer

.

The best way to minimize mineral build-up is to use distilled or de-mineralized water when

using your 

Fabric Steamer

.

  In addition, it is recommended that the unit be cleaned regularly using

the procedure below.  This will help to extend the life of your 

Fabric Steamer

, and keep it 

functioning at its maximum potential.

NOTE: It is recommended that the following procedure be followed once every 3-4 uses.
1.

 Set Lighted On/Off Switch to “OFF” position, and unplug power cord from electrical outlet.

2.

 Allow unit to cool completely (at least 30 minutes is recommended).

3.

 Remove Water Tank from unit.  Unscrew Valve Cap and drain remaining water into sink or tub.

4.

 Remove Drain Plug and drain any remaining water in Water Reservoir into a sink or tub.

5.

 Using measuring cup (not included), make a mixture of 6 oz. (177 ml.) vinegar and 6 oz. (177 ml.)   

    distilled water.

6.

 Slowly pour water-vinegar solution into Water Tank, then replace Valve Cap and place Water Tank 

    back onto unit.

7.

 Set Lighted On/Off Switch to “ON” position.  Allow unit to heat up and steam out all of the

    water-vinegar solution.

8.

 Once emptied, set Lighted On/Off Switch back to “OFF” position.  Remove Water Tank and refill

    with approximately 12 oz. (355 ml.) fresh distilled water, then replace Water Tank.

9.

 Set Lighted On/Off Switch to “ON” position.  Allow unit to heat up and steam out all of the fresh

    distilled water.  Once emptied, set Lighted On/Off Switch back to “OFF” position.

10.

 Repeat STEPS 8 & 9 as necessary until vinegar odor completely dissipates.  Once finished,

      follow normal storage guidelines outlined above.

Summary of Contents for MODEL SF-407

Page 1: ...MODEL SF 407 Fabric Steamer Please read all instructions before use Mail in your warranty registration card KEEP YOUR RECEIPT FOR WARRANTY PURPOSES by Top Innovations...

Page 2: ...vides a variety of other unique benefits It s natural and environmentally friendly eliminating the need for potentially harmful chemicals It also helps to neutralize smoke and other unpleasant odors r...

Page 3: ...e care to position extension cord where it is least likely to be damaged or tripped over during use 3 Before plugging power cord into electrical outlet be sure that all electrical information on ratin...

Page 4: ...potential build up of mineral deposits Other cleaning agents could damage unit or cause injury Do not overfill unit 15 Do not attempt to use steam without properly filling Water Tank 16 To reduce risk...

Page 5: ...o obtain possible missing parts refer to the Customer Support section on Page 14 of this manual Unit Features Accessories Pole Top Clothes Hanger Hook Steam Nozzle Holder Steam Nozzle Handle Telescopi...

Page 6: ...d The Water Tank 6 holds water to be transferred into the Water Reservoir up to a maximum capacity of 40 oz 1 183 ml The Water Tank is removable for convenient filling The Valve Cap 6A controls the fl...

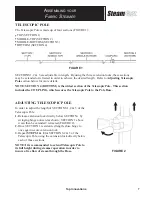
Page 7: ...ction includes the COUPLING which secures the Telescopic Pole to the Pole Base ADJUSTING TELESCOPIC POLE In order to adjust the length of SECTIONS 1 2 3 of the Telescopic Pole 1 Release extension lock...

Page 8: ...e Pole Base insert SECTION 4 of Telescopic Pole into Pole Base then twist Pole to properly align the guide grooves and guide ridges 4 Slide COUPLING down over Pole Base then screw clockwise to secure...

Page 9: ...in clockwise direction until Hose is tightly secured onto Hose Base FIGURE 6 B Hand tighten only Do not over tighten 3 Hang Steam Nozzle on specially designed Steam Nozzle Holder FIGURE 6 C CAUTION T...

Page 10: ...z 1 183 ml mark NOTE To prolong the life of your Fabric Steamer it is recommended that distilled or de mineralized water be used in Water Tank CAUTION Only water should be used in unit other chemicals...

Page 11: ...Nozzle NOTE It is common for the unit to produce gurgling sounds and small amounts of water during the first few minutes of steaming This is a natural part of the steaming process Pointing Steam Nozz...

Page 12: ...le free GENERAL STEAMING TIPS For best steaming results press Steam Nozzle directly against fabric or hold within 1 2 of surface Curtains and draperies may be steamed while still hanging To remove wri...

Page 13: ...r Fabric Steamer The best way to minimize mineral build up is to use distilled or de mineralized water when using your Fabric Steamer In addition it is recommended that the unit be cleaned regularly u...

Page 14: ...position Steam output is weak or intermittent Excessive gurgling in Hose and Steam Nozzle water drips from Steam Nozzle POSSIBLE CAUSE Unit is not plugged in No water in unit Mineral build up in unit...

Page 15: ...credit card You must have a Return Authorization Number before returning unit If you need to request warranty service or have any questions about coverage under this warranty please visit the Warranty...

Page 16: ...tions com V081205 PRINTED IN CHINA PRODUCT SERIAL NUMBER For your convenience space has been provided below for you to record the serial number of your unit located on the back or bottom of the unit f...

Reviews: