a
ssembLIng
your
F
abric
S
teamer
Top Innovations
9
CONNECTING FABRIC BRUSH
1.
Make sure Lighted On/Off Switch is set to “OFF” position, and that
unit is not emitting any steam.
CAUTION: Do not try to connect Fabric Brush while unit is
emitting steam, as this can cause burns and injury.
2.
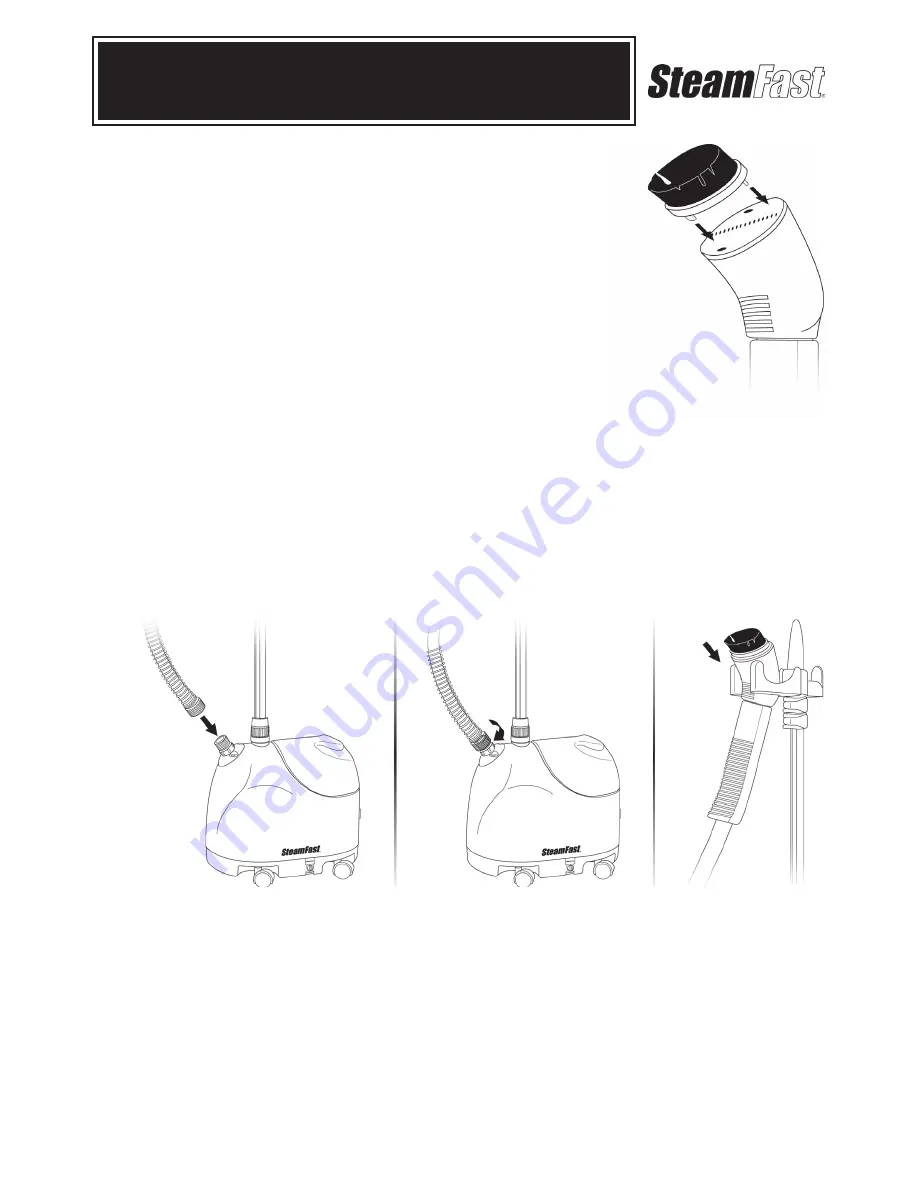
Align the four pegs on back of Fabric Brush (2 circular and 2
elliptical) with corresponding holes on face of Steam Nozzle.
3.
Press Fabric Brush firmly onto Steam Nozzle, until it fits snugly
and firmly in place (FIGURE 5).
CONNECTING HOSE
1.
Place end of Hose onto threaded Hose Base (FIGURE 6-A).
2.
Rotate coupling in clockwise direction until Hose is tightly secured onto Hose Base
(FIGURE 6-B). Hand tighten only. Do not over-tighten.
3.
Hang Steam Nozzle on specially designed Steam Nozzle Holder (FIGURE 6-C).
CAUTION: To prevent steam from causing bodily injury or damage to surfaces, always hang
Steam Nozzle on Steam Nozzle Holder when not in use. Do not lay the Steam Hose on the floor
as condensation may occur, causing unwanted water droplets in the steam. Do not pull on the
Steam Hose with excessive force as this may damage it, resulting in a steam leak.
Your new SF-407 Fabric Steamer is now fully assembled and ready for use. Please continue
reading this manual for instructions on using the Fabric Steamer, as well as directions for proper
cleaning, storage and troubleshooting.
FIGURE 5
FIGURE 6
A
B
C

