background image

Removing Mineral Buildup 

One common  problem with steamers

is mineral buildup caused by the high

mineral content in many municipal water supplies. Mineral residue inside 

of the

internal pipes and heater can cause intermittent steaming or in severe cases no
steaming at

all.

The best way to avoid this is

to use demineralized or distilled water in the unit.

The procedure below can be used to clear mineral buildup. If you  are unable to 

use de-mineralized

or

distilled water we recommend you use this procedure 

monthly

to

help avoid mineral buildup. 

1.

2.

3.

4.

5 .

6.

Turn the unit off and unplug the power  cord. 

Unscrew and remove the hose from the hose connector on the top of the

unit.
Remove the pole from the unit.

Remove the water tank from the main unit and drain any water in the

unit.
Make

a

mixture of 50% vinegar and 50% water. In most cases 1 cup of 

this mixture will be sufficient.

Slowly pour the water-vinegar mixture into the hose connector.

a. If the internal piping 

is only partially blocked by mineral

buildup, the water- vinegar mixture will soon start flowing out 

of the water intake hole. If this happens proceed to step 8.

b. I f  t h e internal piping is completely blocked, continue to pour

the mixture into the hose connector till full.

7 .
8.

9.

10.

Pour clean water though the hose base and water intake hole until the

11

.

Reassemble the unit and operate normally.

Pour the water-vinegar mixture into the water intake hole until full. 

Let stand for 40 minutes.

Drain the water using the drain plug. 

vinegar smell dissipates. 

If the procedure above does not return the unit

to normal operation, the unit may

need servicing.

P.11

Summary of Contents for SP-350 Series

Page 1: ...Built for years of care free use Read These Instructions completely I before use MODEL SP 350 Series Please read this manual before using and keep for future reference...

Page 2: ...steamer will automatically begin heating again when the temperature drops below 248 F Should the water tank run dry while the unit is in operation we recommended that it be turned off immediately If...

Page 3: ...sults every time 1 Holds over one half gallon of water enough for approximately 2 Water container is removable and easy to fill 3 Automatic shut off safety feature 4 Easy to use drain port 5 Eliminate...

Page 4: ...its intended use only 7 Do not operate any appliance with a damaged cord or plug or after the appliance malfunctions or is dropped or damaged in any manner A damaged cord plug or unit may result in fi...

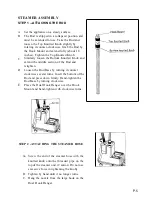
Page 5: ...steam 5 The ON OFF switch is located on the front of the base 6 The WATER CONTAINER is filled through a hole in the bottom and should be placed in the reservoir on the base Avoid spilling excess wate...

Page 6: ...ection of the Rod and retighten D Loosen the Rod Base by turning it counter clockwise several turns Insert the bottom of the Rod and press down firmly Hand tighten the Rod Base by turning clockwise Pl...

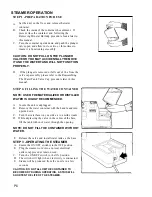
Page 7: ...AINER NOTE USE OF DEMATERIALIZED OR DISTILLED WATER IS HIGHLY RECOMMENDED A Insure the unit is unplugged B Remove the water container with the handle and turn upside down C Turn the water facet in you...

Page 8: ...if there are fewer creases in the object to be steamed b Shaking out the article prior to steaming will avoid excess creasing c For towels handkerchiefs and napkins peg drape them over a rod or steam...

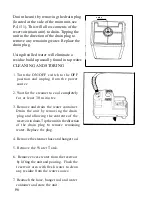
Page 9: ...om the power source 2 Wait for the steamer to cool completely for at least 30 m i n u t e s 3 Remove and drain the water container Drain the unit by removing the drain plug and allowing the contents o...

Page 10: ...disappear when the excess moisture inside the hose has had a chance to drain back into the base If the steamer stops producing steam then starts again a You may wish to examine the inside of the reser...

Page 11: ...n in hose Hold the hose vertical and allow water to drain back to tank Steam is intermittent sediment in container Follow the removing mineral buildup procedure Water tank Valve plunger Follow the Rea...

Page 12: ...Remove the water tank from the main unit and drain any water in the unit Make a mixture of 50 vinegar and 50 water In most cases 1 cup of this mixture will be sufficient Slowly pour the water vinegar...

Page 13: ...he container B and search for the disk C Insure the spring is around the plunger D Place the small end of the plunger through the center hole of the cap E Push the plunger through the central hole in...

Reviews: