®
Instructions for Installation and Use
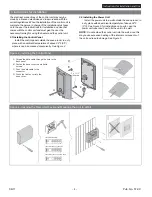
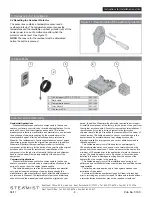
Figure 4 - Installing the Control Panel
06/11
Pub. No. 572-C
- 4 -
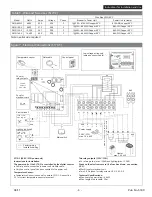
3. Instructions for Installation
The electrical connections of the control unit may only be
made by a licensed electrician and in accordance with the
current regulations. When the installation of the control unit is
complete, the person in charge of the installation must pass
on to the user the Instructions for Installation and Use that
comes with the control unit and must give the user the
necessary training for using the heater and the control unit.
3.1 Installing the Control Panel
Install the control panel outside the sauna room, in a dry
place with an ambient temperature of above 32°F (0°C)
where is can be accessed conveniently. See Figure 4.
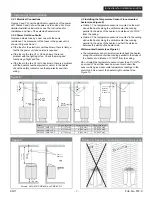
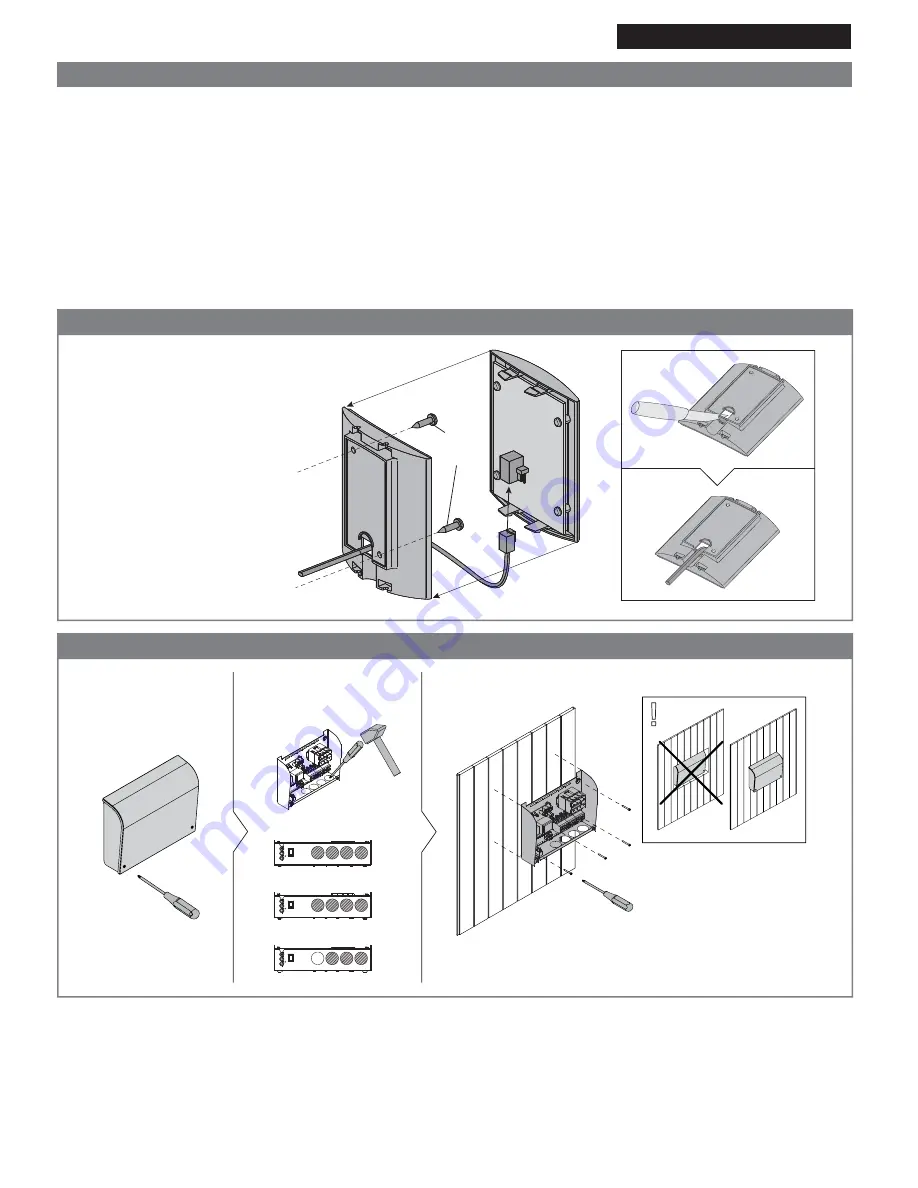
3.2 Installing the Power Unit
Install the power unit to a wall outside the sauna room, in
a dry place with an ambient temperature of above 32°F
(0°C). See Figure 5 for instructions on how to open the
power unit cover and how to fix the unit to the wall.
NOTE: Do not embed the control unit into the wall, since this
may cause excessive heating of the internal components of
the unit and lead to damage. See Figure 5.
A . Thread the data cable through the hole in the
back panel.
B. Fasten the back cover to a wall with
screws.
C. Push the data cable to the
connector.
D. Press the front cover into the
back cover.
A
C
B
D
5 x 1 1/2”
(40 mm)
Figure 5 - Opening the Power Unit Cover and Mounting the Unit to a Wall
SMS-100-3, SMS-125-3, SMS-145-3
SMS-100, SMS-125, SMS-145
SMS-60R, SMS-80R

