background image

7. REPAIRS

The STEARNS

®

Cordova

comes equipped with a repair kit that

includes adhesive and several patches. This can be found in the mesh
pocket and should remain with the boat. Making repairs to the inner
tube of the boat may require unzipping the cover and temporarily
removing the tube. Always make sure the boat is fully deflated before
unzipping the cover. If there is difficulty opening the zipper, refer to the
section 

“Care and Maintenance.”

When the repair has been

completed, be sure the tube is aligned properly in the boat cover and
the zipper is completely closed and appropriately locked.

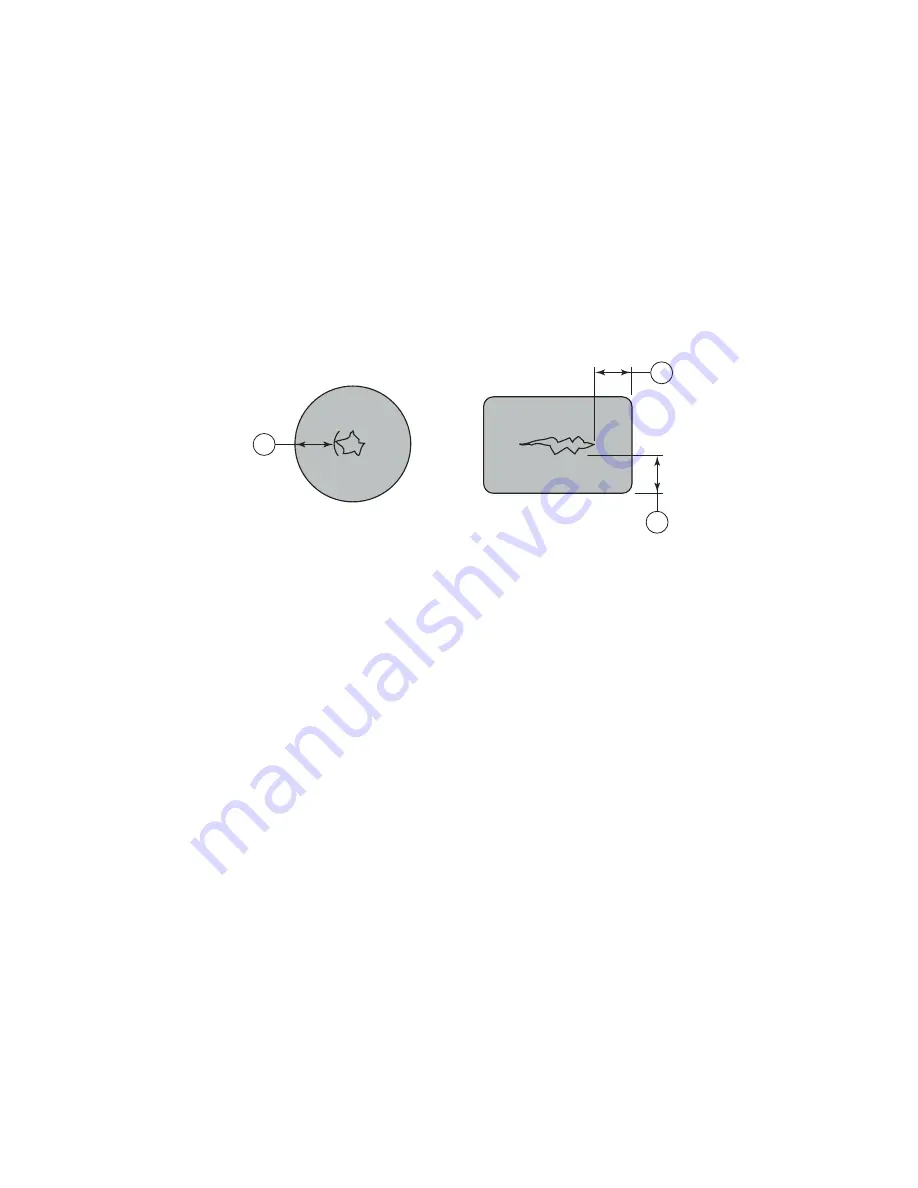
Figure 9

7.1 Repairing Small Punctures and Cuts

1. Cut a patch which is round or with round corners, at least 1/2 in.

(12.7 mm) larger than the hole or cut.

2. Use water and/or mild soap to clean the area where the patch will

be placed.

3. Make sure all surfaces are dry.
4. Spread a thin layer of glue on both the patch and on the damaged

area and let it sit for three to five minutes or until tacky.

5. Press the patch onto the boat, making sure that no air bubbles form.
6. Apply pressure to the patch by placing weight on it. Do not peel

back to see if adhesive is holding.

7. Do not inflate the boat for at least twelve hours.

7.2 Repairing Pinholes

1. Inflate the kayak. Locate the pinhole by sponging soapy water over

the tube until you see air bubbles.

2. Deflate the kayak. Clean the area around the pinhole and apply a

drop of adhesive to the hole once the area is completely dry.
A patch may not be necessary.

14

A

A

A

A = 1/2 in. (12.7mm)

Summary of Contents for Cordoba

Page 1: ...24 IMPORTANT BEFORE PROCEEDING READ THIS MANUAL CAREFULLY CONTAINS IMPORTANT SAFETY INFORMATION AS WELL AS CARE AND MAINTENANCE Stearns Inc St Cloud Minnesota 56302 U S A Phone 320 252 1642 or 1 800 697 5801 Fax 320 252 4425 www stearnsinc com Cordova B524 ...

Page 2: ... FIRST ASSIGNMENT FOR VALUE RECEIVED in the amount of _____________________________________________ the undersigned hereby transfers the Certificate of Origin and the boat described therein to ______________________________________________________________________________ Address __________________________________________________________________________ and certifies that the boat is new and has no...

Page 3: ... 4 Specifications 7 4 1 Capacity 7 4 2 Features 8 5 Preparing Your Stearns Inflatable Kayak 8 5 1 Quick Start to Inflating Your Boat 9 5 2 Knowing Your Valves 10 5 3 Make Sure Bladders Are Aligned 10 5 4 Over Inflation 11 6 Underway 12 6 1 Before You Start 12 6 2 Transporting Carrying and Towing 12 6 3 Care and Maintenance 13 6 4 Folding 13 7 Repairs 14 7 1 Repairing Small Punctures and Cuts 14 7 ...

Page 4: ...elates meets the essential health and safety requirements and is in conformity with the relevant EU Directives listed below General Product Safety Directive using the relevant section of the following EU standards and other normative documents EN ISO 6185 1 2002 ABYC H28 76 Date 01 09 04 Paul Ebnet President This product complies with European directives for recreational vessels as published by th...

Page 5: ...ith for your own comfort and safety please ensure that you obtain handling and operating experience before assuming command of the craft PLEASE KEEP THIS MANUAL IN A SECURE PLACE AND HAND IT OVER TO THE NEW OWNER WHEN YOU SELL THE CRAFT 2 WARRANTY Complete and return the Warranty Registration Form found on the back of this Owner s Manual 2 1 MODIFICATIONS Because of the possibility of interference...

Page 6: ...lly hazardous situation which if not avoided may result in property damage Used without the safety alert symbol indicates a potentially hazardous situation which if not avoided may result in property damage NOTICE Indicates installation operation or maintenance information which is important but not hazard related The precautions listed in this manual and on the craft are not all inclusive If a pr...

Page 7: ...ear at specific locations on the craft where safety is of particular concern Safety labels must remain legible and should not be removed If you suspect a label is missing or one becomes damaged contact STEARNS at 320 252 1642 or 1 800 697 5801 3 1 2 Registration The U S Coast Guard requires that all power boats operated on the navigable waters of the United States must be registered in the state o...

Page 8: ...RE of local boating regulations and follow them BE AWARE of your environment water currents tides weather traffic and other potential hazards in the water and surroundings DO NOT use this kayak UNDER the INFLUENCE of DRUGS or ALCOHOL DO NOT use this kayak if you suspect a tear or hole IT MAY BE UNSAFE USE CAUTION when entering or exiting the kayak Keep your weight centered and distribute the weigh...

Page 9: ...apacity Cordova capacity label Do not exceed the certified maximum capacities under any circumstances Overloading will reduce freeboard and increase the likelihood of swamping especially in heavy seas Overloading causes handling to become sluggish making it difficult to react quickly MAXIMUM CAPACITIES 1 PERSONS OR 175LBS MANUFACTURER STEARNS INC ST CLOUD MN USA 56302 MODEL B524 CORDOVA THIS BOAT ...

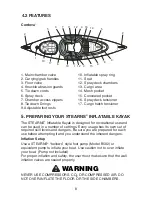
Page 10: ...OUR STEARNS INFLATABLE KAYAK The STEARNS Inflatable Kayak is designed for recreational use and can be used in a number of settings Every usage has its own set of required skill levels and dangers Be sure you are prepared for each use before attempting it and you understand the inherent dangers Inflation Setup Use a STEARNS bellows style foot pump Model B502 or equivalent pump to inflate your boat ...

Page 11: ...MBERS beyond 1 75 psi or 0 12 bar 3 Partially inflate the inner chamber inside the seating area with the valve adaptor inside the patch kit Refer to page 10 for valve operation 4 Partially inflate the outer chamber with the valve adaptor until the cover shape begins to fill out The kayak should feel soft or limp at this point 5 Next add air to each chamber until most of the wrinkles are gone and t...

Page 12: ...flation Open position allows for two way air flow and release until desired effect 5 3 MAKE SURE BLADDERS ARE ALIGNED 1 Each internal air chamber is aligned in relation to the cover which can be adjusted by unzipping the access zipper located behind the seat If the air chambers are not aligned or centered A Relieve air pressure B Unzip the cover C Partially inflate D Realign air chambers zip cover...

Page 13: ...eft and starboard air chambers right You should be able to press down 3 4 in 19 mm The chamber should feel firm without too much resistance If you have difficulty achieving 3 4 in 19 mm the chamber could be over inflated If you are easily able to press further than 3 4 in 19 mm the chamber could be under inflated Before paddling be sure all the kayak s air chambers are properly inflated DO NOT ove...

Page 14: ...ent Tell someone of your travel plans Check local weather reports before casting off do not leave the dock area when strong winds and electrical storms are in the area or predicted to be in the area Secure or store loose items before getting underway 6 2 Transporting Carrying and Towing Your kayak should always be transported dry and in its transporting carrying bag Dry and clean as much as possib...

Page 15: ...the chamber covers when the kayak is inflated Be sure to rinse your kayak with fresh water after every use in salt water and allow it to dry thoroughly before storing To store your boat 1 Wash your kayak using a mild soap or detergent Never use strong solvents to clean your kayak Rinse it off with fresh water and allow it to dry thoroughly before storing 2 Deflate the kayak Make sure the valves ar...

Page 16: ...which is round or with round corners at least 1 2 in 12 7 mm larger than the hole or cut 2 Use water and or mild soap to clean the area where the patch will be placed 3 Make sure all surfaces are dry 4 Spread a thin layer of glue on both the patch and on the damaged area and let it sit for three to five minutes or until tacky 5 Press the patch onto the boat making sure that no air bubbles form 6 A...

Page 17: ...ad section Repairing Pinholes Air valves don t align Let air out of both chambers to allow you to shift the inner tube to match up with the valve holes in the cover Doesn t inflate Make sure that the tube is aligned completely The zipper is stuck Read Care and Maintenance section 6 3 regarding zippers Difficulty draining water Wipe off excess water with a high absorbing sponge or towel Kayak dries...

Page 18: ...re or in professionally guided tours and other uses not considered normal recreational purposes punctures cuts and abrasions sustained in normal use items involved in accidents items damaged in whitewater mishaps and other unreasonable uses or improper storage STEARNS shall within 30 days from receipt of an authorized return from purchaser perform its responsibilities in conformance with this warr...

Page 19: ..._________________ Dealer s Name _____________________________________________ Address __________________________________________________ City _________________ State_______ Zip________ Country_______ Thank you for responding to the following 1 How did you first learn of this product _____ Dealer _____ Friend _____ Magazine _____ Radio _____ TV _____ Catalog _____ Internet _____ Other 2 What most i...

Page 20: ...BUSINESS REPLY MAIL FIRST CLASS PERMIT NO 558 ST CLOUD MINNESOTA POSTAGE WILL BE PAID BY ADDRESSEE STEARNS INC PO BOX 1498 ST CLOUD MN 56302 9743 NO POSTAGE NECESSARY IF MAILED IN THE UNITED STATES ...

Reviews: