25
MAINTENANCE
LUBRICATION
The motor on this unit has sealed bearings and requires
no further lubrication.
Periodically lubricate moving parts using a white lithium
grease, including the threaded depth control, sliding
surfaces, and bronze bushings associated with the
depth control mechanism.
CONVEYOR FEED BELT
REPLACEMENT
Common cause which require replacement of the con-
veyor feed belt are:
• Normal wear and tear.
• Inadvertent contact with the sanding drum abrasive
during operation.
• Tears caused by mistracking of the belt.
• Excessive buildup of non-removable film.
The following steps describe how to remove and re-
place the conveyor belt, if it ever becomes necessary:
1.
Raise the sanding drum to it’s highest position by
turning the handwheel clockwise.
2.
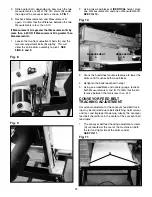
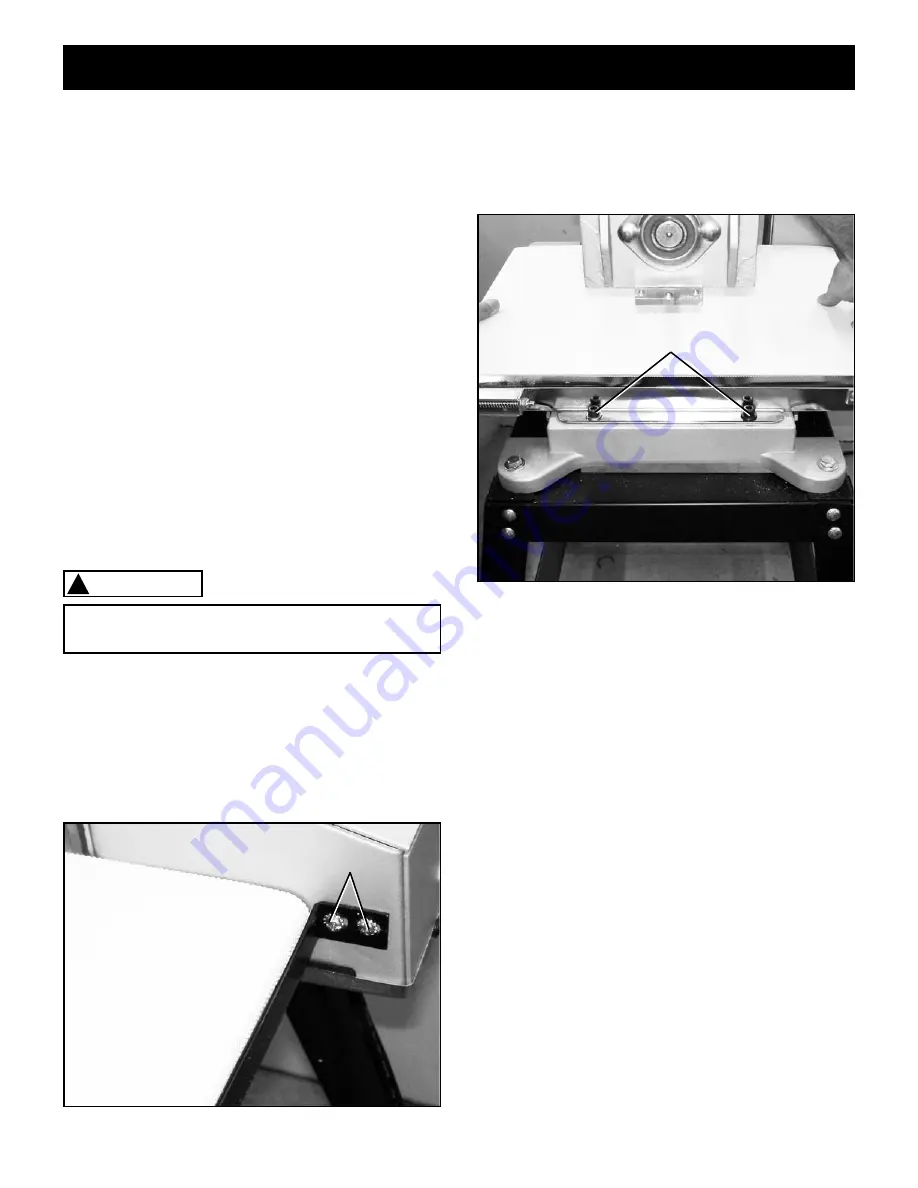
Using a Phillips screwdriver, remove the two
screws(A) and star washers securing the front
guard to the variable speed control box and remove
the guard.
SEE FIG 14.
MAKE CERTAIN THAT THE SANDER IS DISCON-
NECTED FROM THE POWER SOURCE.
WARNING
!
3. Using the supplied hex wrench, remove both con-
veyor table mounting bolts(B) on the open side of the
sander.
SEE FIG 15.
Fig. 14
A
4.
Reduce the tension on the conveyor belt by loosen-
ing both of the feed belt tracking adjustment screws
SEE FIG 11 on page 22.
5.
Remove the conveyor belt by grasping both sides
of the belt as shown in Fig 15. Gently lift the con-
veyor table as you slide off the conveyor feed belt.
If the belt will not move, further reduce the tension
on the feed belt and ensure that you are lifting the
table high enough to allow the belt to slide off.
6.
To install a new belt, follow steps 2-5 in reverse
order. Make sure to set the tracking on the new
conveyor belt. The procedure for setting the track-
ing can be found in the ADJUSTMENTS section of
this manual.
Fig. 15
B
Summary of Contents for 55210
Page 27: ...27 N NOTES N ...
Page 28: ...28 PARTS ...
Page 30: ...30 ...
Page 32: ...32 ...
Page 36: ......


